I want to show you everything you need to know about the equipment and tools that you need to make homemade bread, including essential bread making equipment and good to have equipment for a keen bread maker.
The equipment and tools you need depend on how seriously you want to get into bread making at home, budget and the types of bread you think you’ll make the most.
For example, if you love experimenting with different dough types and want to make breads that have a very wet consistency such as Ciabatta, then I’d definitely recommend a decent mixer with a dough hook, which will save you time and a lot of mess!
If you only bake now and again and you’re quite happy getting stuck in with your hands, then you will only need basic equipment such as a dough scraper and a bread tin.
You can you can make bread on any budget – large or small depending on how serious a hobby it is.
So, I’ve put together this in-depth page to show you the various items of bread making equipment out there to help you decide what you need in your kit.
TIP: Not sure if you have all the necessary bread baking equipment at home? Check out my recommended picks below (Amazon links):
-
- Scale: Nicewell 22lb Digital Kitchen Scale
- Mixing Bowls: OXO Stainless Mixing Bowls Set
- Pastry Scraper: OXO Stainless Pastry Scraper
- Loaf Pan: OXO Non-stick Loaf Pan
- Kitchen Thermometer: ThermoPro Digital Thermometer
- Stand Mixer (optional): Kenwood Kmix Stand Mixer
Equipment for bread making
1- Dough Scraper
Price range – less than £10
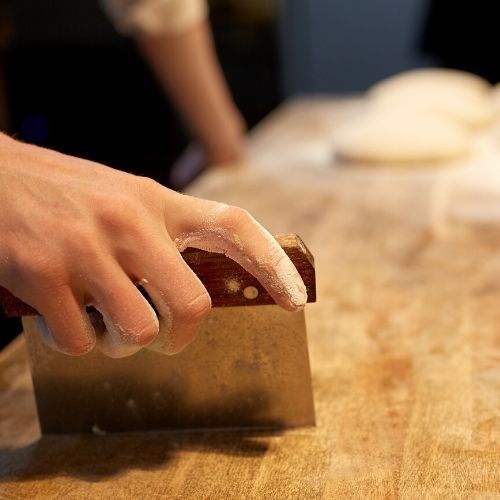
If you’ve ever made bread and you’ve not used a dough scraper, you might be wondering why this is in the essential section, but trust me, once you have one you’ll realise why.
The dough scraper is a very cheap and simple bit of kit, which will help you out with the messier jobs and stop wet dough getting all stuck to your hands.
If you’ve ever tried to wipe up dough and excess flour with a dishcloth, you’ll know that cloth’s life is pretty much over!
With a scraper, you can simply scrape up any excess flour or dough residue without ruining your cloths.
You can also use a dough scraper for other baking tasks such as scraping out cake batters and leveling out anything creamy, such as cake frosting or mash potato.
What is a dough scraper used for?
A dough scraper can be used for various jobs in bread making including:
- Scraping dough out of a mixing bowl and onto a work surface.
- Moving or scraping dough off a work surface.
- Cutting and dividing dough into equal portions – for example if you’re making bread rolls or pizzas.
- Picking up excess flour from a work surface.
- Measuring dough if the scraper has a ruler on it.

What is the best dough scraper?
There are two main types of dough scrapers which are plastic and metal.
They’re both good when it comes to scraping up dough, but a plastic scraper with a rounded edge is much better than a metal scraper when it comes to bowl scraping.
The metal scraper comes with its own benefits, such as it’s more ridged when it comes to cutting dough and scraping up, however the plastic scraper is better if you have surfaces which easily scratch.
Some metal scrapers have ruler on the side so that you measure your dough as you cut it.
Below are a few pros and cons of each type – if you can’t decide which is best for you and you do a lot of baking, you might want to consider having both types in your baking kit!
Plastic dough scraper V’s…
- Can be used for all kinds of baking jobs
- Flexible for bowl scraping
- Gentle on work surfaces
- Needs to be good quality & not flimsy
- Can start thinning around the edges after a while
Metal dough scraper
- Can be used for all kinds of baking jobs
- Heavy duty & good for cutting dough
- Can be used to measure dough
- Not good for surfaces which scratch easily
- No flexibility for bowl scraping
If you want to find out more about dough scrapers and whether you need one, take a look at the following article:
Do you need a dough or bench scraper and what can you use instead?
2 – Mixing bowl for bread making
Price range – £5-15
A mixing bowl for bread making is an essential item that you’ll need to make homemade bread. The main factor when choosing a mixing bowl is that it’s large.
You need a large bowl so there’s space for mixing and room for the dough to rise and double or even triple in size before it reaches the top.
What material is best for mixing bowls?
Most mixing bowls are either metal, glass or ceramic and in some cases plastic. The best type of bowl for bread making is metal because it’s light-weight, you can’t break it and it’s good for keeping the dough warm. Although dough will still rise in any type of bowl, it just might be a bit slower.
For speciality doughs such as sourdough you might want to consider using a glass bowl so you can see the air bubbles as it’s rising.
If you have a stand mixer with a dough hook, you can use the mixer bowl to rise dough after it’s been kneaded by the dough hook to save on washing up.
This is great way to quickly make bread and really hands off, because you just weigh, mix and then cover to rise.
3 – Baking trays for bread
Price range – around £10
Baking trays are a vital piece of kit for bread makers if you’re planning to make bread which needs to be cooked on a flat surface such as rolls, bloomer bread, ciabatta or pizza.
If you generally cook at home then chances are you already have baking trays in your kitchen. If you don’t and you’re considering buying trays then there are a few things to consider.
With baking trays, buying cheap means buying twice. Cheap trays tend to only have a thin protective coating and as soon as they get scratched they start going rusty and need to be binned.
Buying a slightly more expensive tins is an upfront investment which will save you money in the months to come.
The best baking trays for bread are metal with a non-stick coating. Stainless steel is also good as they don’t go rusty.
A good weighty tin is generally a sign that it’s of a good quality. Samual Groves is a good quality tin maker and are available to buy on Amazon.
4 – Loaf/bread tins
Price range – less than £10
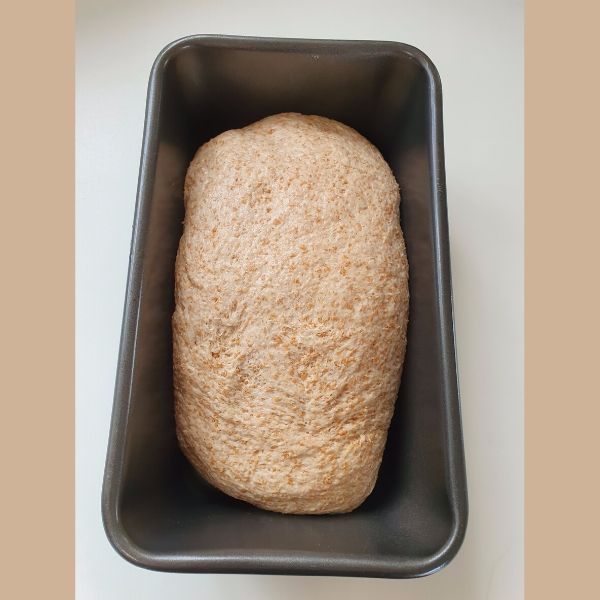
If you want to make a traditional ‘tin’ loaf then you will need a loaf/bread tin to create the bread shape which is perfect for sandwiches and toast.
Generally loaf tins are made from metal, silicon versions are available, but metal is best for browning and crispiness.
If you’re worried about your bread getting stuck in a metal tin, a light oiling or buttering will stop this from happening.
As with baking trays, it’s worth spending a little bit more on a quality tin with a good non-stick coating which will last longer without going rusty.
What size is a loaf tin?
Loaf tins are generally available in two sizes, which are traditionally called a 2lb tin or a 1lb tin.
A 2lb tin is also known as a 1kg tin – although these aren’t the exact converted weights. You would use this bread tin for a large loaf recipe which typically uses around 500g of flour.
A 1lb tin is used to make a smaller loaf (half the size) if you don’t need so much bread. A large loaf recipe can also be split between two 1lb tins.

5 – Pastry brush
Price range – less than £5
A pastry brush is an essential bit of kit if you plan to make bread where you need to egg wash the dough, such as bread rolls or brioche.
Traditionally pastry brushes have hair like bristles which can sometimes be problematic as bristles tend to fall out and get stuck to your dough.
To stop this happening, the best type of brush to buy for bread making is a silicon pastry brush.
Silicon is much longer lasting, hygienic and can be washed in a dishwasher.
What can you use instead of a pastry brush?
A pastry brush is really the best thing to use if you have one because it’s gentle risen dough, where you don’t want to lose any air bubbles.
If you don’t have a pastry brush you could use a piece of rolled up kitchen roll, but be gentle on the dough.
You can buy a pastry brush for under £5 so it’s definitely worth adding one to your kit if you can.
They’re not just for bread making they’re also handy for pies and any other recipes where you need to egg wash.
6 – Digital scales
Price range – £10-£15
Although traditional style scales will work, digital scales are definitely worth investing in if you don’t have any because they are much more precise.
You can weigh all of your ingredients into your mixing bowl one at a time and reset to zero between adding each ingredient.
Digital scales I also good for weighing small quantities such as yeast and salt.
having a set of digital scales in your kitchen is useful for so many cooking jobs where you need to follow a precise recipe.
Digital scales are relatively inexpensive and a good brand such as Salter can be picked up for under £20 on Amazon.
They also give you the option to change between measurement type, such as grams, ounces and milliliters.
how do you know if your kitchen scales are accurate?
When you buy good quality digital scales for the kitchen they will be pre calibrated which means they should be accurate.
Over time is possible for kitchen scales to lose a bit of their accuracy, this could be a problem when it comes to making bread because precise measurements are important.
You can check if your scales are still accurate by weighing an item such as an unopened bag of flour where you know what the weight should be. You might need to add a bit on for packaging.
It’s also worth checking a light item if you were going to be weighing out small amounts such as yeast or salt.
Good to have bread making equipment
7- Pizza stone
Price range – around £20
When it comes to bread making the pizza stone is a non-essential item but it can help you create better results if you’re a keen bread maker and you regularly make homemade pizzas.
The pizza stone is a round ceramic plate that can be heated up in the oven before you place your breads or pizza onto it. you can also get a metal pizza stone which can be used in the same way.
What does a pizza stone do?
The pizza stone is a simple bit of equipment which helps to get extra heat into the dough when you put it in the oven.
The main benefits of using a pizza stone are:
- It holds in heat within the oven and helps to prevent temperature drops when you open the oven door.
- It cooks a pizza more evenly.
- A pizza will cook faster on a hot pizza stone that it would on the oven racks or a normal baking tray.
- It helps you to achieve a crispy bottom on your pizza or bread.
How do you use a pizza stone
Here are some tips for the best results when using a pizza stone to bake pizza or bread:
- Place your pizza stone in the oven before you turn it on to avoid cracking your stone.
- Make sure your dough is at room temperature as refrigerated or frozen dough could cause the stone to crack.
- It’s highly recommended that you also use a dough peel to get your pizza onto the stone quickly in the hot oven.
- If you don’t have a dough peel you could use a flat baking sheet, but make sure you wear oven gloves too.
- It’s best not to wash your pizza stone, just brush or wipe it down after use and keep it in a dry place.
- For a quick and easy transfer onto the baking stone, try using a bit of semolina to prevent the dough sticking to the peel.
8 – Dough peel
Price range – £10 upwards
The dough peel sometimes known as the pizza paddle, is a good piece of equipment if you make a lot of homemade pizza or if you use an outdoor pizza oven.
The peel allows you to slide the pizza into a hot oven or onto a pizza stone, without burning your hands.

How to stop dough sticking to the peel
Dusting your surface and pizza peel with a bit of semolina flour should stop your dough sticking to the surface.
Semolina flour is a great addition to your bread making ingredients. Because it’s quite coarse it allows the dough to slide much better than ordinary flour does.
It’s also important not to make pizza dough too wet and give it some extra kneading to create a dough that doesn’t ping back when you roll it.
You can also place your dough onto some baking parchment to stop it from sticking, the baking parchment can stay beneath the dough while it’s cooking and will easily come away when you take it out of the oven.
9 – Dough hook for a stand mixer
Price range – £300 upwards for a stand mixer
If you make bread regularly then a dough hook could be a really useful addition to your baking equipment, especially if you like to make breads with wetter doughs such as ciabatta.
The initial outlay for a stand mixer is big investment, but a good mixer such as a Kenwood Chef or a KitchenAid stand mixer can be used for all kinds of cooking and baking and will keep going for many years.
A stand mixer is definitely the best option for a hands off approach, but if it’s outside your budget there are cheaper alternatives such as a dough hook attachment for a hand mixer.
What is a dough hook for a mixer
A dough hook for a mixer is an attachment which you can use on a stand mixer such as the Kenwood chef. The dough hook gets its name from its hook-like appearance which is the perfect shape to knead bread mechanically.
The dough hook is a great time saving device because you can weigh all of the dough ingredients into the mixer bowl and leave it to knead the bread while you get on with something else.
You can then cover and leave the dough to rise in the same bowl.
Although the dough will take a few hours to rise and prove, the actual hands on time to make the bread is minimal using a dough hook compared to kneading by hand.
Another benefit of using a dough hook is that you can knead wetter doughs without it getting all stuck to your hands.
Do hand mixer dough hooks work?
Dough hooks on a hand mixer are a little bit different to a stand mixer, you use two hooks instead of one and they tend to be more of a spiral shape.
The downside of the hand mixer version is there is less power behind the mixer and it will struggle with a firm dough.
You also need to hold the mixer firmly throughout the kneading process which can be tricky because the bowl will move around too.
The hand mixer dough hooks will work better for a wetter dough as it’s not so much of a struggle to mix and will save you from getting sticky hands.
Overall, for a regular dough, it’s probably not worth investing in a hand mixer with a dough hook because it takes as much effort kneading as kneading by hand.
For more information on using a bread hook to make dough, you might find the following article helpful:
How to make bread using a dough hook
So, what equipment do you need to make bread?
I hope this post has helped you understand what you need and don’t need in your bread making equipment kit.
Bread making only needs to be as complicated as you want to make it. So if you just want to try bread making out to see if you like it, I would recommend starting small and not spending too much on unnecessary equipment.
The main thing is enjoying the baking process and most of all, enjoying eating the tasty delights with the knowledge that you’ve made them yourself!
TIP: Not sure if you have all the necessary bread baking equipment at home? Check out my recommended picks below (Amazon links):
-
- Scale: Nicewell 22lb Digital Kitchen Scale
- Mixing Bowls: OXO Stainless Mixing Bowls Set
- Pastry Scraper: OXO Stainless Pastry Scraper
- Loaf Pan: OXO Non-stick Loaf Pan
- Kitchen Thermometer: ThermoPro Digital Thermometer
- Stand Mixer (optional): Kenwood Kmix Stand Mixer
You might also like…
Hopefully, you now have an idea of the kind of equipment you might need to start making homemade bread, you might also find the following article helpful:
