When I started out making bread one of the biggest problems I encountered was that no matter how I followed the recipe my bread was turning out like a brick every time and I just couldn’t understand why.
After doing a lot of experimenting I finally worked out exactly where I’d been going wrong and from this point onwards I could make soft well-risen bread every time. In this article, I’m going to share these tips with you so you don’t have to go through the ‘brick’ phase as I did.
The key to creating a bread dough which is softer and less dense is making sure you’re following the right steps when you make a dough. These steps include; using the right ingredients and ingredient ratio, kneading your bread for long enough, allowing enough time to rise and prove (proof) the dough and shaping the dough correctly.
By following these simple steps, you can create softer, well-risen bread every time. Read on to see all of my tips in more detail and I promise you’ll never bake a brick again!
1 – How Ingredients Effect Bread Dough Softness
The type and amount of ingredients you use to make bread dough can greatly affect dough performance and softness.
By looking at these aspects individually and making some simple changes you can really refine your technique and end result.
Here are some of the main changes you can make to your dough ingredients to create softer bread:
- Use the right type of yeast to provide a better rise.
- Be careful not to kill yeast or reduce its performance.
- Find a bread flour that works well for you.
- Incorporate fat into your recipe.
- Replace some of the water in the recipe with milk.
- Make sure you’re using enough liquid and don’t be scared of stickiness.
I’ll now go on to explain each of these points in more detail.
Using the Right Type of Yeast to Provide a Better Rise
Creating a softer bread isn’t just about what you put into the dough, it’s also about the technique you use when creating the dough.
Using the right type of yeast is key to getting a better rise, which will result in a well-risen loaf or roll which is less dense.
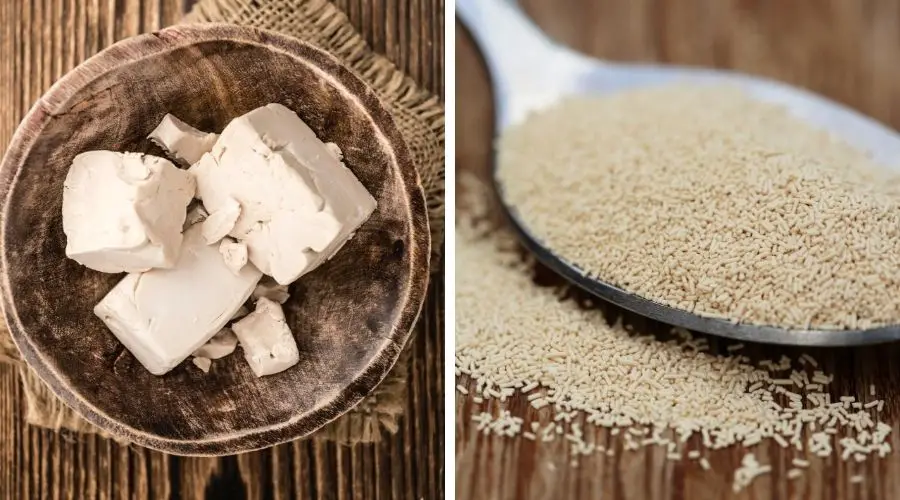
In general you can buy yeast in the following ways:
- Dried yeast sold in individually sealed packets (usually 7g).
- Dried yeast which is sold in small tins which you can measure out.
- Fresh yeast which is usually sold in blocks.
While each type of yeast has the potential to work well in its own right, the one you use also depends on the amount of time you have for rising and other factors such as room temperature.

For consistent results every time and when you’re starting out as a bread maker it is best to use the sealed sachets of yeast.
The tins do contain the same dried yeast as the sachets, however, once they’re open the yeast will become less effective once the days go by.
You may also find it useful to read my post on fresh yeast vs dried yeast.
Be Careful not to Kill the Yeast or Reduce its Performance
Yeast is a living single-celled microorganism, so by treating it in the wrong way you can kill it or slow it down considerably. There are some simple steps you can take to make sure your yeast is at optimum performance to help your dough rise:
- Don’t let the yeast touch the salt when you add it to the mixing bowl as direct contact with salt can kill the yeast.
- Make sure your water and or milk is the right temperature, which is just warm – too hot or too cold can cause rising problems.
- Don’t use too much sugar in your bread as this can slow down the performance of the yeast.
- Don’t use yeast beyond its use-by date – you could go to the effort of making bread only for it not to rise, especially when using fresh yeast.
Use a Good Bread Flour
You might be thinking, isn’t flour just flour, surely if you buy bread flour it will work, because that’s what it’s for?
Well, this is true to some extent, the flour will work, but once you start experimenting with different flours, especially high-quality artisan and organic flours you will see they can make a great deal of difference to the final outcome of your bread.
The reason for this is because flour producers mill their flours in different ways and some are milled to a finer level than others.
Each flour producer uses different wheat or a blend of wheat, which will vary in quality and protein levels.
It’s, for this reason, you can experience some very different results, for example I recently bought some supermarket’s own organic flour and it was awful, my bread was ok, but just not the same and I didn’t like the colour either.
In the UK we’re very lucky to have the right weather for producing some excellent wheat crops and there are many small producers which can be found online.
Supermarkets are also expanding into supplying more speciality flours as bread making becomes more popular.
So give some brands like Wrights, Doves Farm or Marriages a try and find the flour which you like best.
Each flour will vary slightly in how much hydration it needs because they all have varying protein levels, which will, in turn, affect gluten production.
If you can, stick to a flour brand you like because you’ll know how it performs and you’ll know how much liquid you’ll need every time.
See my recommended bread flour products here along with a directory of stockists.
Fat Makes a Softer Bread Dough
If you’re looking for a softer texture to your bread then adding some fat to your bread dough will help to create a softer texture and a bread that keeps for longer than bread with no fat.
The type of fat you add to your dough really depends on the type of bread you’re making, as a general rule softened butter is used for traditional loaves and olive oil used for Italian bread.
It’s really personal preference and you can experiment with either to see what works for you.
Lard is another alternative for savoury bread and works particularly well in soft burger buns.
Use the table below as a general guide as to which fat is best for each bread type:
| Bread Type | Fat to use |
| Standard white/brown loaves | Softened butter, Olive oil or Lard |
| Soft white rolls/ Burger baps/hot dog rolls | Softened butter or lard |
| Pizza Dough | Olive oil |
| Milk loaf | Softened butter |
| Ciabatta | Olive oil |
| Foccacia | Olive oil |
| Brioche | Butter & eggs |
| Breadsticks | Olive oil or softened butter |
| Spelt bread | Olive oil or softened butter |
You can find out more about what fat does to bread dough, how much to use and when and when not to use it in my article ‘what does adding fat do to bread dough‘.
Replace Some of the Tater in Your Bread Recipe With Milk
Milk is a great way to make a softer bread and it can be used to replace some or all of the milk in a bread dough recipe.
Similar to adding fat (because there is fat in milk), milk can also help the bread stay fresher and softer for longer.
Adding milk helps to produce a loaf which is creamy in colour and soft in texture, but at the same time it does need to be used with caution in some recipes for the following reasons:
- While milk does make bread softer, it also makes the loaf a bit heavier and more filling.
- Milk contains natural sugars so if you usually put sugar in your bread, you may want to leave it out of the recipe if you’re using milk.
- The milk will need to be warmed to a ‘tepid’ temperature before you add it to the dough mix.
Unless I’m making a milk loaf which replaces all of the water content with milk, I generally replace part of the water with milk to create a softer but lighter bread dough.
For example, if the recipe calls for 300ml of water, I’ll use half and half (15oml water and 150ml milk) or even two-thirds milk and one-third water.
Top tip!
If you’re using the part milk method, instead of warming the milk, add boiling water from the kettle to the cold milk. Check it’s not too warm before adding the milk and water mix to the dry ingredients.
I like to use the part milk, part water method for bread rolls and burger buns because you get the right level of softness without the rolls being too dense.
Make Sure You Use Enough Water in Your Bread Dough
The hydration level of bread dough is a key part of getting a good rise and a softer dough. You can even achieve a soft dough with no added fat or milk if you get the hydration right.
It’s easy to panic when a dough looks a bit sticky and start adding more flour, especially if you’re making the dough by hand.
By adding more flour to the dough, the dough will be tighter, it won’t rise so well and will probably produce a dense, brick-like loaf.
Keeping the dough on the sticky side will help it to rise because if its slightly wetter, air bubbles will form more easily and it aids gluten production.
Many recipes recommend a 5:3 ratio, for example, 500g flour to 300ml of water, however, I like to increase this to 320-350ml of water, depending on the flour I’m using.
Don’t worry if the dough seems unmanageable, to begin with, the more you work it and the more you stretch the gluten, the more manageable it will become.
Flours containing part or all of the whole grain will continue to absorb liquid throughout the kneading process, so a dough which seems too wet at the beginning can quickly become too tight.
If you have a stand mixer with a dough hook, this can help you work with ‘wetter’ dough if you don’t like getting sticky hands. You may find it helpful to read how to make bread using a dough hook.
TIP: Not sure if you have all the necessary bread baking equipment at home? Check out my recommended picks below (Amazon links):
-
- Scale: Nicewell 22lb Digital Kitchen Scale
- Mixing Bowls: OXO Stainless Mixing Bowls Set
- Pastry Scraper: OXO Stainless Pastry Scraper
- Loaf Pan: OXO Non-stick Loaf Pan
- Kitchen Thermometer: ThermoPro Digital Thermometer
- Stand Mixer (optional): Kenwood Kmix Stand Mixer
2 – Kneading Your Dough for Long Enough
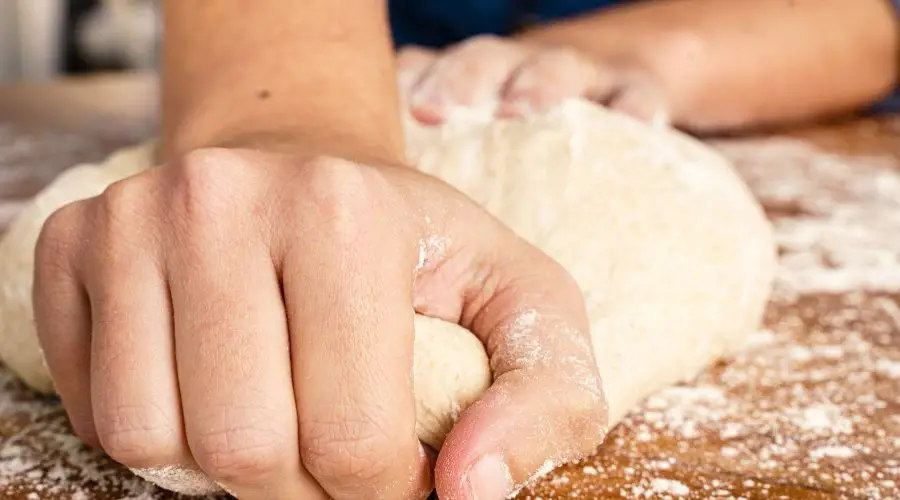
Keading your bread for long enough is also key to producing soft and well-risen bread every time.
You don’t need to be a kneading professional, you just need to be able to keep stretching the dough so that in turn you stretch the gluten and help the dough to rise.
As a general rule, you should knead the bread for at least 10 minutes if you’re using white bread flour and up to 15 minutes for brown and whole grain doughs.
If you’re using a dough hook on a stand mixer, 8-12 minutes on a low speed should be long enough.
As you knead the dough it will start to become smooth, glossy looking and almost blistered when you stretch it.

3 – Allowing Enough Time for Dough to Rise for Good Structure
If the dough isn’t given enough time to rise, the final result will be dense bread. Once your dough is needed, it needs plenty of time to rise in a large bowl so that bubbles can form and it can increase in size.
The rising process also helps to enhance flavour, so the longer you have to let your bread rise, the better it will taste.
As a general rule, the dough needs at least an hour to rise and double in size, however, if you can leave it for longer it will be even better.
If the dough triples in size on the first rise, this is no problem.
All this is dependent on the type of yeast you use and how warm the room is. If the room is very cold it could take hours for the dough to rise.
You can, in fact, stall the rising process to enhance the bread flavour by leaving the dough in the fridge overnight.
4 – Shaping the Dough Correctly
As a bread-making beginner, it’s easy to skip the step of shaping the dough correctly and it’s understandable that this element of bread making may be seen as being unimportant.
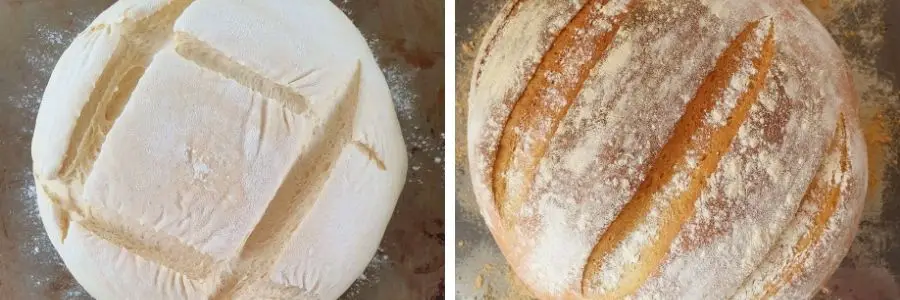
If you’re making a shaped loaf which won’t have the support of a bread tin, shaping it correctly can mean the difference between a flat loaf and a lovely rounded bread which produces large slices.
To produce a well shaped round loaf follow the steps below once your dough has risen:
- Scrape the dough onto an oiled or lightly floured surface.
- Flatten the dough slightly with your hands and then bring one corner into the middle, then keep repeating until the bread forms a round shape and the top of the bread is tight.
- Turn the dough over so the seams or creases are underneath.
- Use the sides of your hands to fold the dough under to create a tighter top.
The tightness of the top is the key to the dough keeping its shape and not collapsing as its proved (risen for a second time).

5 – Allow enough time for dough to prove (proof)
Once the dough is well shaped, leave it to prove (or proof) for as long as it takes to double in size.
It’s really important not to rush this step because the under-proved dough will lead to dense bread and stodgy bread which won’t rise well when it’s cooked in the oven.
Proving will take around an hour but could take much longer if the room is cold, so let it take as long as it needs to increase in size.
Combining the steps
This might seem like such a lot to take in, but trust me, by understanding and implementing the tips for each step you will create perfect soft and well-risen bread that you can be proud of.
Once you get used to the processes, bread-making will become second nature and you will spend very little time on the hands-on aspect of making dough.
The most important thing to take away from this post is not to rush any of the steps and let the dough take the time it needs to grow and improve.
You might also find the following post useful for improving your bread making skills:
