Recent Posts

Making HOMEMADE Bread Using a Dough Hook in 4 Simple Steps


In this post I’m going to show you how to make bread using a dough hook, along with a quick and easy bread recipe which you can use to make to make a simple white loaf from scratch using the dough hook.

Using a dough hook is a quick and easy way to make many types of bread and is especially good for sticky doughs which have a higher water content such as ciabatta. 

Dough hooks can be attached to stand mixers and also hand mixers to assist with mixing and kneading the bread dough.

Read on for a step by step demonstration on how to make bread using a dough hook on a stand mixer along with tips and advice on how to choose the best mixer to use with a dough hook.


How to make bread using a dough hook with a stand mixer

Step 1 – Weigh the ingredients

Bread Ingredients

  • 500g Strong white flour
  • 7g Dried yeast
  • 10g Sea salt
  • 280-300ml Warm water
  • 30g Butter

Method

  1. Place the mixer bowl on digital scales and weigh the flour, yeast and salt into the bowl, keeping the salt and the yeast separate from each other.
  2. Boil the kettle and place a jug on the scales, pour 100ml of boiling water into the jug and add the butter so it begins to melt and becomes soft. Then top up the rest of the water with cold water. The water should feel just warm.
  3. Make a well in the flour and pour in the water and butter mix.

Step 2 – mix the ingredients and knead the dough using the dough hook

  1. Place the bowl in the mixer stand and bring down the dough hook, start mixing on a low speed checking the dough consistency as it starts to come together. If it looks too dry at this point, you can add a little bit more water or if it’s too wet, a bit more flour.
  2. Once you’re happy with your dough, turn up the speed to around 1-2 (for a Kenwood stand mixer) and leave to knead for around 8 minutes. 

Stop your mixer from moving around

Although it’s fine to leave your mixer to knead the dough for around 8 minutes while you get on with something else, keep in mind that if it’s on a shiny surface it may move bit by bit across the worktop. 

I found mine on the edge once, which could have ended in disaster! To stop your mixer moving fold a tea towel and place it under the side of the mixer which is nearest to the edge of your worktop.


How do you know if dough is too wet or too dry?

If the dough is too dry it will look flaky and might not incorporate all of the flour at the mixing stage, if this is the case add a little of water at a time until the dough reaches a good consistency. 

A regular dough recipe will stay around the dough hook as its mixing (see image below).

If the dough is too wet it will pool at the bottom of the bowl, some types of bread do require a wetter mix so this is not necessarily a problem unless the recipe requires a firmer dough such as a pizza.

The texture of the dough will change as you start mixing, it’s best to let it mix for about 30 seconds before you can really tell if it’s too wet or dry.

TIP: Not sure if you have all the necessary bread baking equipment at home? Check out my recommended picks below (Amazon links):


Step 3 – Rise and prove the dough

  1. When 10 minutes is up, remove the dough hook and scrape any dough that’s stuck to the hook back into the bowl.  
  2. Cover the bowl with cling film and leave to rise for at least an hour or until the dough has doubled in size.
  3. Once the dough has risen, scrape the dough out of the bowl using a dough scraper onto a floured or oiled surface.
  4. Flatten the dough out using your fists (but don’t punch the dough) to remove any large bubbles.
  5. Roll the dough up into either a round shape if you’re baking the bread on a baking sheet or a rectangular shape if you’re using a loaf tin, making the seam side of the bread is facing downwards.
  6. Slash the top of the loaf (about 0.5cm in) with a serrated knife and cover in something that won’t stick to the dough such as a clean tea towel or place inside a large plastic bag.
  7. Leave the dough to prove for another hour.

How do you know if the bread is proved?

Proving (or proofing) the bread is the process you need to follow to give the dough chance to rise for a second time.

For most bread recipes you will need to prove the bread in the shape it’s going to be baked in either on a baking tray or in a bread tin. 

The proving process generally takes about an hour to complete and during this time the dough will increase in size by about 50%.

How quickly the does rises depends on many factors, including room temperature and the type of dough.

Under-proved dough will result in a dense loaf and over-proving will lead to a bread which is too light and fluffy.  So you need something between the two.  

You can test if your dough is proved enough by sticking your finger into the dough and if it doesn’t spring back all the way and a small indent remains, the dough is proved.

For more information on proving dough, you might find the following post helpful:

What is Dough Proving (proofing) and How to do it Properly

The image below shows an example of a dough before and after proving:
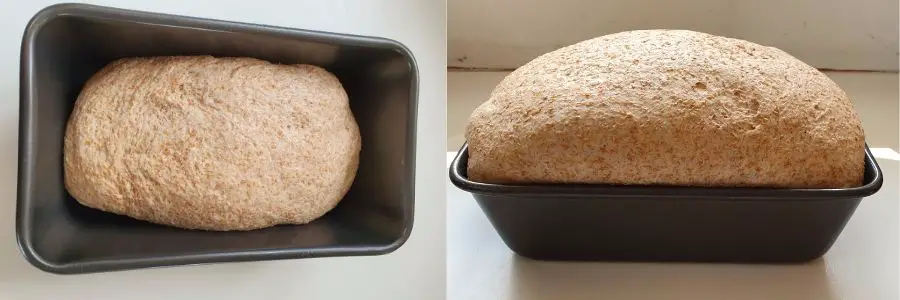
Before and after dough is proved

Step 4 – bake the bread

  1. Preheat the oven to 230°C/450°F.
  2. Place the bread in the oven and bake for about 30 minutes until the bread is golden brown and makes a hollow sound when you knock the bottom of the loaf.
  3. Cool the loaf on a wire rack and enjoy!

Stand mixers v’s Hand mixers with dough hooks

Using the dough hook/s attachments on a hand mixer is different to using the attachment on a stand mixer, there are pros and cons each type of mixer which are outlined below. 

The dough hook on the stand mixer is usually a hook shape and there’s only one of them.  For a hand mixer the dough hooks are generally a spiral or corkscrew shape and there are usually two of them.

Stand mixer with bread hook V’s…

  • High power machine which does all the work.
  • Long term investment which will last for many years.
  • Can be used with other attachments for many baking tasks.
  • You can do something else while the dough is kneading.
  • Higher initial cost outlay
  • It’s a bulky item for a small kitchen

Hand mixer with bread hooks

  • Lower initial cost outlay
  • Takes up less space in the kitchen
  • Can be used with other attachments for many baking tasks
  • Less power behind the mixer
  • You have to hold the mixer throughout the process
  • Can be a battle to hold the mixer especially with firmer doughs

Which stand mixer is best for kneading dough?

My recommendation – the Kenwood Chef

There is a lot of choice out there when it comes to stand mixers, thanks to shows such as Bake Off they have become a trendy kitchen accessory which people pay a premium for to get it in a certain colour. 

There are various options when it comes to choosing a stand mixer, including power (wattage), accessories and bowl capacity. 

For me, the best stand mixer is a Kenwood Chef, I’ve had mine for about 15 years now and it just keeps on going, before then I used my mums which I think she’d had for even longer. 

The current version of the standard Kenwood Chef comes with a dough hook, a whisk attachment and the ‘K’ attachment which is good for beating ingredients such as buttercream.  It also comes with a large mixing bowl which is perfect for bread making.

With a wattage of 1200 for the standard Kenwood Chef (Amazon link), there’s plenty of power to produce excellent dough results, the upgraded ‘Titanium’ version (Amazon link) offers more power again at 1700 watts, but comes with a higher price tag.

Click the link below to view the Kenwood Chef at Amazon and to see the latest prices:

Shop or check prices of the Kenwood Chef here.

For more information on how the Kenwood Chef and a comparison of the different models, take a look at the following article:

Kenwood Chef for bread dough – video instructions and machine reviews


Best budget hand mixer to use with dough hooks

My recommendation – Bosch hand mixer

Many hand mixers now come with dough hooks as standard, but if the mixer its self hasn’t got much power behind it, then you will have a ten minute battle with the mixer and the dough and it would probably be much easier just to knead the bread by hand.

I recommend the Bosch hand mixer (Amazon link) because for a small machine, it has a decent amount of power behind it with a wattage of 450.

It comes with dough hooks as standard along with beaters which are perfect for cake baking.

Check the version which you are looking to purchase to make sure the wattage is 450.

There are some cheaper Bosch hand mixers available (Amazon link), however they will have a lower power which will struggle with bread making.


Summary

I hope this post has given you some tips on how to make bread using a dough hook.  You may also like the following articles:

What equipment do you need to make bread?

Ingredients for bread making

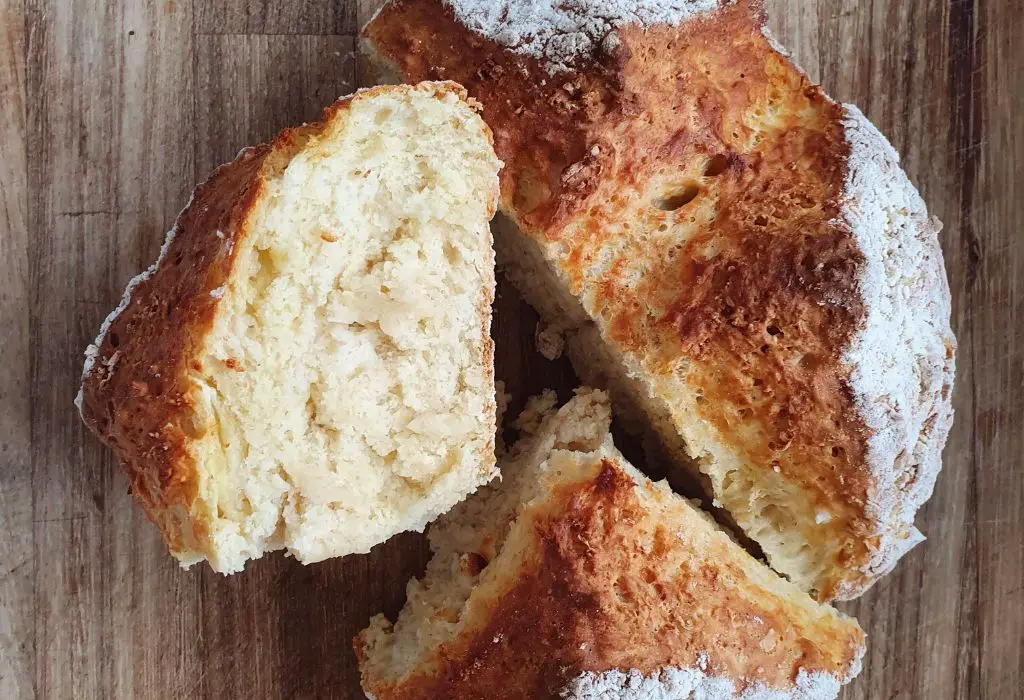
Simple Soda Bread Recipe (+ Version with Cheese & Onions)


Soda bread is a perfect get out of trouble yeast-free bread which is great to make when you don’t have time to wait for dough to rise.  

Read on to see the recipe, find out more about soda bread and see an additional recipe for soda bread with cheese and onions.

how to make soda bread - page header image

Quick and easy soda bread

Make this tasty soda bread to turn a soup or stew into a hearty meal.
3.38 from 8 votes
Prep Time 15 minutes
Cook Time 30 minutes
Total Time 45 minutes
Course Side Dish
Cuisine Irish
Servings 6 People
Calories 257 kcal

Equipment

  • Large mixing bowl
  • Baking sheet or tray
  • Sheet of baking paper
  • Serrated bread knife

Ingredients
  

  • 375 g Plain white flour
  • ¾ tsp Sea salt (Maldon if you have it)
  • ¾ tsp Bicarbonate of soda
  • 284 ml Buttermilk

Instructions
 

  • Preheat the oven to 200°C/390°F.
  • Place a sheet of baking paper onto the bakingtray or sheet.
  • Add all the ingredients to the mixing bowl mix and bring together with your hands to form a dough.
  • If the dough seems too dry, add a splash of milk to the mix. 
  • Generously flour your work surface and tip out the dough onto the flour.
  • Gently shape the dough into a round shape and lightly roll all sides in the flour so they're covered.
  • Place the loaf on the lined tray.
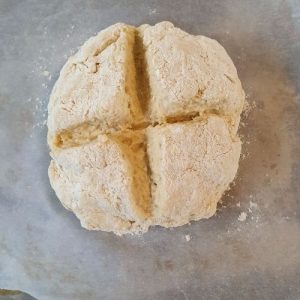
  • Using a bread knife cut a line into the middle of the dough stopping once you get half way through. Then turn and cut another line halfway through to form a cross (see image).
    Image of an uncooked soda bread loaf with a cross cut in
  • Bake in the oven for around 30 minutes until the loaf is golden brown and crunchy on the top – it should also hear a hollow sound when you knock on the base of the loaf.
  • Leave to cool on a wire rack and enjoy!

Nutrition

Sodium: 478mgCalcium: 64mgVitamin A: 78IUSugar: 2gFiber: 2gPotassium: 131mgCholesterol: 5mgCalories: 257kcalSaturated Fat: 1gFat: 2gProtein: 8gCarbohydrates: 50gIron: 3mg
Keyword No knead, No rise, No yeast, Soda Bread
Tried this recipe?Let us know how it was!

TIP: Not sure if you have all the necessary bread baking equipment at home? Check out my recommended picks below (Amazon links):


Soda bread with cheese and onions

Ingredients

  • 1 quantity soda bread dough (see above) stop at stage 4 while the dough is still in the mixing bowl.
  • One small red onion
  • 75g Mature cheddar cheese – grated
  • 1tbs olive oil

Method

  1. Chop the onion into small pieces. 
  2. Place a small pan over a medium to low head, add the olive oil and gently fry the onions for around five minutes until slightly softened. 
  3. Leave the onions to cool.
  4. Add the onions and grated cheddar to the mixing bowl with the dough and gently fold it into the dough with your hands.
  5. Continue with the soda bread recipe from step 5 (see above).

What is soda bread?

Soda bread is a traditional Irish recipe which is made by using baking soda as the rising agent instead of yeast. Soda bread has a unique taste which is unlike bread made with yeast, it has a fluffy almost scone-like texture and crunchy top which is extra tasty.

It’s very easy to make soda bread, because it doesn’t need time to rise, no kneading is required and this recipe only contains four ingredients which are flour, salt, buttermilk and bicarbonate of soda.

If you’ve not used buttermilk before, its consistency is a bit like a thin yogurt and it helps to give soda bread it’s fluffy texture. 

You can buy buttermilk from most supermarkets and it’s usually found alongside fresh cream, the main buttermilk brand is St. Ivel.  

Soda bread goes well with soup, stews or just warm with lashings of real butter.

Read on to see the soda bread recipe and an additional recipe for soda bread with cheese and red onions.


How long can you keep soda bread for?

For best results, soda bread is best eaten within 24hours of baking.  You can freeze a soda bread loaf or slices and it does freeze well, but I recommend freezing it when it’s very fresh.

To save time, make a double batch of soda bread and freeze one of the cooked loaves in a large freezer bag and then simply defrost and use.


You might also like…

If you enjoyed making soda a yeast free bread, you might like the following posts to find out more about other yeast-free bread types:

What bread does not contain yeast?

2 Methods on Making & Using Different Types of Croutons


In this post I’m going to show you how to make and use croutons using various types of bread, I’m also going to show you how you can use homemade croutons in your cooking, along with some other crouton tips.

Croutons are quick and easy to make and can be make with fresh or slightly stale bread, using pretty much any bread type. 

Croutons are made using a simple process of cutting bread into cubes and then adding fat such as olive oil and seasoning.

Depending on how you plan to use your croutons, you can add other flavors such as garlic, herbs and even cheese. 

You can also experiment with different breads to introduce more flavor and different textures to your crouton recipes. 

Homemade croutons are so much better than the little crispy cubes you get at the supermarket.  Making a larger crouton also helps to get a chewy centre which is crunchy on the outside. 


How to make croutons with white bread – in an oven

This recipe is for a classic white bread croutons which are perfect for soups and salads including caesar salad or gazpacho. 

You can use any white bread for this recipe, but if you do have homemade bread or Sourdough they’ll taste even better!

It’s up to you whether you leave the crusts on the bread, but it’s fine to leave them on or even use the crust ends of the bread. 

It’s a good idea to use the crust because it’s the most flavorsome part of the bread and can add more colour, texture and a rustic look to your croutons.

This recipe quantity makes around a cupful of croutons, to sprinkle into a salad or onto soup.  If you need more or you want to make a batch to last a few days, then double or triple the quantities.  

Homemade croutons can be kept for up to three days (find out more about how to store croutons later in this post).

This method is for making croutons in an oven, find out how you can make them using a pan after this recipe. 


White bread croutons Ingredients

  • 2 slices thick white bread
  • 2 tbs olive oil (you may need a little extra see top tip below)
  • a good pinch of sea salt (Maldon if you have it) & pepper

Recipe info

  • Preparation time
  • 5-10 minutes
  • Cooking time
  • 10 minutes
  • Makes
  • Around a cup of croutons

Equipment

  • Large baking tray or frying pan
  • Wooden spoon
  • Air-tight container for storage

Method

  1. Pre-heat the oven to 200°C (fan oven)/390°F.
  2. If you don’t want to use the bread crusts, remove them before you start.
  3. Using a bread knife cut across the bread into around 1cm to 2cm strips (depending on how big you want your croutons).
  4. Then turn the bread and do the same again to make cubes of bread.
  5. Place the bread cubes in to a baking tray, drizzle the oil all over, crunch up the salt over the croutons and season with pepper.
  6. Using two spoons, toss the croutons in the oil so they’re all covered – if they look too dry you might need a little bit more oil.
  7. Spread the croutons out on the tray so they have room to go crispy.
  8. Bake in the oven for around 10 minutes or until they’re golden brown and crispy.
  9. Leave the croutons to cool and then toss in a bowl lined with a few sheets of kitchen roll to remove any excess oil.

How to make croutons in a pan – in less than 10 minutes

Another way to make quick croutons without using an oven is by frying them in a pan. 

This recipe is slightly different to the oven version, because we’re going to use butter to get extra flavor into the croutons.  

This method produces more of an indulgent fried bread style crouton and they’re super fast to make. 

Again, depending on how many croutons you cant to make, you can double or triple the quantity. 

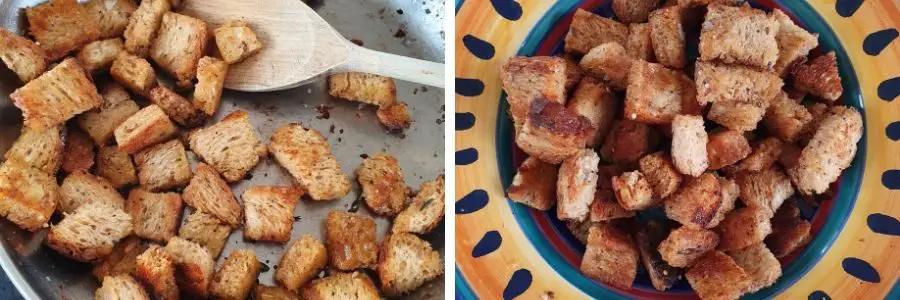
The image below shows how may croutons you can make from two thick slices of bread from a large loaf.

How to make croutons in a pan

Pan fried crouton Ingredients

  • 2 slices thick bread any type will do (I used a seeded loaf for this example)
  • 1 tbs olive oil
  • 20g butter
  • a good pinch of sea salt (Maldon if you have it) & pepper
  • a few sprigs of fresh thyme (optional)

Recipe info

  • Preparation time
  • Less than 5 minutes
  • Cooking time
  • 5 minutes
  • Makes
  • Around a cup of croutons

Method

  1. If you don’t want to use the bread crusts, remove them before you start.
  2. Using a bread knife cut across the bread into around 1cm to 2cm strips (depending on how big you want your croutons).
  3. Then turn the bread and do the same again to make cubes of bread.
  4. Add the butter and oil to a frying pan over a medium to high heat (using both will prevent the butter from burning).
  5. Once the butter is bubbling add the bread cubes to the pan and stir to cover them with the butter and oil. 
  6. Season with salt and pepper and strip the thyme leaves from the stalk into the pan.
  7. Keep stirring the croutons so they don’t burn and they’re golden brown – this should take around 5 minutes. 
  8. Spoon the croutons into a bowl lined with a few sheets of kitchen roll to remove any excess oil.

TIP: Not sure if you have all the necessary bread baking equipment at home? Check out my recommended picks below (Amazon links):


Top tip – Add a bit more oil if you need to

Because all breads are different and crouton sizes will vary, you might need to add a bit more oil if your croutons are looking too dry. 

You don’t want them to be dripping in oil, but you need enough so the croutons go golden brown and they’ve absorbed the flavor.


How to make garlic croutons

You can make garlic croutons using either the oven bake recipe or the pan fried version (see above) – either will work well.

White or brown bread will work for garlic croutons or try ciabatta if you have some because it goes extra crunchy when it’s made into croutons and works well with garlic- find out how to make ciabatta here.

For garlic croutons I would recommend using garlic salt instead of fresh garlic, normally I’d always use fresh garlic, but because the bread absorbs all the moisture and makes the pan or the baking tin very dry, the garlic could burn and produce an unpleasant flavor.  

Sprinkle about half a teaspoon of garlic salt per 2 slices of bread (depending on how much garlic you like) over the croutons once they’ve been coated in oil and add a tablespoon of chopped fresh parsley (optional) to add a bit of colour. 

Cook using the same method as above, checking the seasoning because garlic salt is salty.


How to make parmesan croutons

Parmesan is a great cheese to use for croutons because it’s flavorsome and because its a hard cheese it won’t make the croutons soggy.

Again, you can use any type of bread to make parmesan croutons, but I would recommend following the oven cook recipe (see above). 

Follow the method above and sprinkle over 20g of parmesan (per one quality) when you toss the croutons in the oil, bake and enjoy!


Everything else you need to know about croutons

Can you use stale bread to make croutons?

You can use stale bread to use croutons and homemade croutons are a great way to use bread which is past it’s best instead of wasting it.

Although it is fine to use stale bread, make sure it’s not too hard and there’s no sign of mould.

Think of it like toast, you would use the dry bread for toast rather than a sandwich and once it’s toasted, you can’t tell the bread was dry.

In fact, with croutons the bread is easier to cut into cubes if it’s a little bit stale and very fresh bread will absorb the oil much faster because it acts like a sponge.

How do you store homemade breadcrumbs?

Once homemade croutons have cooled, they can be stored for up to three days in an air-tight container. 

The crutons should stay crispy in the container providing they are kept at room temperature and out of direct sunlight.

You can freeze croutons, but they may lose their crispiness once defrosted.  I would recommend freezing bread cubes if your bread is going stale and then defrost once you’re ready to bake or pan fry the croutons.   

Ways to use homemade croutons

Croutons work really well in homemade soups and many types fo salads including Caesar salad or gazpacho.  They also work really well as a crispy topping for cauliflower cheese or a pasta bake.   

You might like to try:

The following three-cheese cauliflower cheese recipe uses croutons as a crispy topping, great as a side dish or as a main meal:

Cauliflower cheese and crouton recipe

Step-by-Step Guide: Ultimate Moist Banana Bread Recipe


Banana bread is one of the most popular types of bread at the moment.  In most cases it’s actually more of a cake made in the shape of a loaf than a bread.  

You can make banana bread using yeast, but if you want to achieve ultimate moistness and flavor, the cake version is the best.

This ultimate moist banana bread recipe is all about moistness and flavour.  With added spices, and brown sugar to great a rich golden colour.  This banana bread really stands out from the crowd and best of all it’s quick and easy to make.  It smells so good when it’s baking that it’s difficult waiting for it to cool down before eating any.

In fact, it does go really well with a scoop of vanilla or caramel ice-cream while still slightly warm.

Banana bread is a great way to use over-ripe banana’s – the riper the better! Find out more about ripe banana’s and other tips further on in this post.

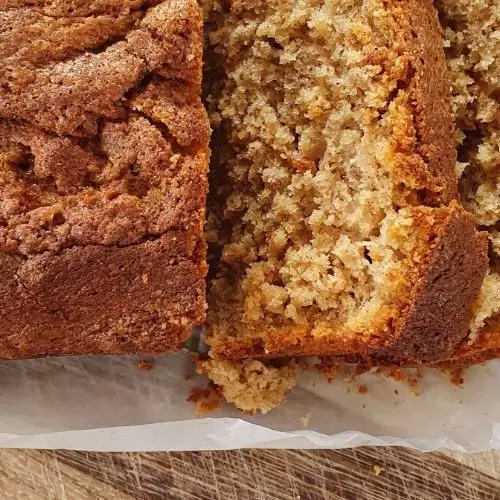
Ultimate moist banana bread recipe image

Ultimate moist banana bread

Try this delicious and moist banana bread recipe, with added spices for extra warmth and flavour.
5 from 1 vote
Prep Time 20 minutes
Cook Time 1 hour 10 minutes
Total Time 1 hour 30 minutes
Course Bread, Dessert, Snack
Cuisine Worldwide
Servings 10 Thick slices
Calories 335 kcal

Equipment

  • 2lb (1KG) Loaf/bread tin
  • Hand or stand mixer
  • Parchment paper or a cake tin liner
  • Large mixing bowl
  • Spatula or bread scraper

Ingredients
  

  • 4 Bananas Very ripe
  • 125 g Caster Sugar
  • 100 g Soft brown sugar
  • 140 g Butter Softened
  • 2 Eggs
  • 1 tsp Ground Cinnamon
  • 1 tsp Mixed spice
  • 250 g Self raising flour
  • 2 tbsp Milk

Instructions
 

  • Preheat the oven to 170°C/340°F.
  • Grease the loaf tin with a little butter and then line the tin with baking parchment or a tin liner (no greasing required).
  • Add the caster sugar, soft brown sugar and butter to a large mixing bowl.
  • Cream the butter and sugar together until light and fluffy. 
  • Peel the bananas and add one at a time straight into the sugar and butter mixture while continuing to beat the mixture.  If they're very ripe they will easily mash into the mix with no need to pre-mash.
  • Weigh the flour and spices into a separate bowl (there's no need to sift the flour).
  • Add an egg to the creamed sugar, butter and banana mix along with a table spoon of the flour mix and beat, once incorporated add the other egg with another spoon of flour to stop the mixture curdling.
  • Once the egg is incorporated into the mix add the rest of the flour and spices along with the milk and beat for 30 seconds or so until the mixture is well combined.
  • Scrape the mix into the prepared loaf tin using a spatula or bread scraper to get all the mix out of the bowl.
  • Bake the bread for an hour to an hour and 10 minutes, check if the bread is ready by inserting a skewer or knife into the middle and if it comes out clean it's ready. (See below for more information on cooking temperature).
  • Once the bread has been out of the oven for a few minutes, carefully tip it out of the tin, cool the bread on a wire rack and enjoy!

Nutrition

Sodium: 118mgCalcium: 29mgVitamin C: 4mgVitamin A: 428IUSugar: 28gFiber: 2gPotassium: 223mgCholesterol: 63mgCalories: 335kcalSaturated Fat: 8gFat: 13gProtein: 5gCarbohydrates: 52gIron: 1mg
Keyword banana bread, Sweet bread
Tried this recipe?Let us know how it was!

TIP: Not sure if you have all the necessary bread baking equipment at home? Check out my recommended picks below (Amazon links):


Try the ultimate Moist banana bread recipe with nuts

Add extra texture and flavor to banana bread by stirring in 150g of lightly chopped nuts to the finished mixture before you pour it into the loaf tin.

What nuts can you put in banana bread?

The best nuts to use in banana bread for texture and flavor are walnuts or pecans.  

By using lightly chopped nuts you can retain larger chunks within the bread, just place the nuts on a chopping board and chop them all together a few times using a rocking motion.  

You won’t need to increase the cooking time if you add nuts to the recipe.


Everything you need to know about banana bread

If you love banana bread and you want to find out more about how to get perfect results from you bake, read on to find out everything you need to know about how to make the best banana bread!

How ripe should bananas be for banana bread?

There isn’t really too ripe when it comes to bananas in banana bread, as log as they’re not moldy or turning too black, you can use banana’s which are in the process of turning very brown to black.

Don’t worry about them going brown, because when they’re like this the banana flavor you get from the bread is much more intense, they’re more sugary and have moister texture.

So, the browner they go, the better your banana bread will be.  

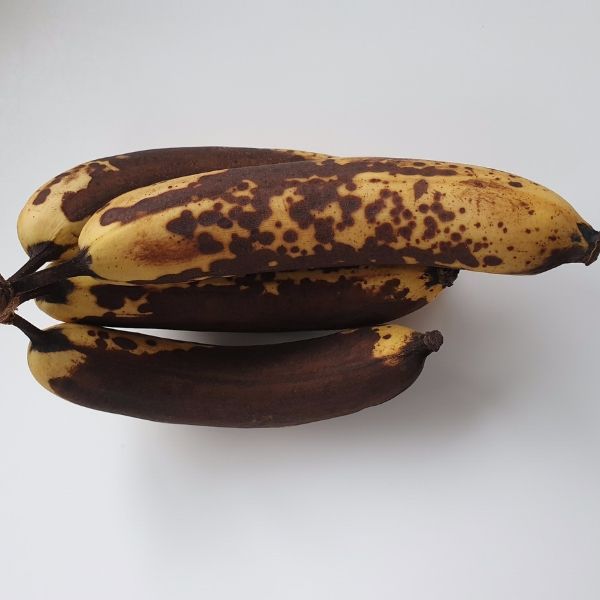
Here’s an image of the bananas I used for this recipe, as you can see, there isn’t much yellow left and they’re mainly dark brown…

Image of ripe bananas for banana bread

How do you get a banana to ripen quickly?

There are some tips out there on ripening banana’s in a microwave, but the best way to ripen a banana is naturally over time. This is because the natural flavors and sweetness of a very ripe banana just can’t be recreated unless it happens naturally.

You can speed the ripening process up a bit by leaving the bananas in a warm sunny place such as a windowsill which gets a lot of sun.

Keeping the bananas attached to each other also helps, because they make each other go brown.

If you bake banana bread regularly, you could have buy and ripen the second batch before you make the first bread so you always have brown bananas available.

If you’re lucky you might find bananas past their best in the bargain section of your local shop or supermarket.

Banana bread oven temperature

For this recipe I recommend using quite a low heat (170°C/340°F), this means the bread takes quite a long time to cook (over an hour), but it has a nice golden finish on top.

Because of the amount of sugar and natural sugar in the bananas, if you have the oven too high then the top can burn and go too dark before the cake is cooked in the centre. 

All ovens are different and some cook more evenly than others, so if your bread does look like its starting to burn or it’s going too brown place a sheet of tin foil over the top of the tin without taking the bread & turn the oven down a touch.

Is banana bread healthy

The sad answer to this question is no! Although bananas are very high in Vitamin B6, Potassium, Vitamin C and they’re a good source of fibre, they’re also very high in natural sugars particularly when they’re very ripe.

When you add the natural sugars to the sugar in the banana bread this means a lot of sugar, oh and the fat in the butter!

So, unfortunately, banana bread isn’t healthy, but like everything, its all fine in moderation and there are worse things you could be eating:)

For more information on this topic you might find the following post helpful:

Is banana bread good if you’re on a diet?

You might also like…

I hope you enjoy giving this banana bread recipe, it’s great on its own, but why not try a few serving ideas to take your tasty treat up to the next level? Find out more in the article below:

What is banana bread eaten with?

Or try making my Fruit Tea Bread version of banana bread, for a moist yet rich version of the original:

Banana and fruit tea bread recipe

All Tools You Need to Make a Bread (with Explanation Why)


I want to show you everything you need to know about the equipment and tools that you need to make homemade bread, including essential bread making equipment and good to have equipment for a keen bread maker.

The equipment and tools you need depend on how seriously you want to get into bread making at home, budget and the types of bread you think you’ll make the most.

For example, if you love experimenting with different dough types and want to make breads that have a very wet consistency such as Ciabatta, then I’d definitely recommend a decent mixer with a dough hook, which will save you time and a lot of mess!

If you only bake now and again and you’re quite happy getting stuck in with your hands, then you will only need basic equipment such as a dough scraper and a bread tin. 

You can you can make bread on any budget – large or small depending on how serious a hobby it is.  

So, I’ve put together this in-depth page to show you the various items of bread making equipment out there to help you decide what you need in your kit.

TIP: Not sure if you have all the necessary bread baking equipment at home? Check out my recommended picks below (Amazon links):


Equipment for bread making

1- Dough Scraper

Price range – less than £10

If you’ve ever made bread and you’ve not used a dough scraper, you might be wondering why this is in the essential section, but trust me, once you have one you’ll realise why.

The dough scraper is a very cheap and simple bit of kit, which will help you out with the messier jobs and stop wet dough getting all stuck to your hands.

If you’ve ever tried to wipe up dough and excess flour with a dishcloth, you’ll know that cloth’s life is pretty much over!

With a scraper, you can simply scrape up any excess flour or dough residue without ruining your cloths.

You can also use a dough scraper for other baking tasks such as scraping out cake batters and leveling out anything creamy, such as cake frosting or mash potato. 

What is a dough scraper used for?

A dough scraper can be used for various jobs in bread making including:

  • Scraping dough out of a mixing bowl and onto a work surface.
  • Moving or scraping dough off a work surface.
  • Cutting and dividing dough into equal portions – for example if you’re making bread rolls or pizzas.
  • Picking up excess flour from a work surface.
  • Measuring dough if the scraper has a ruler on it.
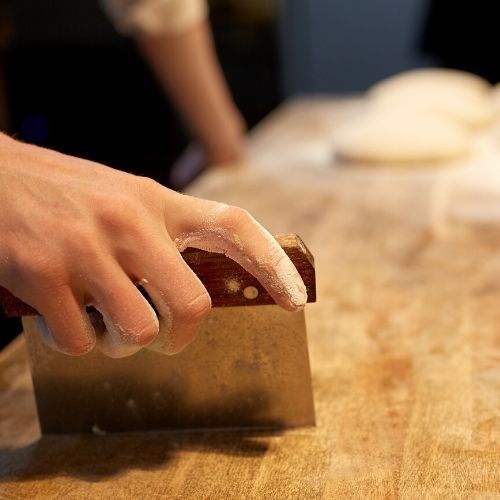
Image of a dough scraper

What is the best dough scraper?

There are two main types of dough scrapers which are plastic and metal. 

They’re both good when it comes to scraping up dough, but a plastic scraper with a rounded edge is much better than a metal scraper when it comes to bowl scraping.

The metal scraper comes with its own benefits, such as it’s more ridged when it comes to cutting dough and scraping up, however the plastic scraper is better if you have surfaces which easily scratch.

Some metal scrapers have ruler on the side so that you measure your dough as you cut it.  

Below are a few pros and cons of each type – if you can’t decide which is best for you and you do a lot of baking, you might want to consider having both types in your baking kit!

Plastic dough scraper V’s…

  • Can be used for all kinds of baking jobs
  • Flexible for bowl scraping
  • Gentle on work surfaces
  • Needs to be good quality & not flimsy
  • Can start thinning around the edges after a while

Metal dough scraper

  • Can be used for all kinds of baking jobs
  • Heavy duty & good for cutting dough
  • Can be used to measure dough
  • Not good for surfaces which scratch easily
  • No flexibility for bowl scraping

If you want to find out more about dough scrapers and whether you need one, take a look at the following article:

Do you need a dough or bench scraper and what can you use instead?


2 – Mixing bowl for bread making

Price range – £5-15

A mixing bowl for bread making is an essential item that you’ll need to make homemade bread.  The main factor when choosing a mixing bowl is that it’s large.

You need a large bowl so there’s space for mixing and room for the dough to rise and double or even triple in size before it reaches the top.

What material is best for mixing bowls?

Most mixing bowls are either metal, glass or ceramic and in some cases plastic.  The best type of bowl for bread making is metal because it’s light-weight, you can’t break it and it’s good for keeping the dough warm.  Although dough will still rise in any type of bowl, it just might be a bit slower.

For speciality doughs such as sourdough you might want to consider using a glass bowl so you can see the air bubbles as it’s rising. 

If you have a stand mixer with a dough hook, you can use the mixer bowl to rise dough after it’s been kneaded by the dough hook to save on washing up. 

This is great way to quickly make bread and really hands off, because you just weigh, mix and then cover to rise.


3 – Baking trays for bread

Price range – around £10

Baking trays are a vital piece of kit for bread makers if you’re planning to make bread which needs to be cooked on a flat surface such as rolls, bloomer bread, ciabatta or pizza.

If you generally cook at home then chances are you already have baking trays in your kitchen.  If you don’t and you’re considering buying trays then there are a few things to consider.

With baking trays, buying cheap means buying twice.  Cheap trays tend to only have a thin protective coating and as soon as they get scratched they start going rusty and need to be binned.

Buying a slightly more expensive tins is an upfront investment which will save you money in the months to come.

The best baking trays for bread are metal with a non-stick coating.  Stainless steel is also good as they don’t go rusty.

A good weighty tin is generally a sign that it’s of a good quality.  Samual Groves is a good quality tin maker and are available to buy on Amazon.


4 – Loaf/bread tins

Price range – less than £10

If you want to make a traditional ‘tin’ loaf then you will need a loaf/bread tin to create the bread shape which is perfect for sandwiches and toast.

Generally loaf tins are made from metal, silicon versions are available, but metal is best for browning and crispiness. 

If you’re worried about your bread getting stuck in a metal tin, a light oiling or buttering will stop this from happening. 

As with baking trays, it’s worth spending a little bit more on a quality tin with a good non-stick coating which will last longer without going rusty.

What size is a loaf tin?

Loaf tins are generally available in two sizes, which are traditionally called a 2lb tin or a 1lb tin.

A 2lb tin is also known as a 1kg tin – although these aren’t the exact converted weights.  You would use this bread tin for a large loaf recipe which typically uses around 500g of flour.

A 1lb tin is used to make a smaller loaf (half the size) if you don’t need so much bread.  A large loaf recipe can also be split between two 1lb tins.

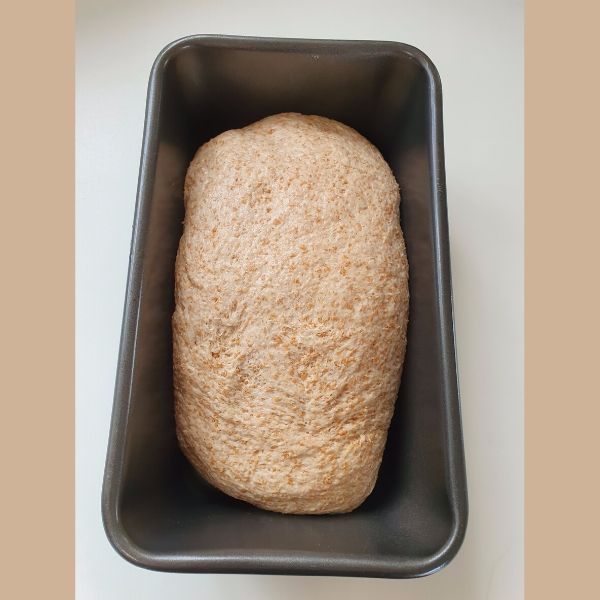
Image of a loaf tin

5 – Pastry brush

Price range – less than £5

A pastry brush is an essential bit of kit if you plan to make bread where you need to egg wash the dough, such as bread rolls or brioche.

Traditionally pastry brushes have hair like bristles which can sometimes be problematic as bristles tend to fall out and get stuck to your dough.

To stop this happening, the best type of brush to buy for bread making is a silicon pastry brush.

Silicon is much longer lasting, hygienic and can be washed in a dishwasher.

What can you use instead of a pastry brush?

A pastry brush is really the best thing to use if you have one because it’s gentle risen dough, where you don’t want to lose any air bubbles. 

If you don’t have a pastry brush you could use a piece of rolled up kitchen roll, but be gentle on the dough.

You can buy a pastry brush for under £5 so it’s definitely worth adding one to your kit if you can. 

They’re not just for bread making they’re also handy for pies and any other recipes where you need to egg wash.


6 – Digital scales

Price range – £10-£15

Although traditional style scales will work, digital scales are definitely worth investing in if you don’t have any because they are much more precise.

You can weigh all of your ingredients into your mixing bowl one at a time and reset to zero between adding each ingredient.

Digital scales I also good for weighing small quantities such as yeast and salt.

having a set of digital scales in your kitchen is useful for so many cooking jobs where you need to follow a precise recipe.

Digital scales are relatively inexpensive and a good brand such as Salter can be picked up for under £20 on Amazon.  

They also give you the option to change between measurement type, such as grams, ounces and milliliters.

how do you know if your kitchen scales are accurate?

When you buy good quality digital scales for the kitchen they will be pre calibrated which means they should be accurate.

Over time is possible for kitchen scales to lose a bit of their accuracy, this could be a problem when it comes to making bread because precise measurements are important.

You can check if your scales are still accurate by weighing an item such as an unopened bag of flour where you know what the weight should be.  You might need to add a bit on for packaging.

It’s also worth checking a light item if you were going to be weighing out small amounts such as yeast or salt.

Good to have bread making equipment


7- Pizza stone

Price range – around £20

When it comes to bread making the pizza stone is a non-essential item but it can help you create better results if you’re a keen bread maker and you regularly make homemade pizzas.

The pizza stone is a round ceramic plate that can be heated up in the oven before you place your breads or pizza onto it.  you can also get a metal pizza stone which can be used in the same way.

What does a pizza stone do?

The pizza stone is a simple bit of equipment which helps to get extra heat into the dough when you put it in the oven. 

The main benefits of using a pizza stone are:

  • It holds in heat within the oven and helps to prevent temperature drops when you open the oven door.
  • It cooks a pizza more evenly.
  • A pizza will cook faster on a hot pizza stone that it would on the oven racks or a normal baking tray.
  • It helps you to achieve a crispy bottom on your pizza or bread.

How do you use a pizza stone

Here are some tips for the best results when using a pizza stone to bake pizza or bread:

  • Place your pizza stone in the oven before you turn it on to avoid cracking your stone.
  • Make sure your dough is at room temperature as refrigerated or frozen dough could cause the stone to crack.
  • It’s highly recommended that you also use a dough peel to get your pizza onto the stone quickly in the hot oven.
  • If you don’t have a dough peel you could use a flat baking sheet, but make sure you wear oven gloves too.
  • It’s best not to wash your pizza stone, just brush or wipe it down after use and keep it in a dry place. 
  • For a quick and easy transfer onto the baking stone, try using a bit of semolina to prevent the dough sticking to the peel.

8 – Dough peel

Price range – £10 upwards

The dough peel sometimes known as the pizza paddle, is a good piece of equipment if you make a lot of homemade pizza or if you use an outdoor pizza oven. 

The peel allows you to slide the pizza into a hot oven or onto a pizza stone, without burning your hands.

Image of a pizza peel

How to stop dough sticking to the peel

Dusting your surface and pizza peel with a bit of semolina flour should stop your dough sticking to the surface.

Semolina flour is a great addition to your bread making ingredients.  Because it’s quite coarse it allows the dough to slide much better than ordinary flour does. 

It’s also important not to make pizza dough too wet and give it some extra kneading to create a dough that doesn’t ping back when you roll it.

You can also place your dough onto some baking parchment to stop it from sticking, the baking parchment can stay beneath the dough while it’s cooking and will easily come away when you take it out of the oven. 


9 – Dough hook for a stand mixer

Price range – £300 upwards for a stand mixer

If you make bread regularly then a dough hook could be a really useful addition to your baking equipment, especially if you like to make breads with wetter doughs such as ciabatta.  

The initial outlay for a stand mixer is big investment, but a good mixer such as a Kenwood Chef or a KitchenAid stand mixer can be used for all kinds of cooking and baking and will keep going for many years.

A stand mixer is definitely the best option for a hands off approach, but if it’s outside your budget there are cheaper alternatives such as a dough hook attachment for a hand mixer. 

What is a dough hook for a mixer

A dough hook for a mixer is an attachment which you can use on a stand mixer such as the Kenwood chef.  The dough hook gets its name from its hook-like appearance which is the perfect shape to knead bread mechanically.

The dough hook is a great time saving device because you can weigh all of the dough ingredients into the mixer bowl and leave it to knead the bread while you get on with something else.

You can then cover and leave the dough to rise in the same bowl. 

Although the dough will take a few hours to rise and prove, the actual hands on time to make the bread is minimal using a dough hook compared to kneading by hand.

Another benefit of using a dough hook is that you can knead wetter doughs without it getting all stuck to your hands. 

Do hand mixer dough hooks work?

Dough hooks on a hand mixer are a little bit different to a stand mixer, you use two hooks instead of one and they tend to be more of a spiral shape.

The downside of the hand mixer version is there is less power behind the mixer and it will struggle with a firm dough.

You also need to hold the mixer firmly throughout the kneading process which can be tricky because the bowl will move around too.

The hand mixer dough hooks will work better for a wetter dough as it’s not so much of a struggle to mix and will save you from getting sticky hands.

Overall, for a regular dough, it’s probably not worth investing in a hand mixer with a dough hook because it takes as much effort kneading as kneading by hand.

For more information on using a bread hook to make dough, you might find the following article helpful:

How to make bread using a dough hook


So, what equipment do you need to make bread?

I hope this post has helped you understand what you need and don’t need in your bread making equipment kit. 

Bread making only needs to be as complicated as you want to make it.  So if you just want to try bread making out to see if you like it, I would recommend starting small and not spending too much on unnecessary equipment.

The main thing is enjoying the baking process and most of all, enjoying eating the tasty delights with the knowledge that you’ve made them yourself!

TIP: Not sure if you have all the necessary bread baking equipment at home? Check out my recommended picks below (Amazon links):


You might also like…

Hopefully, you now have an idea of the kind of equipment you might need to start making homemade bread, you might also find the following article helpful:

Is it cheaper to make your own bread?

Complete List of Ingredients for Bread Making (+ Examples)


For most types of breads the ingredients for bread making are pretty simple – bread flour, yeast, salt, water and in most cases fat. 

It’s only when you go more fancy that you’ll need additional ingredients to make an enriched bread dough.  

In this post, I’m going to show you the main ingredients, why they matter and where you can get them.

Just to let you know before we start, we sometimes recommend products via Amazon and other retailers which we feel might be helpful for a particular topic.

The 6 main ingredients for bread making

1 – Bread Flour

Flour is the main ingredient of all breads and the type is important because it will greatly affect the end result.

For most breads, you will need a strong bread flour, because it’s higher in protein, meaning you can have the right amount of gluten to produce a bread texture.

Plain and self-raising flours have less protein and are used for cakes, biscuits and pastries, where you want the end result to have a crumbly texture. 

Below are some popular bread flour types along with some information on how you can use them and where you can get them:

Strong white bread flour

Strong white bread flour is the most commonly found and used type of bread flour.  It’s easy to use and is the main ingredient of a variety of breads, including a white tin loaf, bloomer bread, ciabatta and baguettes. 

Strong white flour is widely available in most supermarkets and online and is a good flour to start with if you’re a bread-making beginner.

Other specialists strong white bread flours are available including French or Italian Bread flour which can be bought online directly from producers and some are available to buy from Amazon. Click the link below to see bread flour which is available to buy from Amazon:

Shop Bread Flour here

Strong Wholemeal flour

Strong wholemeal flour is used to make a brown wholemeal loaf and contains some of the wheat kernel to give the bread extra texture. 

Wholemeal flour contains extra fibre, particularly if you can get hold of stoneground wholemeal flour, which retains more fibre & nutrients. 

Like strong white flour, wholemeal flour is widely available in most supermarkets and online from producers and stores such as Amazon. 

Granary or malted bread flour

Bread which is made using a malted bread flour is often called Granary bread, however, the term ‘Granary’ is actually a trademark of Hovis.  

If you’re not using the Hovis version, and you’re looking for a similar flour, you can get similar results with various types of malted bread flour, such as Doves Farm or Shipton Mill.

Malted bread has a rich nutty texture because it contains malted wheat, sometimes other malted grains and some contain caramelised sugar.

It’s generally available in larger supermarkets and online.

TIP: Not sure if you have all the necessary bread baking equipment at home? Check out my recommended picks below (Amazon links):

Rye flour

Rye flour comes from a type of grass and is generally lower in carbs than some other bread types.  It’s also full of fibre and is a great choice if you’re looking for the healthy option.

Rye flour is not as readily available in smaller supermarkets, but you can buy it online or in a speciality shop.

Spelt flour

Spelt is an ancient grain whole grain which has seen a big increase in popularity due to its health benefits.

Spelt flour is not gluten-free, but it’s said to contain less gluten than some flours, so it’s good for those with mild intolerances.  It’s also said to contain a higher level of nutrients.

Like Rye flour, spelt is not as widely available, but you should be able to get it in larger supermarkets, online and from specialist shops.

For more information on bread flour (available in the UK), take a look at the following post:

The best bread flour (available in the UK)

The best bread flour brands

There are so many options when it comes to choosing bread flour. 

At the time of writing, this post buying options in supermarkets have become very limited and sometimes the bread and yeast shelves have been completely bare, so it’s been a case of buying what you can get.

Let’s face it, when you have no choice and it’s more important to you to make your homemade bread, supermarket own-brand bread flours are not a bad option and for basic loaves, they’ll do the trick. 

Luckily, if you can buy online, there is much more choice and you can choose from British artisan flour makers who have traditional mills and are creating organic flours.

The thing to remember is that flour isn’t just flour, most flours contain additives and some include greater nutrients than others, depending on the process which is used to make it. 

I’ve put together a directory of some of our favourite bread flour producers in the UK along with various links to shop bread flour online, click the link below to view the directory:

UK Bread Flour directory


2 – Dried or fresh yeast

I generally use dried yeast sachets for my bread-making where yeast is required.  It performs well, it’s easy to use and to keep fresh.

In the past dried yeast was seen as a bit of a cheat in comparison to fresh yeast, however, fresh yeast can be a bit tricky and performance is more temperamental.

Dried yeast is readily available, I use Allinson easy bake yeast, you can get it in either 7g sachets or the 125g tin so you can measure it out. 

If you don’t use yeast that often, I’d recommend using sachets because they stay fresh for longer.

Once the tins have been open for a while the yeast can become very sluggish and takes some time to rise, even if they are still in date.

At the time of writing, yeast is difficult to find in supermarkets, so if you can’t get Allinson yeast, I’ve found supermarket own brands (such as Tesco & Lidl) seem to work just as well for most bread (although I’ve not tried them all). 

If you like using or want to experiment with using fresh yeast, you can buy it online, I recommend Bioreal Organic fresh yeast which you can buy in small blocks from Bakery Bits.

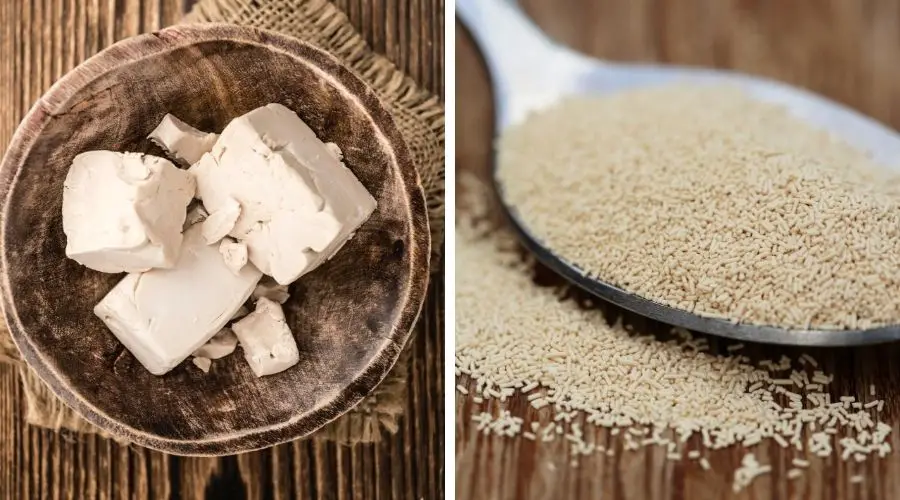
Image of dried and fresh yeast products

3 – Water

There’s no special water which you need for bread making, but it does need to be the right temperature.

The temperature you need is tepid, so just warm to the touch.

A good way to get tepid water is either, use water from the kettle which has cooled down or mix boiling kettle water with cold tap water so that it’s just warm.

An easy way to measure the water, (in case you need a bit extra), is to make too much in a jug and then weigh it into your mix by pressing zero on your digital scales after you’ve made a well in your dry ingredients. 

Water which is too hot or too cold can affect the yeast’s performance or make it rise too quickly or not at all.


4 – Fat

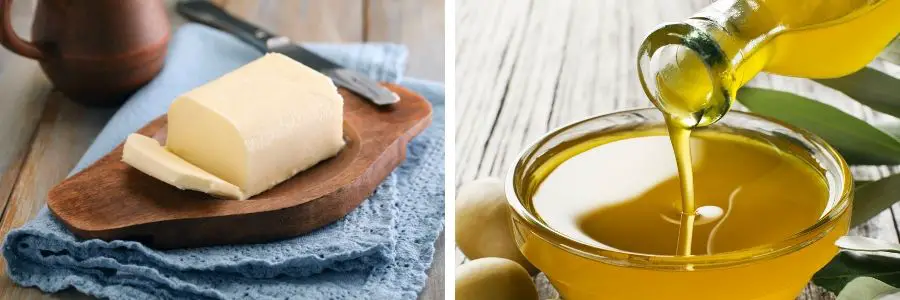
Using fat in bread helps it to stay fresher for longer and helps create a lovely soft dough. Butter is good to use in traditional loaves and rolls, whereas olive oil is great for Italian breads such as Ciabatta.

Olive oil is also good to use on your work surface for kneading and knocking back the dough.  It also helps to give a nice brown finish when baking.

The type of olive oil or butter you use is really personal preference and what you have available at the time. I personally prefer salted butter and extra virgin olive oil.

Some bread recipes contain milk which creates a softer dough and end result.

For more information on using fat in bread dough, you might find the following post helpful:

What does adding fat do to bread dough?

Fats in bread image

5 – Salt

Although you can use any salt in bread, some are definitely better than others and contain more minerals with no additives or chemicals. 

A good sea salt is full of natural minerals and tends to have a more delicate flavour.

My favourite salt for all cooking and bread baking is Maldon Salt, it has a unique shape and is made using traditional methods.


6- Sugar

Many commercial breads contain lots of sugar, for flavor and for bulking.  Good homemade bread doesn’t need any sugar because it has so much more flavor to begin with.

Some people say it helps the yeast to rise, however, it’s not necessary when you’re using a dried yeast because performance will be just as good with or without it.

If you feel you need sugar then it’s fine to add some in, but personally, I only use it for sweet doughs such as brioche.

Another alternative to sugar is honey, which some bakers say actually increases the performance of the yeast.

You might also like…

I hope this post has helped you to find more information on basic bread dough ingredients. You might also find the following articles useful:

Fresh Yeast vs Dried Yeast

Is homemade bread better with milk or water?