Recent Posts

Simple Step-by-Step Granary Bread Recipe You Need to Try


Just to give you a little bit of background, before we get to my Granary bread recipe:

Granary is actually a trademark of the Hovis brand, rather than an actual bread type or flavor. 

Granary flour contains various ingredients, including malted flour, wheat flakes and even caramelised sugar – which is probably why it tastes so good!

If you want to know more about what goes into Granary Flour you can see all the Hovis Granary flour ingredients here.

I have used Hovis Granary flour for this Granary bread recipe, which is available in most supermarkets. Don’t worry if you can’t get Hovis, an alternative ‘malted’ flour will work just as well.

Malted bread is extra tasty and goes really well with a prawn cocktail or cold meats. 

The flour does tend to absorb more water than a white flour, and it continues to absorb throughout the kneading process, so a little extra water will be required. 

Granary dough also takes a little bit more kneading and I would recommend extra raising time too, for the best results.

For this reason, I prefer to make this dough using the dough hook so I can make a wetter mix, but if you’re making it by hand you can decrease the water amount to make it a bit more manageable.

The butter in this recipe will help create a lovely soft loaf and it will also help it to last a bit longer.

For this recipe, you will need a loaf tin and I’d recommend using a dough scraper if you have one.
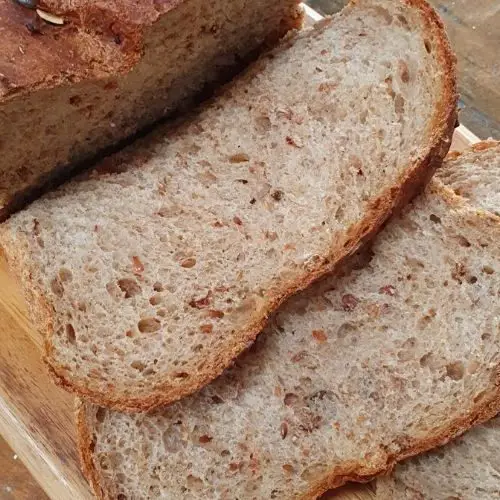
Granary bread recipe

Granary bread recipe

Try this tasty Granary bread recipe with added seeds for extra crunch
5 from 4 votes
Prep Time 25 minutes
Cook Time 30 minutes
Rising & proving time 2 hours 30 minutes
Total Time 3 hours 25 minutes
Course Side Dish
Cuisine British
Servings 12 Thick slices
Calories 208 kcal

Equipment

  • Mixer with bread hook (optional)
  • Large mixing bowl
  • 2lb (1kg) Bread loaf tin or baking tray
  • Dough scraper

Ingredients
  

  • 500 g Hovis Granary bread flour or malted flour
  • 7 g Dried yeast
  • 10 g Sea salt Maldon (if you have it)
  • 30 g Butter softened
  • 300 ml Warm water to 320ml
  • 70 g Mixed seeds Optional
  • 1 Egg beaten (if using seeds)

Instructions
 

Stage 1 – Make the dough

  • Weigh the flour into a large bowl or mixer the bowl if you're using a dough hook.
  • Add the yeast and salt to the flour, keeping them separate on either side of the bowl.
  • Measure the water into a jug (you may not need all of the water, start with 300ml and add a little more if the dough looks too dry).
  • Make a well in the flour, add the water and butter and bring together.
  • Knead the mixture by hand for around 15 minutes on a floured surface or for 12 minutes using a dough hook.
  • Put the dough back into the large bowl and cover with clingfilm or a damp tea towel.
  • Let the dough rise until it's doubled in size – for around one and a half to two hours.

Stage 2 – knock back and prove the dough

  • Scrape the dough out of the bowl onto an oiled surface. 
  • Gently knock the air bubbles out of the dough using your fists.
  • Shape the dough so it fits into the bread tin, making sure any seams or creases are facing down. Divide by 2 if you're using small 1lb tins.
  • Cover and leave for around another hour, until the bread has doubled in size (about an hour). 

Stage 3 – Bake the bread

  • Preheat the oven to 220°C/430°F and lightly oil the bread tin.
  • Slash the top of the loaf with a sharp serrated knife
  • If you're using seeds, gently brush some beaten egg on the top of the loaf and sprinkle over the seeds.
  • Place the bread into the preheated oven.
  • Bake for around 30 minutes until golden brown and then turn out onto a wire rack to cool.
  • Test the bread is cooked by knocking on the base – you should hear a hollow sound

Nutrition

Sodium: 353mgCalcium: 20mgVitamin C: 1mgVitamin A: 90IUSugar: 1gFiber: 3gPotassium: 151mgCholesterol: 19mgCalories: 208kcalSaturated Fat: 2gFat: 6gProtein: 7gCarbohydrates: 34gIron: 3mg
Keyword Brown bread, Granary bread, Malted bread
Tried this recipe?Let us know how it was!

TIP: Not sure if you have all the necessary bread baking equipment at home? Check out my recommended picks below (Amazon links):


Reshape your loaf

Instead of using a bread tin, shape your dough into a round at stage 2 following the same method and bake on a baking sheet.

Slash a cross shape (1/2cm deep) into the dough using a serrated bread knife before it goes into the oven.


You might also like…

If you enjoyed making a granary loaf, I’d also recommend trying the following recipe, using wholemeal Spelt flour:

Seeded Spelt Bread Recipe

For more information on where you can buy Granary or malted bread flour, click the link to my bread flour directory beow:

Bread Flour Online Directory

Easy Ciabatta Recipe: From Making Dough to Baking Ciabatta


Ciabatta is a traditional Italian Bread which is made with a slightly different technique so that air bubbles stay in the bread to give it a light texture.

I’ve put together this easy ciabatta recipe which doesn’t need much handling if you have a dough hook. 

The dough is much wetter than a standard loaf dough, so I recommend making this bread with a dough hook. 

It is possible to knead the dough by hand, however be prepared to get messy hands! See my tip below if you’re kneading by hand.  

Our method keeps things simple and the finished results are well worth the extra raising time.  

These rustic style breads are very versatile, great for barbecues, summer salads, sandwiches and the best ever homemade garlic bread.  

You’ll need a large baking tray or sheet, I’d also recommend using a dough scraper if you have one and a dough hook with a mixer. Find out more about bread-making equipment here.

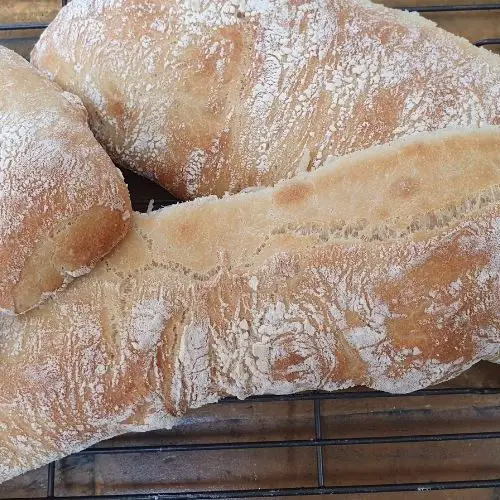
Easy Ciabatta Recipe image

Easy Ciabatta Bread Recipe

Ciabatta is an Italian bread with a light texture due to the air bubbles which form in the dough and is perfect for sharing.
4.20 from 5 votes
Prep Time 25 minutes
Cook Time 25 minutes
Rising time 3 hours
Total Time 3 hours 50 minutes
Course Bread
Cuisine Italian
Servings 6
Calories 312 kcal

Equipment

  • Large baking tray (or 2 smaller ones)
  • Mixer with a dough hook attachment (recommended)
  • Dough scraper
  • Large mixing bowl

Ingredients
  

Instructions
 

Stage 1 – make the dough

  • Weigh the flour into a large bowl or mixer bowl.
  • Add the yeast and salt to the flour, keeping them separate on either side.
  • Measure the warm water & olive oil into a jug. 
  • Make a well in the flour, add the water & oil mix and bring together until all ingredients are combined.
  • Knead the mixture for 10 minutes using a dough hook or 12 minutes by hand (see tip below if kneading by hand).
  • Place the dough in a large oiled bowl and cover with cling film or a cloth.
  • Let the dough rise for at least 2 hours until its around 3 times its original size and bubbly.

Stage 2 – Shape the bread

  • Once risen cover your surface with plenty of flour.
  • Gently tip the dough out onto the surface using a dough scraper, handling as little as possible to retain the air bubbles and sprinkle plenty of four over the top.
  • Using the side of your hands, carefully push the dough into a rough rectangular shape. 
  • Divide the dough up into 2, 4 or 8 depending on how big you want your loaves/rolls to be.
  • Carefully pick up each piece of dough holding an end with each hand and place it onto an oiled baking tray, leaving space between each one.

Stage 3 – bake the bread

  • Preheat the oven to 230°C/450°F
  • Leave to rise again on the tray for another 15 minutes.
  • Bake for around 20-25 minutes until golden brown and then leave on a wire rack to cool.

Nutrition

Sodium: 729mgCalcium: 17mgVitamin A: 20IUSugar: 1gFiber: 2gPotassium: 94mgCalories: 312kcalSaturated Fat: 1gFat: 2gProtein: 11gCarbohydrates: 61gIron: 1mg
Keyword Ciabatta
Tried this recipe?Let us know how it was!

TIP: Not sure if you have all the necessary bread baking equipment at home? Check out my recommended picks below (Amazon links):

Can you make ciabatta bread without a dough hook?

It’s certainly possible to make ciabatta dough without a dough hook, but it’s quite messy to deal with due to the high water content in the dough mix.

The best way I have found to make kneading more manageable is by kneading it within the bowl using a stretching and kneading action with your hands. 

This will take around 12 minutes and is ready once you have a smooth, glossy and stretchy consistency.

You might also like…

You might also find the following article about ciabatta bread helpful:

What makes ciabatta bread different from normal bread?

Wholemeal Bread Recipe: Follow These 3 Simple Steps


If you prefer a brown loaf, then try this tasty wholemeal bread recipe.  This recipe is very similar to the white tin loaf version, it just needs a little bit of extra work, but is still easy to make.

Wholemeal flour absorbs more water than white flour and it continues absorbing water throughout the process.  For this reason, this recipe requires a bit more water and some extra kneading.

You will also find this dough takes longer to rise than the white version, but if you have the time, it’s worth the wait for the extra flavor. 

This wholemeal bread recipe contains butter which will result in a rich, soft loaf which keeps for longer.

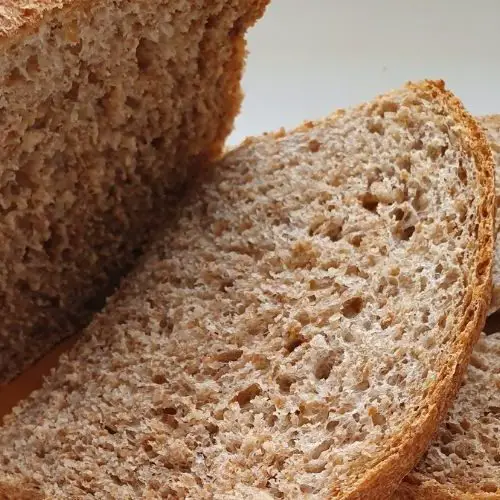
Wholemeal bread recipe image

Wholemeal bread recipe

Easy recipe for a wholemeal tin loaf which is perfect for sandwiches or just eating with butter.
4.41 from 10 votes
Prep Time 25 minutes
Cook Time 30 minutes
Rise time 2 hours 30 minutes
Total Time 3 hours 25 minutes
Course Side Dish
Cuisine Worldwide
Servings 10 Thick slices
Calories 194 kcal

Equipment

  • 2lb (1kg) Loaf tin
  • Mixer with a dough hook (optional)
  • Large mixing bowl
  • Dough scraper

Ingredients
  

Instructions
 

Stage 1 – make the dough

  • Weigh the flour into a large bowl or mixer bowl if you're using a dough hook.
  • Add the yeast and salt to the flour, keeping them separate on either side of the bowl.
  • Measure the water into a jug. 
  • Make a well in the flour, add the butter and water and bring together until all the flour is mixed in and the dough is formed.
  • Knead the mixture by hand for around 15 minutes on a floured surface or for 12 minutes using a dough hook.
  • Put the dough back into the large bowl and cover with clingfilm.
  • Let the dough rise until it's doubled in size – for at least one hour (time will depend on how warm the room is).

Stage 2 – shape and prove

  • Scrape the dough out of the bowl onto a floured surface. 
  • Knead it a few times to get rid of any large air bubbles.
  • Shape the dough so it fits into the bread tin or shape into a round (or 2) if you're using a baking sheet. Make sure any seams or creases are on the underside of the dough. 
  • Cover and leave for around another hour, until the bread has doubled in size. 

Stage 3 – Bake the bread

  • Preheat the oven to 230°C/450°F
  • Uncover the loaf and place it into the preheated oven.
  • Bake for around 25-30 minutes until golden brown and then turn out onto a wire rack to cool.
  • You can test the bread is cooked by knocking on the base – you should hear a hollow sound when it's ready.

Nutrition

Sodium: 412mgCalcium: 18mgVitamin A: 75IUSugar: 1gFiber: 6gPotassium: 188mgCholesterol: 6mgCalories: 194kcalSaturated Fat: 2gFat: 4gProtein: 7gCarbohydrates: 36gIron: 2mg
Keyword Brown bread, Tin loaf, Wholemeal bread
Tried this recipe?Let us know how it was!

TIP: Not sure if you have all the necessary bread baking equipment at home? Check out my recommended picks below (Amazon links):

Top tips

You may not need all of the water in this recipe (depending on the flour brand you choose). Hold a bit back while you’re mixing the ingredients and then add a bit more if it looks too dry.  

You can adjust either way at the mixing stage:

If your dough is too wet – add a little bit more flour while you’re kneading.

If your dough is too dry – add a splash more water.

You might also like…

If you’re looking for more inspiration and delicious wholemeal bread recipes you might also like to try the following:

Granary Bread Recipe

Seeded Spelt Bread Recipe

Simple But Tasty Recipe for White Bread You Must Try!


The traditional white tin is one of the UK’s most popular breads and millions of loaves are sold across the country each day. 

This recipe is based on a traditional recipe for white bread that can be used for many bread shapes and sizes.

Making your own bread is so rewarding, it smells and looks amazing and you know exactly what’s gone into it.  This loaf is easy to make and versatile to use. 

Use it for sandwiches, the best tasting toast, the ultimate cheese toasties or make a bowl of soup extra special with a slice of warm bread and real butter. 

This is a great recipe to start with if you’ve not made bread before.  I also use a bit of butter for a lovely soft loaf which keeps that little bit longer.

You’ll need a loaf tin, or a baking sheet if you don’t have a loaf tin, we’d also recommend using a dough scraper if you have one.  Find out more about bread-making equipment here.

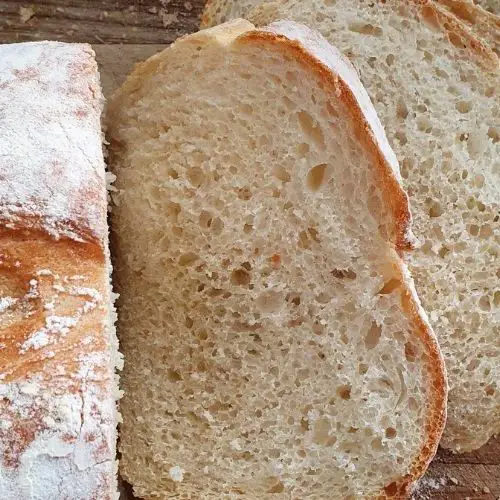
Recipe for white bread image of white loaf

Recipe for white bread

This easy to make white bread recipe is the basis for many types of other white bread recipes in various shapes and sizes and is the perfect recipe for beginner bread makers.
4.80 from 5 votes
Prep Time 25 minutes
Cook Time 30 minutes
Rising & proving time 2 hours
Total Time 2 hours 55 minutes
Course Side Dish
Cuisine Worldwide
Servings 10 Thick slices
Calories 204 kcal

Equipment

  • Bread tin or baking sheet
  • Large mixing bowl
  • Mixer with a dough hook (optional)
  • Dough scraper (optional)

Ingredients
  

Instructions
 

  • Weigh the flour into a large bowl or the mixer bowl (if you're using one).
  • Add the yeast and salt to the flour, keeping them separate on either side.
  • Measure the water into a jug (see tips on warm water below). 
  • Make a well in the flour, add butter and the water mix and bring together.
  • Knead the mixture by hand for around 15 minutes on a floured surface or for 10 minutes using a dough hook.
  • Place the dough back into the large bowl and cover with clingfilm or a damp tea towl.
  • Let the dough rise until it's doubled in size – for at least one hour (time will depend on how warm the room is).
  • Once the dough has risen, scrape the dough out of the bowl onto a floured surface. 
  • Knock back the dough by kneading a few times to get rid of any large air bubbles.
  • Lightly oil the bread tin with olive oil (if you're using one).
  • If you're using a bread tin, shape the dough into a rectangular shape so it fits in the tin with any creases facing down. If you're using a baking tray, shape the dough into a round shape and place it on the tray.
  • Cover the loaf with a clean tea towel or place it in a large bag, making sure the plastic doesn't touch and stick to the dough and let the dough prove (rise again) for another hour.
  • Once the hour is nearly up, preheat the oven to 230°C/450°F.
  • Slash the top of the loaf with a serrated knife (about 1/2cm deep) (see tips below).
  • Place the bread in the oven and bake for around 30 minutes until it's golden brown and sounds hollow when you knock on the base.
  • Take the bread out of the tin, leave to cool on a wire rack and enjoy!

Nutrition

Sodium: 412mgCalcium: 8mgVitamin A: 75IUSugar: 1gFiber: 1gPotassium: 57mgCholesterol: 6mgCalories: 204kcalSaturated Fat: 2gFat: 3gProtein: 6gCarbohydrates: 37gIron: 1mg
Keyword White bread recipe
Tried this recipe?Let us know how it was!

TIP: Not sure if you have all the necessary bread baking equipment at home? Check out my recommended picks below (Amazon links):

How to weigh out warm water for bread making

I can understand if you’re thinking – why is she telling me how to weigh out warm water, but if you’ve not made bread before, I think this is useful to know.

Water for bread making should be just warm or ‘tepid’, my method for creating the right temperate which softens the butter at the same time is:

  • Place a jug on the digital scales and pour in 150ml of boiling water.
  • Add the butter to the hot water and leave for a few minutes while you weigh the dry ingredients.
  • Top up the water and butter mix with 150ml cold tap water and you should now have warm water and melted butter.

You can also use water from the kettle which has cooled from boiling to just warm, but this takes more planning ahead. 


Why do you need to slash dough?

Slashing the dough before the bread goes into the oven helps it to expand as it cooks in the oven and it also creates a nicer looking loaf.

It’s important to use a sharp serrated knife such as a bread knife to create a quick clean cut so you don’t deflate the dough.

Using a knife which isn’t serrated tends to drag the dough and let the air out. Find out more about slashing dough in the following post:

How to score or slash bread dough and why we do it


How to keep homemade bread fresh

As with most homemade bread, this loaf is best eaten fresh, but it can be stored in a large paper or plastic bag if you have one.

If you’re a keen baker, you may want to consider to invest in a reusable bread bag.

It makes the best tasting toast the day after or if you’re feeling adventurous, try out one of our leftover’s recipes.


Other White Bread Recipes You Might Like

If you’re looking for more white bread inspiration, you might like to try one of the following recipes:

Easy Ciabatta Recipe

How to make Soda Bread