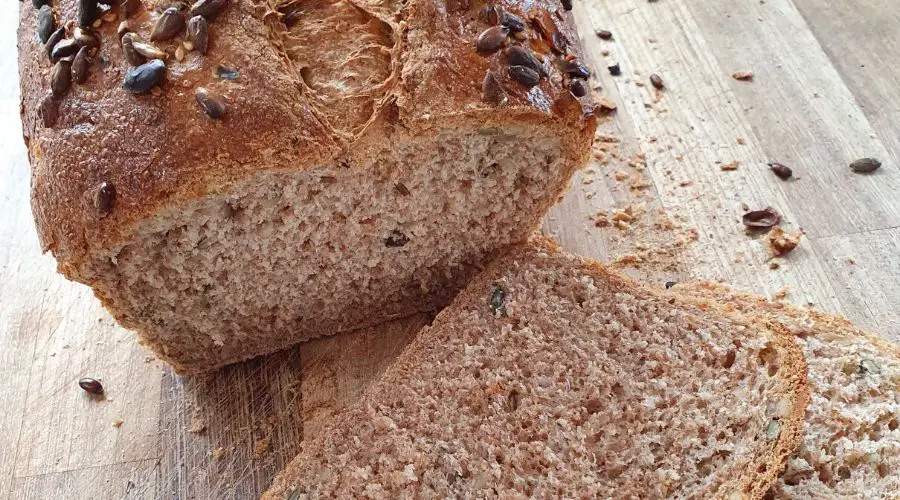
Recent Posts

Ultimate GUIDE: What is Artisan Bread & Why is Different?


The term ‘artisan’ is being used more and more these days, not just in the context of bread, but for many genres where anything is handcrafted or unique. But what is artisan bread and what does the term artisan actually mean? Is it just a word people use to charge more for bread and is artisan bread even a real thing?

The term artisan bread is used to describe bread which has been handcrafted using skill and traditional technique to make a unique and often rustic loaf. Artisan skills can be used to create many bread types using various types of flour, including white, brown, textured flours and flour made from ancient grains.

Read on to find out more about artisan bread types and the methods used to create them, including sourdough and bread made using speciality flour.

The meaning of the word artisan

Oxford languages defines the word Artisan as follows:

a worker in a skilled trade, especially one that involves making things by hand.

Oxford Languages

When referring to food or drink as artisan it’s defined as:

made in a traditional or non-mechanized way using high-quality ingredients.

Oxford Languages

How ‘Artisan’ is used to describe bread

So, using this definition in the bread world, artisan bread can be defined as:

  • Bread which is made using skilled techniques
  • Unique bread which is made and handcrafted without the use of machines
  • Bread which is made using high-quality ingredients

The good news is you don’t have to be a master baker to make artisan bread, you may be making artisan bread at home without even knowing it!

Ultimately, ‘artisan’ is a word to describe hand made bread using good ingredients an traditional methods.


Examples of traditional ‘artisan’ methods

Sourdough

When you think about the process that’s used to make sourdough bread, it’s probably the ultimate artisan bread-making method.

With sourdough, you can make a loaf which looks and tastes amazing from just three ingredients, which are flour, water and salt.

A sourdough starter made from just flour and water is used as the leavening or rising agent and added to the other ingredients.

The sourdough starter is fed with more flour and water over a few weeks and ferments to create a bubbling runny dough-type mixture which helps the dough to rise.

Rising time is much slower with sourdough than a dough which is leavened with yeast and it’s this slow fermentation process which creates the wonderful sourdough flavour.

Some bakers recommend adding an extra ingredient to the sourdough starter such as fruit, to speed up the fermentation process.

I prefer to use just flour and water, it works really well and for me keeps the integrity of the three-ingredient bread.

The texture of artisan sourdough is chewy with a crispy crust and it just has a flavour that you don’t get from a loaf made using a quick rise process.

Creating the artisan bread ‘look’

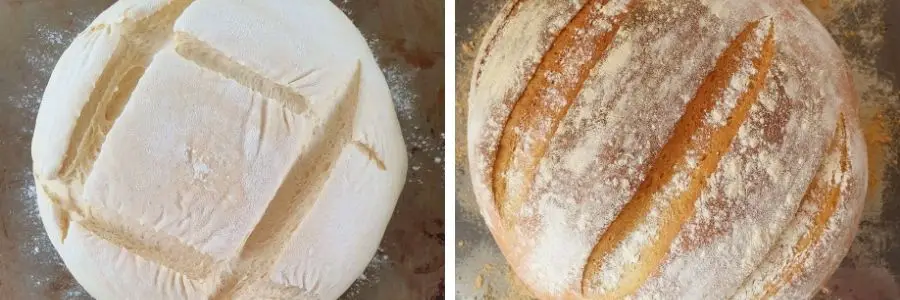
Creating elaborate patterns on sourdough loaves is becoming increasingly popular. This look is created using a blade called a lame where the dough is scored before it’s baked in the oven.

As well as creating a unique look to the bread, it also helps the bread to expand and rise out as it cooks. It works a bit like a concertina in that each line allows that part of the bread to grow.
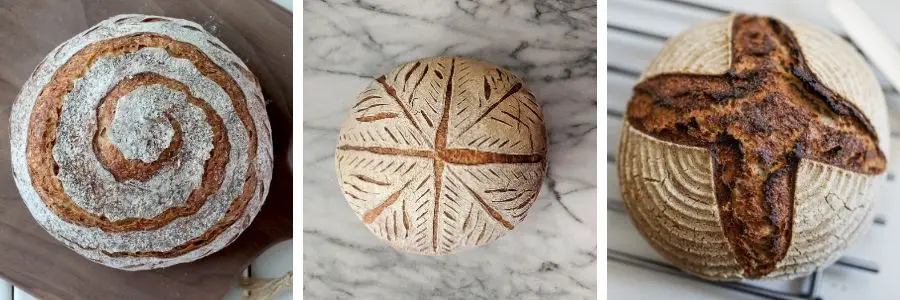
sourdough pattens

Slashing the bread also helps to create a crispy and textured crust at the top of the loaf.

Using a floured proving basket also helps to create a patterned swirl-like effect on top of the bread.

Creating bread by hand

One of the key points in the definition of artisan food is that it’s handcrafted without the use of a machine.

It’s so easy to rely on machines to do do the tough jobs for us these days, we’re all so busy and it’s just easier.

From bread machines which we just add a mix and press a button, to stand mixers which do the kneading for us.

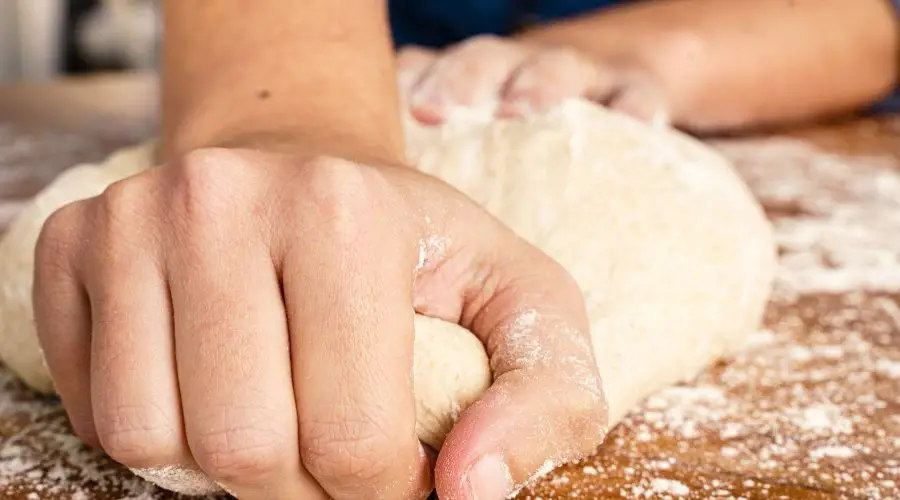
The artisan method takes this back to basics, the dough is made end to end by hand, no matter the type of bread or the rising ingredient used.

Making bread by hand is actually pretty easy once you get used to it and it’s also really relaxing too.

TIP: Not sure if you have all the necessary bread baking equipment at home? Check out my recommended picks below (Amazon links):


The best quality flour to use for artisan bread

When you’re creating bread using artisan methods and only a few ingredients it’s important to make sure the ingredients used are quality and don’t contain unnecessary additives.

While it’s easy to buy bread flour from the supermarket, there are many flour producers out there using their own artisan milling processes and are producing flour which is much better than most supermarket flour.

Depending on which country you live in, there may be government requirements to fortify flour with various additives.

In the UK all white flours have to have nutrients added to them to ensure that people eating bread are getting those nutrients in their diet.

There is no requirement to add additional nutrients to brown flours because flour containing part or all of the wholegrain is higher in natural nutrients.

Sometimes some more sinister additives such as bleaching agents are added to flour and these are the ones to avoid when making artisan bread.

There are are some ancient grains such as spelt flour which work really well in artisan-type bread and sourdough. It’s amazing how much difference you can see in performance and flavour when you use a really good flour.

You can see just some of the flour producers who are producing really good flour in the UK in the following post:

The best bread flour (available in the UK)


So why is artisan bread so popular

If you ever go to a market and a trader is selling unique artisan-type bread in baskets which they wrap up in paper when you buy, it’s easy to see how it can entice buyers.

I remember similar bread shops as a child of the ’80s and it takes you back to the proper way of doing things in a world where now pretty much everything is processed.

You hear of people selling loaves for a premium (especially in big cities), which can seem a bit outrageous, but when you think of the work which goes into a sourdough loaf and the time it takes to feed and grow a starter, you can kind of understand why.

The good news is, with a bit of practice you can make this same artisan bread at home, it’s a great hobby and you’ll be amazed at what you can achieve with just flour, salt and water!


You might also like…

I hope this post has explained the true meaning of artisan bread and how you can achieve the ‘artisan’ effect.

You might also like this post:

Types of bread – the ultimate guide of bread from around the world

ALL About Ciabatta Bread: Differencies, How to Make & More


Ciabatta is a unique bread type and can often seem a bit daunting if you’re making it for the first time.

In this post, I’ll be showing you what makes ciabatta different from other bread, tips on how to make the best ciabatta and ways that you can use ciabatta in meals. So what does make ciabatta bread different from other types of bread?

Ciabatta bread is different from other types of bread because of the process used to make it. The holes in ciabatta are created by gas bubbles which develop as the bread rises. Unlike many other bread types, the bubbles which generate during the rising process are retained rather than kneaded out.

Read on to find out more about ciabatta along with some easy tips on how you can create homemade authentic ciabatta bread.


What is ciabatta bread

Before we get started, here’s some information about ciabatta bread, so you can understand more about what makes ciabatta different from other bread types.

Ciabatta is a bread which originated in Italy in the early ’80s with the intention of being the Italian version of the French Baguette.

The Italian word ciabatta translates to ‘slipper’ in English, which refers to the slipper-like shape of the bread.

It can be made in various sizes from smaller rolls to larger loaves for a family to share.

Below are the key differences between ciabatta and other types of bread:

Ciabatta differencesInfo
Higher dough water contentCiabatta dough is much wetter
which helps to create more air bubbles
It’s easier to make ciabatta
with a dough hook on
a stand mixer
Because of the higher water content in
ciabatta dough, it can be easier to use
a dough hook to knead the dough
Ciabatta dough takes longer
to rise
Ciabatta dough needs a longer rise
to create more bubbles and a deeper
flavour.
Ciabatta dough isn’t
knocked back after the first
rise to retain air holes
Most doughs are knocked back after
the first rise to remove air holes in the
bread. For ciabatta, the dough isn’t knocked
back and air bubbles are retained.
Ciabatta dough doesn’t need
much proving
Unlike many other loaf type bread
ciabatta doesn’t need much proving time
after the dough is shaped
Ciabatta loaves are shaped
by hand and baked on oven
tray
The loaves take very little shaping and are
placed directly onto a tray for baking.

In the next section, I’ll expand more on the techniques that are used to make authentic ciabatta bread.


Tips on how to make the best ciabatta bread

The table above details the different techniques used to make authentic ciabatta. I’ll now expand on these techniques and show you some tips which will help you to get the best results from your ciabatta recipe.

You can also view my full ciabatta recipe here.

1. Don’t be afraid of the additional water content

Good ciabatta loaves have a higher water content ratio. Whereas most bread recipes are around 5:3 flour to water, ciabatta dough should be around 5:4 flour to water.

The added water content helps the yeast to easily ferment in the dough and create the gas bubbles which you see inside a ciabatta loaf.

The downside of using more water is the dough is very wet and sticky and often difficult to handle.

To make kneading easier, I recommend using a dough hook, although don’t worry if you don’t have one, it’s still possible to knead a wet dough by hand.

2. Don’t rush the rising process

As the yeast in the ciabatta dough begins to ferment gas bubbles develop and the dough will rise.

The longer this is allowed to happen, the stronger the flavour will become and the bubblier the dough will become.

Unlike proving (or the 2nd rise), you can’t really rise the bread for too long, some doughs can even be left to rise overnight in cool temperatures.

This is all dependent on factors such as temperature and how effective the yeast is, but letting the ciabatta dough rise for 3 or 4 hours will help to achieve the best results.

3. Handle the dough as little as possible when shaping

A classic ciabatta loaf has a rustic look and doesn’t require the same level of shaping as many other types of bread.

It’s important to handle the bread as little as possible so that you can retain the air holes. The dough can be divided into various sizes depending on what size you want the loaves to be.

The easiest way to divide the dough is by quartering it lengthways to make four longer loaves.

Here are some easy steps and tips you can follow to cut and shape the dough into shape:

  1. Rise the dough in a well-oiled bowl or a large square tup if you have one – this way you can tip the dough out onto the surface and retain the dough volume.
  2. Make sure the surface is really well oiled or floured to prevent the dough from sticking.
  3. Divide the dough with a dough scraper and separate slightly (so they don’t stick together) while handling as little as possible.
  4. Have a large baking tray/trays ready to transfer the dough to – make sure the tray is oiled or covered with a sheet of baking parchment to prevent sticking.
  5. Lift each loaf by placing a hand on each end of the dough and keeping it close together so it doesn’t stretch and quickly transfer to the baking tray.
  6. Leave the loaves to rise for around 15 minutes to regain their shape and then bake.

TIP: Not sure if you have all the necessary bread baking equipment at home? Check out my recommended picks below (Amazon links):


What can you do with ciabatta bread

ideas on how to use ciabatta

Ciabatta can just be eaten alone or dipped in some good olive oil, it also makes a really good sharing bread for parties and barbecues or as a side dish to soups and stews.

You can also use ciabatta to make some more exciting dishes, here are some ideas of ways to make ciabatta more interesting:

Ciabatta garlic bread

Ciabatta makes an amazing garlic bread, especially if the bread is homemade – but it works well on shop-bought too.

Crush a large clove of garlic in a large wedge of softened butter and stir in a handful of chopped flat-leaf parsley, then slice slashes across the top of the bread (go about halfway through) and spread the butter between each cut. Bake until golden brown and enjoy.

Ciabatta pizzas

Ciabatta bread makes a really good pizza base, you just need to slice a loaf open through the middle, top with tomato sauce and sprinkle over the cheese of your choice and your favourite toppings. Bake in the oven until the cheese is melted and golden brown.

Ciabatta sandwiches

Ciabatta rolls and smaller loaves can be sliced through the middle and used as sandwich bread.

The chewiness of ciabatta makes it a great alternative for sandwiches especially when paired with some classic Italian meats and cheeses.

Ciabatta bruschetta

Thin slices of ciabatta make really good bread for bruschetta, rub with garlic and top with some juicy red tomatoes, onions and basil for a simple summertime dish.


Until next time…

I hope this post has helped you understand the key differences between ciabatta and other white bread types. Ciabatta is fun to make and it goes well with many dishes, I recommend having a go at making it at home, click the link below to see the recipe:

Easy ciabatta recipe

For tips on how to make garlic ciabatta, see the following post:

What bread can you use for garlic bread?

5 Simple Ideas: Make Bread Dough Softer & Avoid Heavy Bread


When I started out making bread one of the biggest problems I encountered was that no matter how I followed the recipe my bread was turning out like a brick every time and I just couldn’t understand why.

After doing a lot of experimenting I finally worked out exactly where I’d been going wrong and from this point onwards I could make soft well-risen bread every time. In this article, I’m going to share these tips with you so you don’t have to go through the ‘brick’ phase as I did.

The key to creating a bread dough which is softer and less dense is making sure you’re following the right steps when you make a dough. These steps include; using the right ingredients and ingredient ratio, kneading your bread for long enough, allowing enough time to rise and prove (proof) the dough and shaping the dough correctly.

By following these simple steps, you can create softer, well-risen bread every time. Read on to see all of my tips in more detail and I promise you’ll never bake a brick again!

1 – How Ingredients Effect Bread Dough Softness

The type and amount of ingredients you use to make bread dough can greatly affect dough performance and softness.

By looking at these aspects individually and making some simple changes you can really refine your technique and end result.

Here are some of the main changes you can make to your dough ingredients to create softer bread:

  • Use the right type of yeast to provide a better rise.
  • Be careful not to kill yeast or reduce its performance.
  • Find a bread flour that works well for you.
  • Incorporate fat into your recipe.
  • Replace some of the water in the recipe with milk.
  • Make sure you’re using enough liquid and don’t be scared of stickiness.

I’ll now go on to explain each of these points in more detail.

Using the Right Type of Yeast to Provide a Better Rise

Creating a softer bread isn’t just about what you put into the dough, it’s also about the technique you use when creating the dough.

Using the right type of yeast is key to getting a better rise, which will result in a well-risen loaf or roll which is less dense.

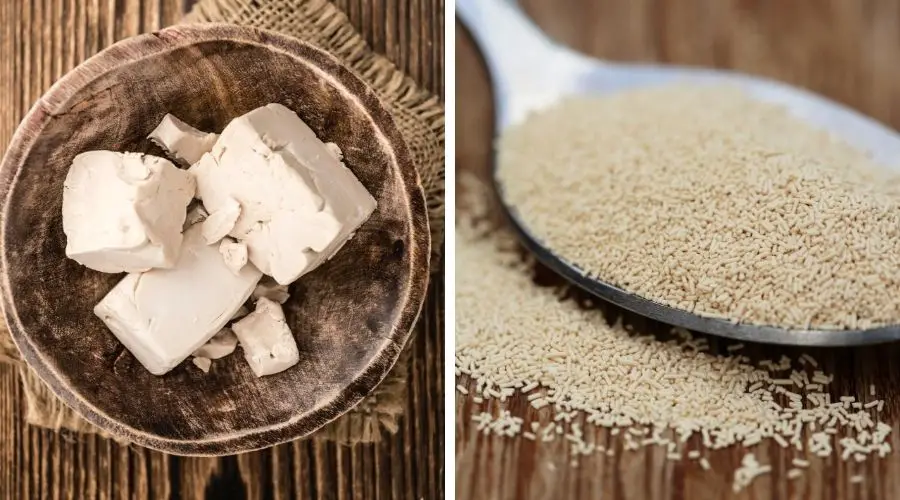
In general you can buy yeast in the following ways:

  • Dried yeast sold in individually sealed packets (usually 7g).
  • Dried yeast which is sold in small tins which you can measure out.
  • Fresh yeast which is usually sold in blocks.

While each type of yeast has the potential to work well in its own right, the one you use also depends on the amount of time you have for rising and other factors such as room temperature.

Image of dried and fresh yeast products

For consistent results every time and when you’re starting out as a bread maker it is best to use the sealed sachets of yeast.

The tins do contain the same dried yeast as the sachets, however, once they’re open the yeast will become less effective once the days go by.

You may also find it useful to read my post on fresh yeast vs dried yeast.

Be Careful not to Kill the Yeast or Reduce its Performance

Yeast is a living single-celled microorganism, so by treating it in the wrong way you can kill it or slow it down considerably. There are some simple steps you can take to make sure your yeast is at optimum performance to help your dough rise:

  • Don’t let the yeast touch the salt when you add it to the mixing bowl as direct contact with salt can kill the yeast.
  • Make sure your water and or milk is the right temperature, which is just warm – too hot or too cold can cause rising problems.
  • Don’t use too much sugar in your bread as this can slow down the performance of the yeast.
  • Don’t use yeast beyond its use-by date – you could go to the effort of making bread only for it not to rise, especially when using fresh yeast.

Use a Good Bread Flour

You might be thinking, isn’t flour just flour, surely if you buy bread flour it will work, because that’s what it’s for?

Well, this is true to some extent, the flour will work, but once you start experimenting with different flours, especially high-quality artisan and organic flours you will see they can make a great deal of difference to the final outcome of your bread.

The reason for this is because flour producers mill their flours in different ways and some are milled to a finer level than others.

Each flour producer uses different wheat or a blend of wheat, which will vary in quality and protein levels.

It’s, for this reason, you can experience some very different results, for example I recently bought some supermarket’s own organic flour and it was awful, my bread was ok, but just not the same and I didn’t like the colour either.

In the UK we’re very lucky to have the right weather for producing some excellent wheat crops and there are many small producers which can be found online.

Supermarkets are also expanding into supplying more speciality flours as bread making becomes more popular.

So give some brands like Wrights, Doves Farm or Marriages a try and find the flour which you like best.

Each flour will vary slightly in how much hydration it needs because they all have varying protein levels, which will, in turn, affect gluten production.

If you can, stick to a flour brand you like because you’ll know how it performs and you’ll know how much liquid you’ll need every time.

See my recommended bread flour products here along with a directory of stockists.

Fat Makes a Softer Bread Dough

If you’re looking for a softer texture to your bread then adding some fat to your bread dough will help to create a softer texture and a bread that keeps for longer than bread with no fat.

The type of fat you add to your dough really depends on the type of bread you’re making, as a general rule softened butter is used for traditional loaves and olive oil used for Italian bread.

It’s really personal preference and you can experiment with either to see what works for you.

Lard is another alternative for savoury bread and works particularly well in soft burger buns.

Use the table below as a general guide as to which fat is best for each bread type:

Bread TypeFat to use
Standard white/brown
loaves
Softened butter,
Olive oil or
Lard
Soft white rolls/
Burger baps/hot dog
rolls
Softened butter
or lard
Pizza DoughOlive oil
Milk loafSoftened butter
CiabattaOlive oil
Foccacia Olive oil
BriocheButter & eggs
BreadsticksOlive oil or softened
butter
Spelt breadOlive oil or softened
butter

You can find out more about what fat does to bread dough, how much to use and when and when not to use it in my article ‘what does adding fat do to bread dough‘.

Replace Some of the Tater in Your Bread Recipe With Milk

Milk is a great way to make a softer bread and it can be used to replace some or all of the milk in a bread dough recipe.

Similar to adding fat (because there is fat in milk), milk can also help the bread stay fresher and softer for longer.

Adding milk helps to produce a loaf which is creamy in colour and soft in texture, but at the same time it does need to be used with caution in some recipes for the following reasons:

  • While milk does make bread softer, it also makes the loaf a bit heavier and more filling.
  • Milk contains natural sugars so if you usually put sugar in your bread, you may want to leave it out of the recipe if you’re using milk.
  • The milk will need to be warmed to a ‘tepid’ temperature before you add it to the dough mix.

Unless I’m making a milk loaf which replaces all of the water content with milk, I generally replace part of the water with milk to create a softer but lighter bread dough.

For example, if the recipe calls for 300ml of water, I’ll use half and half (15oml water and 150ml milk) or even two-thirds milk and one-third water.

Top tip!

If you’re using the part milk method, instead of warming the milk, add boiling water from the kettle to the cold milk. Check it’s not too warm before adding the milk and water mix to the dry ingredients.

I like to use the part milk, part water method for bread rolls and burger buns because you get the right level of softness without the rolls being too dense.

Make Sure You Use Enough Water in Your Bread Dough

The hydration level of bread dough is a key part of getting a good rise and a softer dough. You can even achieve a soft dough with no added fat or milk if you get the hydration right.

It’s easy to panic when a dough looks a bit sticky and start adding more flour, especially if you’re making the dough by hand.

By adding more flour to the dough, the dough will be tighter, it won’t rise so well and will probably produce a dense, brick-like loaf.

Keeping the dough on the sticky side will help it to rise because if its slightly wetter, air bubbles will form more easily and it aids gluten production.

Many recipes recommend a 5:3 ratio, for example, 500g flour to 300ml of water, however, I like to increase this to 320-350ml of water, depending on the flour I’m using.

Don’t worry if the dough seems unmanageable, to begin with, the more you work it and the more you stretch the gluten, the more manageable it will become.

Flours containing part or all of the whole grain will continue to absorb liquid throughout the kneading process, so a dough which seems too wet at the beginning can quickly become too tight.

If you have a stand mixer with a dough hook, this can help you work with ‘wetter’ dough if you don’t like getting sticky hands. You may find it helpful to read how to make bread using a dough hook.

TIP: Not sure if you have all the necessary bread baking equipment at home? Check out my recommended picks below (Amazon links):


2 – Kneading Your Dough for Long Enough

Keading your bread for long enough is also key to producing soft and well-risen bread every time.

You don’t need to be a kneading professional, you just need to be able to keep stretching the dough so that in turn you stretch the gluten and help the dough to rise.

As a general rule, you should knead the bread for at least 10 minutes if you’re using white bread flour and up to 15 minutes for brown and whole grain doughs.

If you’re using a dough hook on a stand mixer, 8-12 minutes on a low speed should be long enough.

As you knead the dough it will start to become smooth, glossy looking and almost blistered when you stretch it.

Bread making tips and techniques

3 – Allowing Enough Time for Dough to Rise for Good Structure

If the dough isn’t given enough time to rise, the final result will be dense bread. Once your dough is needed, it needs plenty of time to rise in a large bowl so that bubbles can form and it can increase in size.

The rising process also helps to enhance flavour, so the longer you have to let your bread rise, the better it will taste.

As a general rule, the dough needs at least an hour to rise and double in size, however, if you can leave it for longer it will be even better.

If the dough triples in size on the first rise, this is no problem.

All this is dependent on the type of yeast you use and how warm the room is. If the room is very cold it could take hours for the dough to rise.

You can, in fact, stall the rising process to enhance the bread flavour by leaving the dough in the fridge overnight.


4 – Shaping the Dough Correctly

As a bread-making beginner, it’s easy to skip the step of shaping the dough correctly and it’s understandable that this element of bread making may be seen as being unimportant.

If you’re making a shaped loaf which won’t have the support of a bread tin, shaping it correctly can mean the difference between a flat loaf and a lovely rounded bread which produces large slices.

To produce a well shaped round loaf follow the steps below once your dough has risen:

  • Scrape the dough onto an oiled or lightly floured surface.
  • Flatten the dough slightly with your hands and then bring one corner into the middle, then keep repeating until the bread forms a round shape and the top of the bread is tight.
  • Turn the dough over so the seams or creases are underneath.
  • Use the sides of your hands to fold the dough under to create a tighter top.

The tightness of the top is the key to the dough keeping its shape and not collapsing as its proved (risen for a second time).

Image of shaped loaves

5 – Allow enough time for dough to prove (proof)

Once the dough is well shaped, leave it to prove (or proof) for as long as it takes to double in size.

It’s really important not to rush this step because the under-proved dough will lead to dense bread and stodgy bread which won’t rise well when it’s cooked in the oven.

Proving will take around an hour but could take much longer if the room is cold, so let it take as long as it needs to increase in size.


Combining the steps

This might seem like such a lot to take in, but trust me, by understanding and implementing the tips for each step you will create perfect soft and well-risen bread that you can be proud of.

Once you get used to the processes, bread-making will become second nature and you will spend very little time on the hands-on aspect of making dough.

The most important thing to take away from this post is not to rush any of the steps and let the dough take the time it needs to grow and improve.

You might also find the following post useful for improving your bread making skills:

Bread making tips and techniques.

Do Crumpets Need to be Toasted? Find Out Why & How


Crumpets are a British classic which are often eaten buttered for breakfast or as a snack for any time during the day.

They also work really well with toppings such as jam or something more savoury like bacon and eggs or cheese.

Crumpets are traditionally made using a batter which is poured into rings and cooked on a griddle until they’re cooked through. As they cook bubbles rise up through the mix which creates the holey and fluffy texture which crumpets are known for.

Although crumpets arrive in our shops ready cooked and will not make you unwell if you eat them unheated, they do need to be toasted or heated further to enhance the texture and taste. A crumpet straight from the packet is not very appetising and has a firm almost rubbery texture.

Read on to find out more about why crumpets taste better toasted, along with tips on the best way to toast crumpets along with an alternative to toasting if you don’t have access to a grill or toaster.


Why crumpets taste better toasted

Crumpets need to be toasted or at least heated to enhance their flavour and texture.

When you buy crumpets they’re very pale and firm, by toasting them and adding colour you create flavour and the browner they go (but not burnt) the more flavoursome they will become.

As well as flavour, toasting or heating a crumpet enhances the texture inside and out, by creating a crispy outside and a soft and fluffy middle.

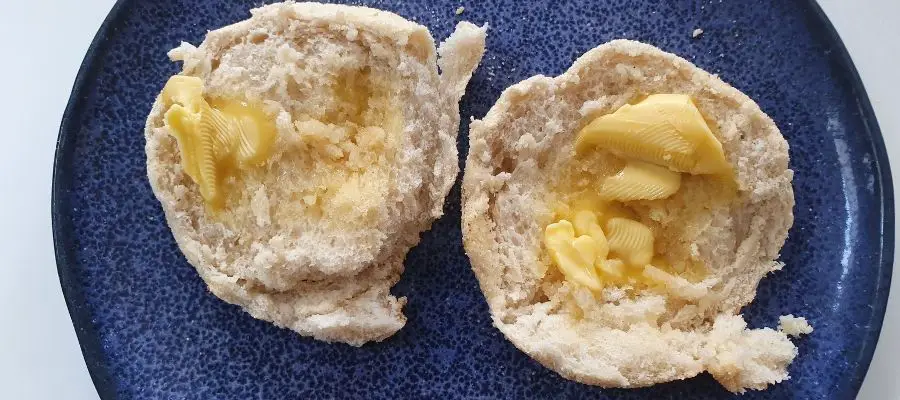
When butter is spread onto a hot crumpet it will melt into the middle and become spongy and buttery, which is what makes a crumpet so yummy and also unique.


How to toast a crumpet

Crumpets can be toasted in either a normal toaster or under a grill, below are the best toasting methods for each type:

Toasting a Crumpet in a Toaster

Although crumpets are smaller than most bread types, they should fit comfortably in pretty much any toaster.

If your toaster is very deep, you may struggle to get them out again, so be prepared to fish them out with something non-metallic with the power off.

Crumpets take a little longer than some bread types to toast, depending on how dark you like them. To get a good colour they will need toasting on a medium to high heat for around 3-4 minutes (although toasters do vary).

Toasting Crumpets Under a Grill

To toast crumpets using a grill, place them onto a grill pan or baking tray and toast each side (underside first) for two to three minutes until golden brown and heated through.

By toasting the underside first the top will be hottest when they’re ready which will help the butter to melt through properly.

TIP: Not sure if you have all the necessary bread baking equipment at home? Check out my recommended picks below (Amazon links):


Can you Toast a Pikelet?

A pikelet is a flatter version of a regular crumpet and just like a standard crumpet, the taste and texture of a pikelet is much better if it’s toasted or at least heated before serving.

It can be difficult to toast a pikelet in a regular toaster because they’re so thin and can slip down the side and get stuck. They’re also difficult to get out of the toaster once they’re cooked.

Because it can be difficult to toast pikelets in a toaster, the best way to toast them is by cooking them each side for a minute or two on each side (underside first) under a grill until lightly golden and heated through.

Because it’s much thinner than a crumpet, if a pikelet is toasted too much it can become dry and hard and not so fluffy in the middle.

Just like a crumpet, a pikelet goes well with butter and jam but works well with savoury toppings too.


How to Toast Crumpets Without a Toaster or Grill

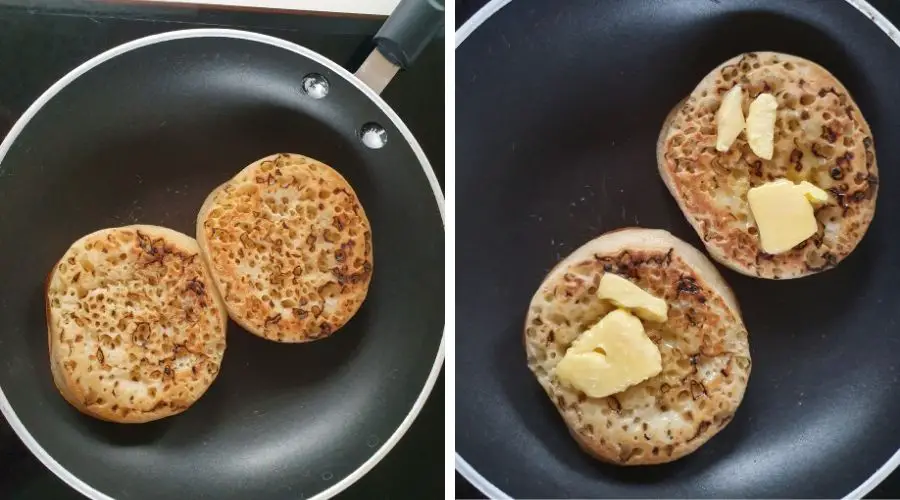
If you don’t have a toaster or grill and you want to toast your crumpets or pikelets, an excellent alternative is a frying or griddle pan, using the following instructions:

  1. Heat a dry pan (no need for oil butter) over a medium-high heat.
  2. Place the crumpet or pikelet underside first onto the hot pan.
  3. Use a fish slice or spatula to lightly press down on the crumpets as they cook to help them brown.
  4. Cook for a minute or two on each side until golden brown and heated through.

Just before they’re ready I like to put some butter on the top to help it melt through, this produces delicious hot crumpets which are crispy on the outside and fluffy on the inside.

Image of cooking crumpets in a pan

For some more interesting ways to toast crumpets, you can also use the following methods:

  • Stab one with a long fork or skewer and toast over a campfire.
  • Toast using the hot plate on an Aga or similar type oven.
  • Toast on top of a log burning stove.
  • Place over a fire on a grill rack.

Toasted crumpets make a great snack or breakfast when you go camping and are quick and easy to cook using the campfire method.

Just take care not to let them burn and keep an eye on them as they cook.


You might also like…

I hope this article has helped you to find out more about toasting crumpets, you might also like the following article:

How to Heat up an English Muffin

4 Proven Ways: How to Heat up an English Muffin


English Muffins are famously used as the bread part of the breakfast muffin, but they’re also great just toasted with some butter and jam as a lighter alternative to thicker bread.

They arrive on our shelves pre-cooked so they can be eaten straight out of the packet, but for best results, they need to be toasted or heated up to soften them up and to enhance flavour.

When you buy English Muffins they’re usually very pale in colour and also quite dry. English muffins are usually rolled in semolina flour which adds a crunchy texture to the outside of the muffin when it’s heated.

The best way to heat up an English Muffin is to toast it using either a toaster or a grill to brown each side of the muffin to produce a crispier texture along with more flavour which you get from toasting.

I’ve done some experimenting with heating and toasting English Muffins so I can share the results with each method with you.

Read on to find out more about how to heat English Muffins along with some alternatives if you don’t have a toaster or grill and tips on how to get the best results when heating muffins.


How to Toast an English Muffin

When you buy English Muffins some are ready-sliced, but if they’re not they can be easily sliced with a serrated bread knife or pulled apart using your hands.

Pulling them apart can add to the crispy texture once they’re toasted, but it could also lead to the uneven fluffy parts burning as they cook..

Toasting English Muffins Under a Grill

The best way to toast an English Muffin is by placing each half on a grill pan under a grill if you element (usually built into most cookers/ovens), turning them halfway through to toast to the desired colour on each side.


Top tip!

I always find that it’s best to toast the outer side first if you’re going to butter the muffin, that way the inner side is hotter and will help the butter to melt when you spread it on.


Toasting English Muffins Using a Toaster

You can also use a toaster to toast English Muffins and this works well, however, be aware that a sliced muffin is small so it can be difficult to remove from the toaster once it’s toasted.

If you’re having trouble getting your muffins out of the toaster turn of the power and gently prise it out using some plastic tongs or something similar.

How long English Muffins Take to Toast

Although English Muffins are small, they do take longer to toast than most other shop-bought breads because the texture is generally denser than basic bread.

As with most bread products, the texture of an English Muffin will change depending on how long you toast it for, the longer you toast the muffin the darker and crispier it will become. So, it’s really down to personal preference and what you’re going to be using the muffin for.

If you’re toasting a muffin to eat it alone with butter or another topping it will take around 3-4 minutes under medium heat to create a golden brown colour. If you’re using the muffin as a sandwich bun around 2 minutes is enough to heat it without it becoming too crispy.

If you’re using the English Muffin as a bread for a breakfast muffin then usually they are just lightly toasted/heated to retain the softness of the muffin.

TIP: Not sure if you have all the necessary bread baking equipment at home? Check out my recommended picks below (Amazon links):


How to toast an English muffin Without a Toaster

If you don’t have a toaster or a grill, it’s possible to toast an English Muffin in a frying or griddle pan. There are a few ways you can do this depending on how much you want to toast the muffin.

If you just want to warm through the English Muffin without too much colour or toasting then you can just split the muffin and place it in the pan over medium-high heat for a minute or two on each side.

For a darker more toasted effect, rub the pan with a little butter to help the muffin brown while adding some extra flavour, repeating on both sides until golden brown.

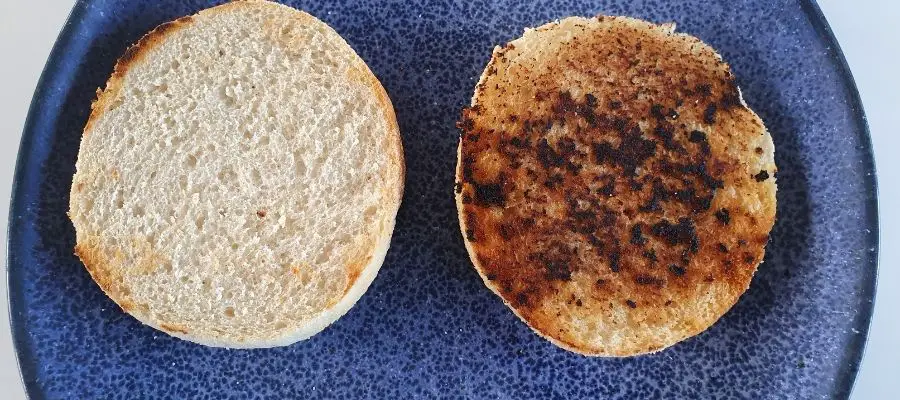
Below is an example of an English Muffin which I toasted in a pan, with and without butter. The muffin on the left was lightly toasted to warm through in a dry pan and the muffin side on right was buttered before toasting.

It’s worth noting that the muffin with butter toasted very quickly and was on the verge of burning because butter does burn easily. I used butter over other oils because it just takes better and won’t make the muffin greasy as oils would.

Image of an English Muffin toasted in a pan

Can you heat an English Muffin in a Microwave?

If you’re just looking to warm through an English Muffin to soften it up to use as a breakfast muffin or sandwich, then it is possible to heat it in a microwave, although it’s not possible to toast or colour a muffin in a standard microwave.

I heated up an English Muffin using a microwave (using the method below) and the results were surprisingly good. Steam is created while the muffin heats which makes it soft, fluffy and easy to pull apart.

Time needed: 2 minutes.

How to heat an English Muffin in a microwave

  1. Place the muffin in a microwaveable bowl.

    Keeping the muffin whole (for best results heat one at a time).

  2. Add some water

    Spray or splash a few drops of water onto the top of the muffin to keep it moist as it heats.

  3. Microwave on full power

    Heat for around 30 seconds until the muffin starts to steam.

  4. Carefully cut open to serve

    The muffin will tear apart using your hands or you can slice with a serrated knife.

Image of an English Muffin cooked in a microwave

Toasting an English Muffin on a Campfire or Barbecue

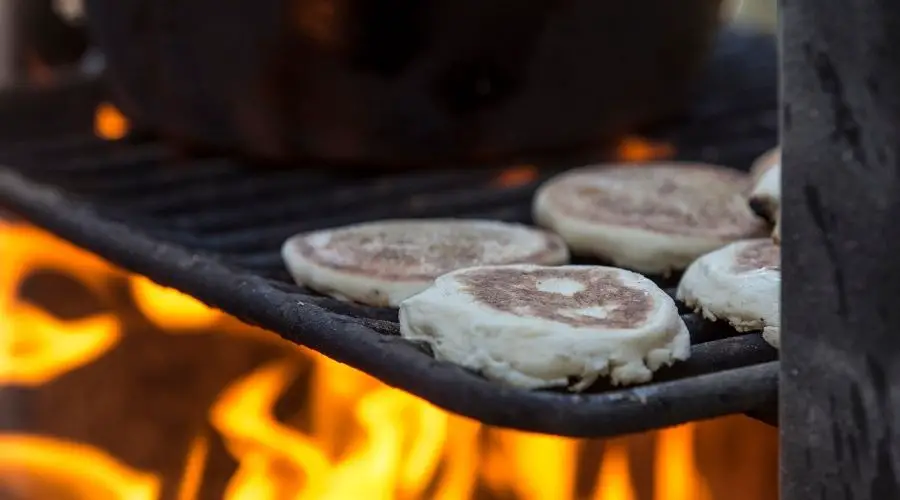
It’s also possible to toast an English Muffin on a campfire or barbecue which is great if you’re camping and want to make some breakfast muffins with bacon or sausage straight from the fire.

The best way to toast an English Muffin over fire is to slice it in half and put it on a skewer or long fork and hold it near to the fire until you have the right colour. You can also buy toast holders for the campfire which work really well too.

If you’re heating an English Muffin on a barbecue, slice it in half and place directly onto the grill for a minute or two on each side.

They can quickly start to burn near the flame, so keep an eye on them while they cook.

Image of an English Muffin 2

You might also like

I hope this post has helped you to find out more about heating english muffins and how you can get the best flavours and textures, you might also find the following articles helpful:

How to hea eed to Heat Wraps and Tortillas? 5 Proven Options

Do crumpets need to be toasted?

Complete Guide: 7 Best Bread Flours (Available in the UK)


There are so many varieties of bread flour out there, it can be difficult to know which are the best bread flours in the UK. 

You might be thinking, surely flour is just flour, but having experimented with many different types of bread flours I have experienced varying results, which I’m going to share with you today.

In this post, I’ll show you the various types of bread flours you can buy, including what you use them for, what to avoid, and where you can find them.


Bread flour we recommend

In 2020 and during lockdown it became increasingly difficult to buy bread flour for many months and especially in supermarkets where some shelves have been pretty much empty in that department.

The good news is, there are some amazing flours which you can buy online if you know where to look.

The current situation is bringing smaller mills in the UK to the forefront, which is great because generally, these flours are so much better than most you can buy in a supermarket (although more artisan bread flour is becoming available in supermarkets). 

Here is a list of some of the best bread flours (by type) available in the UK which you can buy online and in some cases find in supermarkets:

1 – Strong White Bread Flour

Strong white flour is a staple flour for many types of bread, the flours I am recommending below don’t contain any nasty additives.

What can you use strong white bread flour for?

There are many bread recipes you can use strong white bread flour for, but here are just a few:

  • White loaves and bloomers.
  • Sourdough starter and bread.
  • Pizza.
  • Breadsticks.
  • Flatbread, pitta bread etc.
  • Bread rolls.

Recommended Strong white bread flour

Heygates strong white bread flour – a classic strong white bread flour that provides excellent results every time thanks to its higher gluten-producing protein levels (12%). 

Marriages Premier White Bread Flour – High-quality, fine white bread flour which is milled in Essex using local grains.  

Matthews Cotswold Strong White Flour – A good all-round strong white flour which you can now buy in Tesco.

2- Strong Wholemeal Bread Flour

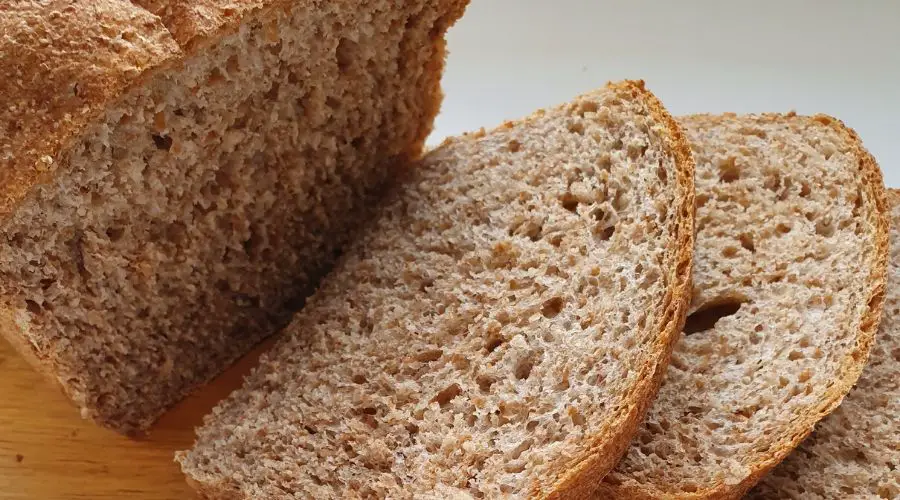
Wholemeal bread flour is made using the whole grain or a large percentage of the whole grain.  Some flour mills still use traditional methods to produce this type of bread flour.

Wholemeal bread is a tasty and healthy alternative to white flour and it contains natural nutrients.

What can you use strong wholemeal bread flour for?

Many bread recipes can be converted to a wholemeal version.  Here are a few good ways you can use wholemeal bread flour:

  • Classic wholemeal tin loaf.
  • Wholemeal bread rolls.
  • Pitta bread.
  • Bagels.
Wholemeal bread recipe image

Recommended Strong wholemeal bread flour

Wrights strong Wholemeal Bread Flour – High quality, strong wholemeal flour milled by Wrights who are a traditional flour mill based in the UK. 

Marriages strong Wholemeal Bread Flour – Made using a traditional stoneground process. Containing 100% Canadian wheat which has a very high protein content and therefore will produce an excellent rise.

3- Malted bread Flour

Malted flour is also known as Granary flour (which is a trademark name of Hovis), contains malted and whole grains and usually some added ingredients such as sugar for extra flavor. 

Malted flour gives the bread a nutty texture which is extra flavorsome.

Hovis Granary flour is available to buy in some supermarkets, however at the time of writing it’s not widely available online other than via a supermarket online shop.

What can you use malted bread flour for?

  • Tin or shaped loaves.
  • Bread rolls
  • Add seeds to make a seeded malt loaf.

Recommended Malted Bread Flour

Hovis Granary Flour – The original and best for the perfect granary loaf or rolls, available in most supermarkets.

Doves farm organic malthouse bread flour – This flour produces a really tasty loaf with a great texture. It contains a blend of wheat and barley flour with added malted wheat flakes.

TIP: Not sure if you have all the necessary bread baking equipment at home? Check out my recommended picks below (Amazon links):

4- Rye Flour For Bread Making

Rye bread is one of the healthier types of bread you can eat, it’s full of nutrients and fiber and is also thought to have less impact on blood sugar levels than other bread.

Not only is rye bread good for you, but it’s really tasty too.  

What can you use rye bread flour for?

  • Rye breads
  • Rye sourdough and sour dough starters
  • Pumpernickel bread

Recommended rye bread flour

Shipton Mill Organic Rye flour – Shipton Mill has an excellent range of Organic rye flour from light rye flour to dark depending on the results you’re looking for. 

You can also buy chopped rye for a nutty texture – this is great for mixing in with the base rye flour or other flours.

5 – Spelt Flour for Bread Making

Spelt flour is made from the ancient Spelt wheat grain. It’s available in wholemeal and white versions, the wholemeal being particularly nutty and sweet in flavor. 

Spelt flour is said to contain greater nutrients and it’s an excellent flour for bread making.

What can you use spelt bread flour for?

  • Use brown or white Spelt flour to replace normal wheat flour.
  • Seeded bread recipes.
  • Bread rolls.
Seeded spelt bread recipe image

Recommended Spelt bread flour

The Doves Farm Spelt Range (wholemeal or white) is particularly nice. 

You can sometimes find Doves spelt flour in Tesco or you can buy it online directly from Doves Farm.

I use the wholemeal version in my Seeded Spelt Bread Recipe.

6 – Gluten-Free Flour for Bread Making

Most bread flours are unsuitable if you have a gluten intolerance, in fact, it’s the gluten that helps to make the bread rise.

There are alternatives that are gluten-free and are usually made from a blend of natural flour such as rice, tapioca, and potato flour.

Adding seeds or other flavors can help to achieve a nicer tasting gluten-free bread.

Recommended gluten-free white & brown bread flour

Free by Doves farm – This is one of the better gluten-free flours and it’s available in various varieties including white, brown, and buckwheat. 

You can buy Doves Gluten-Free Flour at Tesco or directly from Doves Farm shop.

7 – Semolina Flour

Italian Semolina Flour – Semolina flour has a coarse texture and is often used in pizza and pasta making.  

It’s good to have if you’re a keen bread maker because it creates a very good non-stick surface when you’re dealing with wet doughs such as ciabatta.

I recommend San Felice twice milled Semolina Flour which is available to buy from Amazon.


Tips on how to buy good bread flour

Avoid Nasty Flour Additives

All white bread flours which are produced in the UK are required to have calcium, iron and two B Vitamins added to them and some also add citric acid (Vitamin C) which increases the rise.

There’s also a nastier side to flour additives which is often seen in cheap supermarket flours, which add as bulking agents and bleaching agents.

Where you can, try to buy flours which don’t contain additional additives (other than the compulsory ones).

Buying Supermarket Brand Bread Flour

Supermarket bread flour is often a much cheaper alternative to some of the higher-cost artisan alternatives. 

Supermarkets such as Lidl are selling bread flour for under £1 for a 1.5kg bag, meaning you can make a loaf for pence.

Although this can seem very appealing there are a few things to keep in mind when buying flour from a supermarket:

  • Some flours contain a bleaching agent – check the ingredients for words such as peroxide and avoid.
  • Choose organic flours – try to go for organic flours if you can because you know there are no nasty chemicals hiding in the flour.
  • Check the ingredients – all white flour in the UK contains Calcium, Iron and two B vitamins (as required by the Government) and some have Ascorbic Acid (Vitamin C) to aid raising. Be wary of lots of other ingredients other than the basic grain.
  • The quality of the flour – Milling processes vary from flour to flour, which means results will vary.  Some flours struggle to rise more than others and can produce a dense loaf. 

The best thing to do with supermarket flour is to test it and see if you’re happy with the results.  

Having used many flours from good producers I can tell the difference when the flour is not so good. If you find one you really like then stick with it.


How to store bread flour if buying in bulk

Many of the bread flours I have recommended on this page are also available to buy in bulk bags or come in packs of five.

This is because it generally works out cheaper per loaf and saves on postage.  

If you make bread all of the time, then storage probably won’t be too much of a problem.

But either way, storing the flour properly will prolong its freshness and prevent flour mites from getting into it. If you want to find out more about dealing with flour mites, you might find the article below useful:

How to get rid of flour mites and weevils

For bulk flour bags, I recommend splitting the flour down into smaller airtight containers once the bulk bag is opened. 

Store the flour in a cool dark place and keep a note of the use-by date.

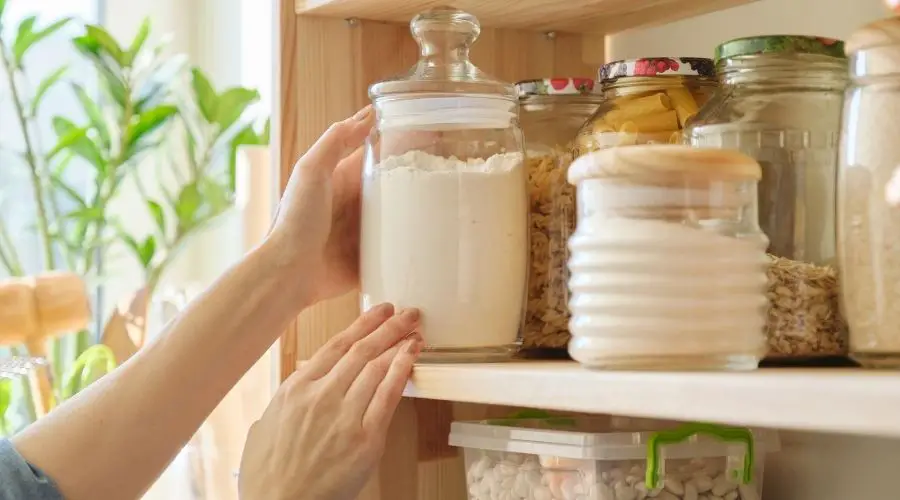
You may want to consider getting some storage containers in which you can keep your flour with labels so you know what it is – Amazon has a wide range of airtight containers suitable for flour.

image of flour in a pantry cupboard

UK bread flour online directory

Here are some useful links for some of the best UK bread flour producers who sell flour online along with links to Amazon bread flour pages.

Please note, at the time of writing this article some types of flour are out of stock, so you may need to shop around between producers to find what you need.

Good Bread flour producers who sell bread flour online:

Shipton mill

Doves farm 

Marriages flour

Wrights flour

Matthews Cotswold Flour

Amazon also stocks a number of bread flour brands and bulk buy offers, the links below will take you directly to the relevant Amazon pages:

Shop Heygates bread flour at Amazon

Shop Wrights Bread Flour at Amazon

Shop Marriages Bread Flour at Amazon

Shop Doves Farm Bread Flour at Amazon

Shop Matthews Cotswold Flour at Amazon

Shop Semolina Flour at Amazon

Good bread flour available in UK supermarkets:

SupermarketRecommended flours stocked
TescoDoves Farm
Matthews Cotswold Flour
Hovis Granary Flour
Sainsbury’sDoves Farm
Wrights flour mixes
(for bread makers)
OccadoDoves Farm
Wrights flour mixes
(for bread makers)
Marriages
Hovis Granary Flour
AsdaHovis Granary Flour
Stores in the UK and available flours

Summary

I hope this article has helped you to choose a bread flour that’s right for you.

If you’ve only used supermarket flours before, you will really notice the difference if you change to an artisan producer – so give them a try!

You might also like this related article…

Ingredients for bread making