Recent Posts

What is Dough Proving (Proofing) & How to do it Properly


Proving or proofing bread dough correctly is one of the most important bread-making steps to achieving a well-risen bread with a good crumb texture.

Learning how to identify if bread dough is proved enough and not over-proved is a key skill which will help bread-makers produce perfect bread every time.

In this post, I want to show you everything we, as home bakers need to know about proving bread, including how long to prove dough, proving temperature and various proving techniques.

As well as this, I’ve also added a link to my YouTube video where I tested and baked dough which was under-proved, proved enough and over-proved.


So, what is proving (or proofing)?

Proving which is also known as proofing is the process where the dough is rested to allow the yeast to ferment and produce gas bubbles which help the dough to rise.

Most bread recipes will require the bread dough to rise twice, the first time after kneading and again after the dough has been risen for the first time and then shaped.

The term ‘proving (or proofing)’ is generally used to describe the second rise of the dough, although you may see some bakers also describing the first rise as a prove.

This can be one of the more confusing aspects of bread making when new bakers start out.


What happens during dough fermentation?

The fermentation process is first activated when water is added to flour and yeast and gluten starts to develop. Kneading the dough at this stage helps to create a strong inner structure which supports the dough as it rises.

The yeast begins to feed on the carbohydrate in the flour and produces carbon dioxide which gets trapped between the gluten strands and causes the dough to rise as it’s left to rest.

The yeast also creates other byproducts such as alcohol and yeast, which all help to create flavour and the longer the dough is allowed to ferment the more flavoursome it will become.


Why does bread dough need to rise twice?

Bread dough needs to rise twice if the bread you’re looking to create needs to rise high, for example, a tin or sandwich loaf needs as much rise as possible to be the right shape.

Dough for flatbread, pizza and breadsticks doesn’t normally need to prove for a second time because the bread style is designed to be flat.

During the second prove the yeast gets another chance to prove its ability to cause fermentation which helps to create structure and the right crumb texture for risen bread. Longer fermentation also helps extra flavour to develop.

TIP: Not sure if you have all the necessary bread baking equipment at home? Check out my recommended picks below (Amazon links):


How long should you prove bread dough for?

Most recipes state that you should allow a first rise time of an hour and another hour for the second prove. In reality, this is probably not the case. If I was to keep a note of every time I’d allowed for rising (which I might start doing), the rise time is probably nearer to the two-hour mark.

This really depends on a number of factors which I’ll cover next, but if you’re rising at normal room temperature, chances are the dough will take longer than an hour to prove.

The key is to make sure the dough has increased in size, by either double or even triple the original size.

For the first rise, you can get away with proving for longer, whereas for the 2nd rise it’s more important to make sure the dough doesn’t under or over prove.

Allowing the dough to ferment slowly generally leads to taster bread with a good structure.

Artisan bread such as sourdough is allowed to slowly ferment over a long period of time which is what helps to create the unique sourdough flavour.
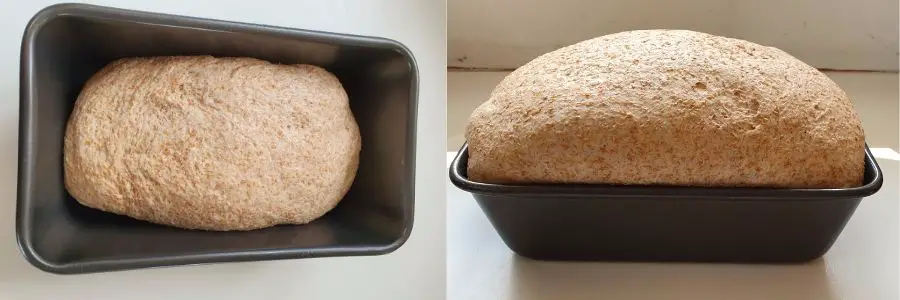
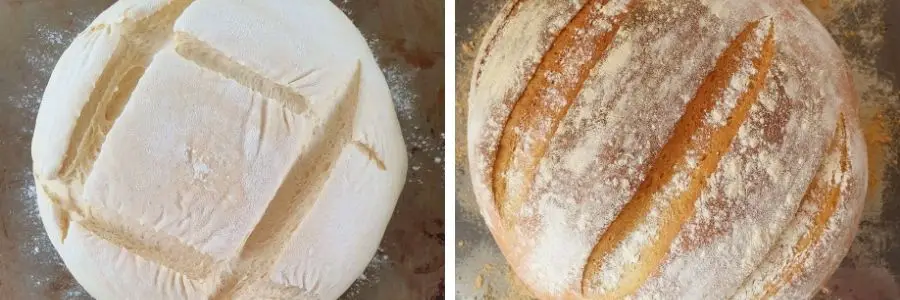
Before and after dough is proved

Factors which may affect proving time

FactorHow it affects proving time
Protein in bread flourStrong flour with a higher protein level
(over 12%) will produce more gluten and
therefore a stronger structure. More protein
also allows the flour to absorb more water
leading to a better bread structure. Some brown flour
containing the wholewheat grain may also take
longer to prove as they’re more weighty.
Ingredient temperatureIf the water used in the dough mix is warm
this will make the yeast more active and increase
the fermentation, this is not always a good thing
and it’s good to use ingredients at around room
temperature.
Room TemperatureIf the room is very cold this can lead to a very
sluggish rise whereas a very warm room will lead to
a very fast rise.
Yeast type and performanceA fast-acting dried yeast will generally produce faster fermentation and rise than fresh yeast. Yeast
which is old or stale if it’s not been stored properly can underperform and take a long time to ferment –
if at all.
Other bread ingredientsThe addition of other ingredients can affect how
the dough rises because can be weighed down.
Other factors such as water and sugar content can
also, make a difference to the rise.
Factors which may affect proving time

Why does sourdough take so long to rise and prove?

The reason many bakers use dried yeast is because it’s fast-acting and easy, you can have a loaf within 3 or 4 hours if proved in a warm room and it’s done.

With sourdough, the fermentation process is much slower and it’s this slow rise that creates the unique sourdough flavour.

Instead of yeast sourdough is made using a starter which is made by creating fermentation in flour and water. It can be a tricky process and each starter is unique and will perform at a different level depending on how its made.

Sourdough can take a whole day to make or even beyond and its for this reason that artisan bread generally comes at a premium.


What happens if you under-prove bread dough?

Under-proving dough means that it’s not given enough chance to rise to its full potential, so the end result is likely to be a flat dense loaf with a poor crumb structure.

Under-proved bread has a very tight crumb structure which clumps together when squeezed, whereas bread which is proved well has a good bounce and will spring back when squeezed.

There is no specific time for dough to become properly proved, so the danger is that you follow a recipe which says to prove for an hour and other factors such as a cool room temperature mean the dough needed two hours to rise.

It’s for this reason that checking if dough is fully proved is best done by eye and touch. This is also something which comes with a little bit of bread making practice and experience.


What happens if you over-prove bread dough

Over-proving bread dough will lead to bread which is very airy and fluffy and large air bubbles which will lead to holes in the bread.

If the dough is allowed to prove for a long time, it will begin to collapse back in on its self because the dough can’t go on supporting all of the gas which is being produced.

It’s a bit like blowing up a balloon, you can only blow it up to the point which can be supported by the balloon structure before it pops and releases the air.

Dough which is a little over-proved isn’t too much of a problem, it will just mean the structure is a little different to normal. It will still be fine to bake and will taste just as good.

On the first rise, this isn’t a major issue because you’re going to be rising the bread again anyway.

The proving process can be slowed down considerably by placing the bread in the fridge overnight, this leads to more flavour without over-proving.


My test on under and over-proving dough

I put together the YouTube video below to show the difference between dough which has been second proved for a very short amount of time, properly proved and over-proved.

My kitchen was very warm on the day I made the video so the dough was rising pretty quickly, these are the times I used for each piece of dough:

  • Under-proved – around 25 minutes rise time
  • Proved – just over one hour rise time
  • Over-proved – over 2 hours rise time

So, take a look to find out how the dough compared using each rise time along with tips on how to tell if the dough is proved enough. (I had to replace my video with the video from Jamie Oliver).


Bread dough rising and proving temperature

Bread dough rising and proving temperature is a major factor which will affect rise time. It can be very difficult to control this if you live in an area of temperature extremes, but you can make adjustments in your bread making process to get around this problem.

If the temperature is very warm the fermentation process will be speeded up which can lead to a very fast rise. Although this might sound like a good thing it’s not always the case and below are a few potential issues if the bread rises too fast

Bread making is all about adapting and experimenting because there are so many factors which can affect the outcome.


Do you need a proving oven or machine?

If you’re a home baker who is just looking to make a nice loaf of bread without getting too technical then no, you don’t need a proving oven or machine.

Your bread will rise perfectly well at normal room temperature and people have managed to make bread without a proving machine since ancient times.

A proving machine is good for people who are keen bread-makers or those who enjoy the scientific side of bread making and artisan sourdough bread. They are also good if you intend to make bread a lot and you struggle with extreme temperatures.


How to deal with dough if your room is too hot or cold

Here are some tips which you might find useful when proving dough if your room is too hot or too cold:

Proving dough in a hot roomProving dough in a cold room
Make sure the dough is in the
shade and in the coolest place
possible
As a best practice, just give the dough
enough time to rise, but if you don’t
have the time, do the following:
Spray the top of the dough
with a little water to help
prevent evaporation and stop
a skin forming
Preheat the oven to around 80°C, turn it
off and then place the bowl containing
the dough in the oven with the door
ajar.
Consider proving the dough
overnight in a fridge
Move the dough to a warmer place
such as near (but not too near) to a
fire or radiator.
Try using fresh yeast which tends
to produce a slower rise
Use a fast-action dried yeast which will
help the fermentation process along

Proving dough overnight and in the refrigerator

I’ve mentioned proving dough in the refrigerator a few times in this post, so I just want to expand on this a bit.

Proving dough overnight in the fridge is definitely worth a try if you struggle for time and to make bread-making fit in around your life rather than having to hang around waiting for dough to rise on a cold day.

Proving overnight allows you to do a slow rise without over fermenting the dough. Overnight proving helps to develop more flavour and you can really taste the difference when you use this process.

There are a few different opinions on what stage you should rise the dough in the fridge and whether it’s the first or second prove. I’ve tried both and have good results from both, below are a few ways you can experiment with on an overnight rise:

Rising dough in the fridge overnight – first rise

If you don’t have time to wait for your dough to rise or you just want to make a more flavoursome bread, then once you’ve kneaded your dough, cover and place it in the fridge at the end of the day and leave to rise overnight.

Remove the dough from the fridge in the morning, shape it and then leave to prove at room temperature and bake as normal.

Rising dough in the fridge overnight – second prove

If you’ve already risen the dough at room temperature you can do the final prove overnight in the fridge.

Once you have shaped the dough, cover it up and prove in the fridge, making sure it’s got enough space to rise without anything touching it.

Remove the dough from the fridge in the morning and allow it to warm to room temperature before baking in the oven. If the dough still seems a little under-proved leave it to warm up a bit and it will start to ferment more quickly.

Using less yeast in overnight dough

Another option for overnight dough is using less yeast than you would in fast-rising yeast bread. Because everything is being slowed down it’s possible to use half the amount of yeast stated in a standard yeast bread recipe.

This is a good idea for times when yeast isn’t readily available in shops, which was an issue during the last lockdown in the UK. Using half the yeast and an overnight rise means your yeast can last twice as long (as long as it’s stored well).
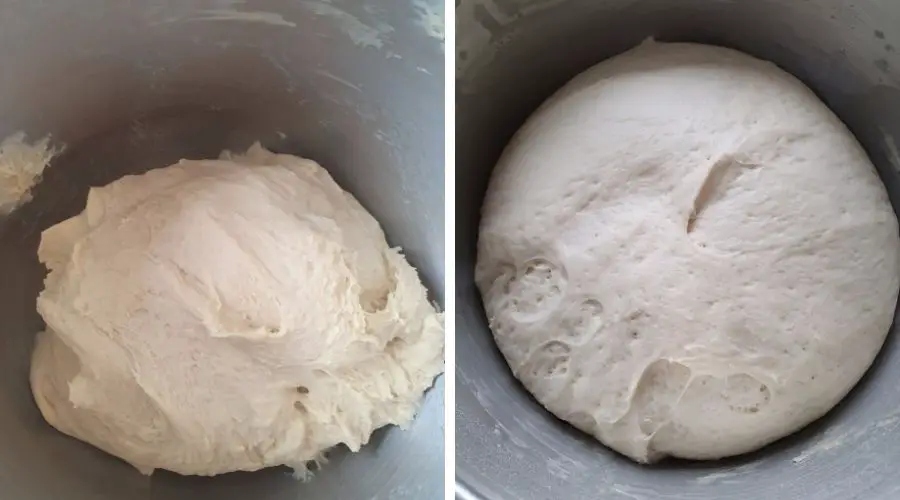
Image of dough before and after rising

How to prove dough quickly

I always recommend letting the dough rise and prove in its own time, but if you’re tight for time or struggling to get a good rise you might find the following post helpful:

How to Make Bread Dough Rise More Every Time


You might also like…

I hope this post has given you some useful information on proving bread dough along with some tips that you can use when you bake bread at home.

You might also find the following post helpful:

Bread making tips for beginners – Everything you need to know

GUIDE: How to Cover Dough While it’s Rising And Proving


How you cover bread dough while its rising may seem like an aspect of bread-making which isn’t that important, but if you’ve ever had proving dough stick to cling film you’ll know this can lead to complete dough collapse and flat and disappointing loaf.

I learned this the hard way when I was starting out, so I want to share with you some best practices for covering dough to keep it moist while it’s rising. So what is the best way to cover bread dough while it’s rising?

The best way to cover bread dough while it’s rising is by using a cloth such as a large clean tea towel or proving cloth to cover the bowl while it rises. This same cloth can also be used to cover dough directly when it’s proving.

Read on to find out more best practices on how to cover dough while it’s rising and proofing, by just keeping things simple and without spending money on coverings which will just go in the bin.


Why is cloth best for covering dough while it rises?

Using a cloth to cover dough is a traditional method used before plastic bags, cling film and shower caps were available!

There’s no waste and if you have a kitchen then chances are you have a clean tea towel or cloth available which you normally use for drying dishes so there’s no need to spend money on plastic which will end up in the bin.

Some bakers advise using plastics because they stop the dough from drying out and avoid a tough skin forming across the dough.

If your bread is rising at normal room temperature and isn’t too warm, then this shouldn’t be a problem.

If the bread is rising in a warm room and you’re worried about the dough drying, spray the top of the dough with water and/or use a damp cloth which will prevent the air from getting through.

I use this method all the time for rising and proving and I don’t have any issues with dough drying out.


How to cover dough while it’s proving/proofing

When I say proving, I mean rising the dough for the second time. During this time the dough will be shaped and either rising on something flat or within a bread tin and either way, the dough will end up touching whatever it’s covered with.

If the dough is covered with un-oiled cling film or plastic it will stick and when you come to take it off it will pull the dough with it and cause it to deflate. I know this because I did it and it’s so frustrating!

So, again I would recommend using the same cloth to cover the dough that you used for the first rise. You don’t want anything too heavy which could reduce the rise, it just needs to be covered.

You can also use a damp cloth at this stage if you need to, or give the top of the loaf a spray of water to keep it moist.

TIP: Not sure if you have all the necessary bread baking equipment at home? Check out my recommended picks below (Amazon links):


What if a skin forms on the dough?

Don’t worry if a dry skin forms on the dough, it won’t ruin the bread at this stage and there are a few things that can be done to recover the dough – which I’ll show you next.

Some recipes (especially sourdough) actually advise leaving the dough uncovered during a final prove or rest to firm up the outer skin and produce a thicker and crustier outer crust.

Here are a few things you can do if a dry skin or crust has formed on top of the dough:

  • If the dough is on its first rise and a skin has formed, just give it a spray with water and incorporate the skin back into the dough when you shape it for the second rise.
  • If the dough has proved for the second time, don’t worry – just bake the bread, at worst it will have a thicker chewier crust, but it will still taste good and you probably won’t even notice.

What you can do to prevent a skin from forming on bread dough

  • Don’t leave the dough rising in direct sunlight – it’s tempting to speed up the rising process, but it will cause the moisture to evaporate from the dough.
  • Make sure the room you’re rising the dough in isn’t too hot – for the best flavour a slower fermentation in a cool to normal room temperature is best. Again this will help prevent evaporation.
  • Spray the top of the dough with a little water to retain moisture at the top of the dough.
  • Cover the dough as soon as it’s mixed and once you’ve shaped it during the 2nd rise.

But what if I want to use plastic?

If you want to use plastic to cover your bread, that’s totally fine, but take care not to let it stick to the dough.

A good way to prevent the plastic sticking to dough is by oiling it with olive oil, or if you’re using a large bag, don’t let the bag touch the dough.

It’s worth being aware that evaporation can still happen when you use plastic if the room or place where the dough is rising is very warm.


You might also like…

I hope this post has helped you find out more about covering dough, you might also like the following posts:

Bread making tips for beginners – everything you need to know

Best ways to keep homemade bread fresh

17 Useful Bread Making Tips For Beginners You Need to Know


When you’re a beginner bread maker the process can feel a little daunting, you might have tried a few loaves and they may not have turned out quite as well as you’d planned.

It’s easy to become disheartened, but fear not! I’ve put together this complete guide packed with tips for beginner bread makers.

The best way to start out and properly learn bread making is with a yeast-based dough, so this is the process I’ll be teaching in this guide.

There are easier ways to make bread, but if you’re here reading this guide, then chances are you’re looking to learn how to do things properly, so let’s begin!


1. Learn the terms of bread making

Firstly, to fully understand the basics of bread making, it’s important to know and understand the terms and language you will see in bread recipes and bread-making advice.

Here is a simple table of bread-making terms, to help you understand what I’ll be talking about in the rest of this guide:

Bread making termTerm meaning
Strong bread flour/
Very strong bread
flour
Flour for bread making which is
Higher in protein than plain (all-purpose),
or self-raising glour
GlutenThe protein found in bread dough which
helps to create the structure and elasticity in the dough.
Fresh yeastA soft yeast which usually bought
in small blocks and
requires activation before use.
Dried yeast/
Fast-acting yeast
A dried yeast in granule form which is
added directly to the dough mix and
instantly activates – the fastest and
the easiest way to rise bread.
Rising/riseThe process of making dough
increase in size and volume as bubbles
form inside the dough structure.
KneadingThe process used to work and stretch
dough to develop and strengthen the
gluten.
Knocking backThe process used to remove air
bubbles from the dough after its risen
for the first time.
ShapingShaping the dough into it’s intended
shape before rising the dough for a
second time.
Proving/proovingRising the dough for the second time once
the dough has been shaped
Bread lameA type of razor which is used to make
patterns and slashes on bread dough
before baking.
Bread tin/panThe type of tin which is used to bake tin
shaped loaves for sandwich bread
FermentationThe process where the yeast feeds on the
the carbohydrate in the dough and creates gas
gas bubbles which make the dough rise
Leaven/leaveningThe term used about a rising agent, for
example ‘yeast is used to ‘leaven’ (rise) the
dough’.
Dough scraperA flat tool made of plastic or metal which is
used to scrape dough from a surface, out
of a bowl or to cut and divide bread.
SourdoughA type of bread where fermented flour and
water is used as a leavening agent for the
dough. Slow fermentation produces
a stronger tasting bread.
Proving basketA basket which comes in various shapes and
sizes for proving the dough into shape to
prevent the dough from spreading (mainly
used for sourdough).
Dough hookA hook or hooks which is attached to a stand
or hand mixer which kneads the bread instead
of doing it by hand.
TepidThe just warm temperature which is used for
water or milk which is added to other bread
dough ingredients.
Four to water ratioThe amount of liquid which is in the dough
compared to flour, for example, if the recipe
uses 500g of flour and 300ml water, the flour
to water ratio is 5:3.
The ratio is also referred to as a percentage in
some cases.

You might also find it helpful to read ‘Types of bread – the ultimate guide of bread from around the world’ to find out more about the various processes used to make different types of bread.


2. Keep it simple

The saying ‘don’t run before you can walk’ is key when it comes to bread making. Keep things simple and concentrate on a basic white bread yeast recipe to begin with.

Make that recipe until you feel that you understand the basics and then move on to experimenting with other bread types and flour types.

By trying to make more complicated bread types at the beginning, it’s easy to lose confidence if things go wrong. So forget about the sourdough for now and perfect the white loaf!

TIP: Not sure if you have all the necessary bread baking equipment at home? Check out my recommended picks below (Amazon links):


3. Stick to basic equipment when you’re starting out

If you’re new to bread baking and it’s something you think you might want to take up as a hobby or you want to produce homemade bread on a regular basis, it can be tempting to go out and buy every available gadget.

If you’re a beginner then it’s a good idea to use basic equipment to keep things simple while you decide if bread making is right for you and before spending lots of money equipment you may never use or need.

There bare minimum essential equipment you will need to make homemade bread is:

  • A large mixing bowl – big enough to mix the dough and to allow it to double or triple in size without it spilling over the top.
  • A bread tin or bread tray (depending on the bread shape you want to make) – to prove and bake the bread dough
  • Digital scales – to accurately weigh out the ingredients for the dough
  • Measuring jug – to measure out the water

Although not essential, a dough scraper is also very useful when you start making bread.

Find out more about where you can see bread-making tools and equipment here.


4. Get the right ingredients

Bread flour

Having the right ingredients ready for bread making is important to get the best results possible from your dough.

Although white bread flour might all look the same, there can actually be some considerable differences between each brand.

The reason that bread flour varies so much is down to the protein levels in the flour and also the milling process used to create it.

I’ve done a lot of experimenting with different bread flour and there are some supermarket own brands (even organic ones) which just don’t work well. By spending a little bit extra and buying a decent flour you can produce consistently good bread every time.

As bread making has become more popular supermarkets such as Tesco have started stocking much more choice when it comes to bread flour, keep an eye out for brands such as Doves Farm, Matthews and Allinson’s is good too.

The important thing is to make sure the flour is suitable for bread and is ‘strong’ or ‘very strong’ because it’s this high protein content which you need to create the right bread texture.

If you’re based in the UK, you might find the following directory link helpful when choosing a bread flour:

Bread Flour Directory

Yeast

When you’re starting out as a beginner bread maker, the best yeast to use is fast-action dried yeast. There’s nothing wrong with using fresh yeast, but I would recommend getting used to bread making with dried yeast first.

The best yeast to buy is a fast action yeast which is ready measured into 7g sachets, I’ve not found any difference between brands, they all seem to work well.

You can also buy dried yeast in small tins, if you’re doing down this route, store it in a fridge once open and only keep it for the time stated on the tin.

Don’t use yeast which has gone out of date because it may not work and will waste the dough ingredients.

Find out more about the differences between fresh and dried yeast via the link below:

Fresh yeast vs dried yeast

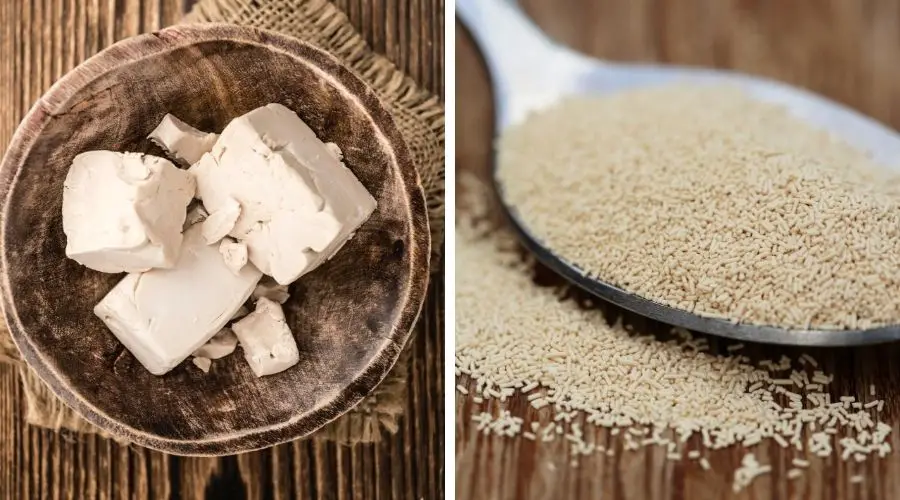
Image of dried and fresh yeast products

5. Weigh out and prepare the dough ingredients correctly

When it comes to making bread dough, it’s important to make sure the ingredients are measured out correctly especially the dried ingredients. You may find that you need to increase the water in the recipe depending on the bread flour you use.

You will find that some white flour needs more water than other flour and this can be dependent on the protein level. I’ll cover how to tell if the dough is too dry in the next section, but this is something which you come to recognize with practice.

As a beginner, it’s easier to stick to the same bread flour so you know the right amount of water to use each time.

It’s better to have a wetter and slightly lose dough than a dough that is in a tight ball – find out more about this in the following post:

How to Make Bread Dough Rise More Every Time

Here are some other steps you need to follow when preparing your dough ingredients:

  • Make sure the yeast and the salt are kept separate in the mixing bowl before its mixed – salt can actually slow down or even kill the yeast.
  • Make sure the water you use is tepid or just warm – too cold will prevent the yeast from working properly and too warm can make the yeast work too quickly or even kill it completely.
  • Make a well in dry ingredients to pour the liquid into.
  • If you’re using butter in your dough mix make sure it’s softened before you add it to the mixing bowl

6. Mixing the ingredients and judging whether the dough is too dry

If you’re mixing and kneading the dough by hand, start by bringing the dry ingredients into the wet from the well you made in the middle. Keep mixing with your hand until everything comes together and a dough is formed.

Once everything is incorporated you will get a feel of whether the dough is too dry, if it is it will seem dry, flaky and tightly packed together. If this is the case, add a bit more water to the dough (a bit at a time) until it’s loosened up.

Don’t worry if the dough feels sticky, it will become more manageable as you knead it and the gluten starts to develop.

The mixing process can be messy when you’re using your hands and this does put some people off or leads them to use a machine instead, but using your hands is a really good way to get to know and understand the dough. It’s also a traditional process and a good skill to learn.

If you think the dough is too wet, try not to add too much extra flour and give it a chance to firm up a bit during kneading. Flour can go on absorbing water throughout the kneading process – especially brown flour.

Adding lots of extra flour while you’re kneading can throughout the recipe and lead to heavy and dense dough.


7. Kneading the dough for long enough

Bread dough needs to be kneaded for long enough to make sure the gluten is worked enough in the dough and that it’s built up enough strength to create a structure that’s perfect for rising and to creating the right bread texture.

Kneading the bread by hand takes around 10-15 minutes and around 8-10 minutes on a slow speed if you’re using a dough hook.

The dough has been kneaded enough when it looks smooth, glossy and elastic when stretched.


8. How long should you rise dough for?

Dough should be left to rise for at least an hour or until it’s at least doubled in size.

There is no set right and wrong time for rising because it’s dependent on other factors such as yeast performance, room temperature and hydration levels.

It’s best not to rush the rising process because the longer the bread is allowed to rise, the more flavour it will develop. If you’re having any issues with rising see my post How to Make Bread Dough Rise More Every Time for more help.


9. Knocking back and shaping the dough

The term ‘knocking back’ sounds quite aggressive and it’s a bit misleading really because it’s better to use a gentler approach when it comes to removing bubbles from the bread.

You might be wondering why you spend hours trying to rise dough only to flatten it out again, but the knocking back and proving of the dough is vital to the final outcome of the bread.

The easiest way to knock back the dough once it’s risen for the first time is:

  • Lightly oil or flour the work surface
  • Scrape the dough out of the bowl onto the surface
  • Depending on the recipe and the shape of the bread your making, gently flatten out the dough with your fists – not too flat, just enough to remove the large air bubbles

Shaping the dough

How you shape the dough will affect how the dough proves (rises again). If you’re making a cob or bloomer style shaped loaf having a good tight shape will make sure the dough rises up during proving and baking rather than spreading out into a loaf with little height.

There’s a video to follow here, but the best way to shape the bread is by folding the knocked-back dough in on its self until it tightens across the top of the loaf when you turn it over.

Once the dough is shaped, place it either on a prepared baking tray (see below) or into a prepared bread tin to prove.

Image of shaped loaves

Preparing baking tins and trays

There is literally nothing worse than spending hours making the perfect bread only for it to stick to the tin leading to a battle and potential damage while you try to extract it or scrape it off a tray.

There are a few simple steps you can take to stop bread from sticking to tins:

  • Place a sheet of baking parchment under the shaped dough or rolls when you’re using a baking tray or baking sheets – the bread will simply slide off the paper when baked.
  • For bread tins, rub a small amount of oil or softened butter all over the inside of the tin, for extra protection sprinkle some flour into the tin and shake it around so it sticks to the fat and shake out any excess.

It’s best to use tins and trays with a non-stick coating, also try to choose bread tins without an elaborate lip at the top that dough can get stick in as it rises.


10. How to prove bread dough

Once you’ve shaped the dough, it’s time to rise the bread again. The process is called ‘proving’ (also called proofing) because you are giving the chance for the yeast to prove it’s self by being able to rise.

Allowing the bread enough time to prove is important because under-proved bread can be dense and heavy.

Typically, it takes at least an hour for the dough to prove, depending on the yeast and room temperature.

For more information about proving dough, see my post on rising here.


11. Do you need to slash the dough?

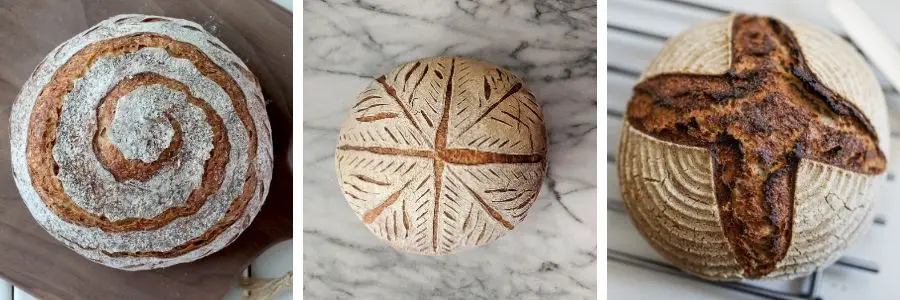
You may have seen bread with elaborate patterns, such as the ones in the pictures below. Creating patterns and slashing bread is becoming more popular, although it’s not all about style, there’s a practical reason for slashing too.

You don’t need to start with anything fancy, but slashing come cuts into the dough can help the bread to expand as it cooks.

Below are some tips on dough slashing and how you can give it a try:

  • You can buy a razor type blade specifically for this job which is called a ‘lame’, but when you’re starting out, a serrated knife or bread knife works really well.
  • If you’re making a white tin loaf, one slash across the top is all you need.
  • Slash the dough after the bread is proved.
  • Use a quick action so the dough doesn’t drag and deflate
  • Don’t go too deep, around 0.5cm is enough.

If you don’t feel confident with this technique, try practising on a small dough to get used to depth and creating a confident cut.

sourdough pattens

14. How to bake bread in an oven

Most bread recipes require a hot oven (220°C/428°F or over). This heat helps to develop a crispy outer crust while cooking the inside of the bread.

Don’t be afraid when the loaf starts to go dark and golden, a darker crust means more flavour.

Below are some tips on bread baking and how you can tell when the bread is ready:

  • Make sure the oven is fully preheated before placing the bread in there.
  • Bake the bread until its a rich golden-brown colour – if the bread is still pale, chances are it won’t be baked in the oven.
  • Test the bread is cooked by knocking your knuckle on the base and if it sounds hollow it’s ready.

15. Do you need to create steam to bake bread?

You don’t have to have steam in the oven to bake bread, it really depends on the outcome you’re looking for from your recipe. Here are some of the benefits of using steam during the bread baking process:

  • The steam inside the oven creates a moist environment instead of a very dry environment.
  • This moist environment helps the top of the bread to stay more flexible during the early stages of cooking, meaning it can expand and grow more in the oven.
  • Further on in the process, the bread will form a crispy and shiny outer crust.
  • Using steam to make bread helps to prevent the dough from burning at high heat while still going golden brown.

How to create steam in the oven

To bake bread with steam, the easiest way is to half fill a deep baking tray with boiling water and then place it in the oven as it heats up.

The water will evaporate considerably throughout the cooking process, so you need to make sure you have enough water in the tray so you don’t need to top it up as the bread bakes.

Take care when opening the oven because the steam can blast you in the face when you open the door.

Some bakers use a water spray over the top of the dough before it’s baked, although this won’t generate much steam, it uses the same principle, in that the dough will be softer when it first starts to bake, allowing more expansion.

For more information on steam and spaying dough, take a look at the articles below:

What does steam in the oven do for bread?

Spraying water on bread dough before baking


16. Cooling bread before using it

The smell of freshly baked bread can be overwhelmingly tempting while it’s baking and when it comes out of the oven.

If you’re baking a loaf, then it’s really important to let the dough cool before slicing into it.

Once the bread comes out of the oven, place it on a wire rack to cool, leaving the bread on a flat surface will cause a soggy base because the steam has no way of escaping.

Slicing the loaf while it’s hot and still full of steam will lead to a stodgy dough texture which squashes together when cut. It’s definitely worth waiting until the bread has cooled if you want to keep the rest of the loaf.


17. Storing homemade bread correctly

You’ve put all of this work into creating perfect bread, so keeping it fresh is more important than ever.

The article in the link below explains ways you can keep bread fresher for longer:

Best ways to keep homemade bread fresh


You might also like…

I hope this post has given you some tips which you can use on your bread-making journey. You might also find the following posts helpful:

How to make bread dough softer and avoid heavy bread

Bread making tips and techniques

Making Garlic Bread: 5 BEST Bread Types You Can Use


Making your own garlic bread is so worth it, you get to choose how buttery it is and how much garlic to add to the butter depending on your own personal taste. Making garlic bread can be as simple or complicated as you want to make it.

You can buy plain bread and turn it into delicious garlic homemade garlic bread, or you can take it one step further and make your own bread too.

Here are the best types of bread you can use to make garlic bread, whether homemade or shop-bought:

  • Ciabatta loaves or rolls
  • French stick/baguette
  • Sourdough loaves
  • Focaccia or tear and share
  • Part-baked supermarket bread

Read on to see more tips about how you can create the best garlic bread – just how you like it!


How to make garlic butter for garlic bread

Before we get started on how to use different bread types to make garlic bread, I just want to quickly show you how to easily make garlic butter for homemade garlic bread.

You will need:

  • 100g softened butter
  • 1 medium garlic clove
  • tbsp chopped fresh parsley (flat-leaf or curly-leaf are both good)

A garlic crusher or a small grater.

Ingredients of garlic butter, garlic, butter and parsley

To make the garlic butter:

  • Place the softened butter in a small bowl.
  • Crush or grate the garlic into the bowl
  • Add the chopped parsley and stir

You can then either use the butter straight away or cover and store in the fridge until need it. If you’re planning on making garlic bread using a larger loaf, you may want to double the quantity.

Adjusting garlic content

Garlic cloves come in many sizes and in some cases, a large clove can be equal to the same amount of garlic of two or three small garlic cloves. For the purpose of this recipe, I would use a medium-sized clove.

If you like lots of garlic or you only like a little bit, then adjust the garlic amount accordingly. Experimenting with different amounts of garlic, will help you to find your perfect level and will help you know how much to use when you have garlic bread in the future.


Top tips!

You can use your garlic butter straight away, but if you’re not ready to use it, cover it up and keep it in the fridge until you’re ready to use it.

If you’re planning on making french stick style garlic bread, roll the butter into a thick sausage shape using cling film, seal the ends and chill. You can then simply slice the butter and slot it in between the precut bread slices.

If you have any spare garlic butter, it works really well melted over steak, mushrooms, some types of fish and giant prawns.

TIP: Not sure if you have all the necessary bread baking equipment at home? Check out my recommended picks below (Amazon links):


How to slice bread for garlic bread

If you want to make a full garlic loaf, the best way to slice it is in sections about 2cm wide depending on how big you want your slices. Using a bread knife, slice partway down through the loaf just over halfway down.

If you slice too far down the bread won’t stay together and you could lose most of your butter during baking.

You can then spread the butter generously between each cut or slide in slices of chilled butter (see top tips above).

Another option is slicing the bread all the way through and buttering the top of the bread, this option will result in a drier garlic bread which is quicker to cook. This option is good if you just want to make a small amount of garlic bread.


Making garlic bread using ciabatta

Ciabatta is a really good bread to use to make another version of garlic bread. Ciabatta is the Italian version of the French baguette, it has a nice airy texture which turns sponge-like on the inside when it soaks up the garlic butter and the addition of butter and extra baking creates a golden crispy crust.

You can use shop bought or homemade ciabatta, both will work well.

Because the bread will be baked again once filled with garlic butter, if you’re using homemade ciabatta it’s best to part bake the original bread so it doesn’t go too brown when it’s baked again. With shop-bought ciabatta, this isn’t really a problem because it generally has a lightly coloured crust, to begin with.

Slice the ciabatta as per the instructions above and fill generously with garlic butter and bake (see below for baking tips).

Find out how to make ciabatta via the link below:

Easy ciabatta recipe


Making garlic bread with a french stick/baguette

The baguette version of garlic bread is probably one of the most popular types. It’s perfect as a sharing side dish to pasta and other Italian dishes and is readily available in most supermarkets.

Slice the garlic bread (as above) and slot ready chilled slices of butter between each slice.

You can also slice on an angle to make attractive individual garlic bread slices.


Making garlic bread using sourdough bread

If you want to take garlic bread to the next level, then use sourdough for extra flavour and crispiness. Sourdough is a yeast-free artisan method of bread making, which is made using a slow fermentation process.

You can use all sorts of shapes of sourdough to make garlic bread, from small loaves to sourdough sticks.


Garlic focaccia and tear and share bread

Focaccia bread and tear and share bread can be made into garlic bread by drizzling melted garlic butter or dotting around pieces of butter so they can melt as they cook.

Garlic butter can be used as al alternative topping on focaccia bread or alternatively, follow the steps below to easily create garlic tear and share bread:

  • Make a basic white bread dough and rise the bread for at least an hour until doubled in size.
  • Divide the dough into ball-shaped buns and place them in a deep baking tray so that all the balls are touching.
  • Dot blobs of butter all over the dough and between any gaps so it drizzles down as it cooks. Prove the dough for at least an hour and then bake in the oven for half an hour or until golden brown.

Using part-baked bread to make garlic bread

The part-baked breadsticks you can buy in supermarkets are a great way to make quick and easy garlic bread.

Because they’re already part-baked they won’t overcook when you add the butter and bake them again. They also come in different shapes and sizes so you can make smaller or larger garlic bread depending on how much you want.

Follow the same instructions as a normal baguette (see above).


How to stop the butter leaking out of garlic bread

One of the main problems which you might experience when you make garlic bread is that all the butter drains out of the bread during baking and you end up with dry bread sitting in a pool of butter.

To get around this issue mould tin foil around the bread to capture the butter and hold it close the bread to retain moisture and flavour. You can also use baking parchment in the same way or a combination of both.

The bread can be served in the foil or paper so it can be dipped in any butter which has leaked out.


How to bake homemade garlic bread

Bake homemade garlic bread in a preheated oven at 200°C/392°F and bake for around 10-15 minutes (depending on the size of the bread) until the butter has melted and the crust of the bread is golden brown.


Freezing homemade garlic bread

Homemade garlic bread or shop bought garlic bread which has been sliced and buttered can be placed in a plastic bag and frozen.

When you’re ready to use the garlic bread remove it from the freezer and leave it to stand for an hour or two before baking as per the instructions above.

If the bread is still a bit frozen in the middle, make sure it’s cooked properly inside and the butter is fully melted before serving.


You might also like…

I hope this post has helped to show you the different bread types you can use to make delicious homemade bread.

You might also like the following articles:

What makes ciabatta bread different from normal bread

Homemade breadsticks with camembert

8 Proven Tips: Making Bread Dough To Rise More Every Time


Not getting enough rise in bread is one of the main issues which bakers encounter when they first start making bread and even something which happens to experienced bakers from time to time.

We’ve all spent hours making that dough, only for it to come out of the oven looking like something that resembles a brick! But don’t worry if this is happening to you, there are some simple steps which you can put into place to get more rise every time.

Getting more rise in bread dough is something that can be achieved by using the following bread-making tips and techniques, these include:

  1. Using enough water in the dough mix by following the recipe.
  2. Making sure water added to the dough mix is the right temperature.
  3. Not adding more flour to the recipe.
  4. Kneading the dough for long enough to stretch the gluten, either by hand or using a dough hook.
  5. Using a good bread flour.
  6. Using the right yeast to create good fermentation.
  7. Rising the dough in a warm place.
  8. Letting the dough prove (rise for a second time) for long enough.

It’s important to know that a slow-rising dough is not always a bad thing, a slow fermentation process creates a more flavoursome bread.

This post is really to help you with issues where the dough (using a yeast method) isn’t rising enough despite the amount of rising time or if you don’t have much available time to wait for the dough to rise.

Read on to see more detailed tips and advice on how following the tips and techniques in the above list can help you get more rise in your bread.


1. Using enough water in the dough

When you’re making bread, one of the key things to remember is to use enough water in the dough mix.

Most bread recipes recommend using a ratio of 5:3 flour to water, for example, if the recipe tells you to use 500g flour with 300ml of water.

This ratio of water tends to produce quite a tight dough, which can be heavier and slower to rise than a dough which contains a higher water content.

I like to use a bit more water (around 20ml extra) depending on which flour I’m using. Using a bit more water creates a slightly stickier but lighter dough which allows the gas bubbles (which help the dough) to rise to develop more freely.

Brown flours which contain part or all of the whole grain will absorb more water and will keep on absorbing it throughout the rising process.

White bread flours will also vary on how much water they will absorb as different brands of flour contain varying levels of protein.

It’s a good idea to stick to a brand of flour you like because you’ll get to know how much water you need each time you make bread.

Working with stickier or wetter doughs does take a bit of getting used to, but after a few minutes of kneading it will become smoother and more manageable.

If you really don’t like getting doughy hands you could try kneading with a dough hook if you have one.


2- Make sure the water is the right temperature

Water temperature will affect how bread dough rises, if the water is too cold it will slow down the yeast and the fermentation process.

If it’s too warm it will make the bread rise too quickly and lead to bread with less flavour. Using water which is hot could even kill the yeast and stop it from working altogether.

The perfect temperature is just warm or ‘tepid’ to the touch. To get this temperature I like to put around a third of the water temperature into a jug and top the rest up with cold water.

If you use this method, test the temperature with a finger too because the temperature of cold tap water can vary a lot throughout the year.

Top tip!

Make extra water at the right temperature in case you need a bit extra if the dough is too dry. Then weigh the water into the mix by placing the bowl on some digital scales.


3- Try not to add extra flour to the recipe

Adding extra flour to the dough as you knead can cause the dough to become too dry and tight. If the dough is too tight it won’t rise as much as well hydrated dough because it makes it more difficult for the gas bubbles to form freely

It’s sometimes easy to panic and add more flour when you mix the ingredients and start to knead because the dough can feel sticky on the hands at this stage. It does become more manageable once the gluten starts to stretch and the dough becomes smoother.

Instead of using flour on your work surface for kneading, try oiling it with olive oil, this helps to prevent the dough from sticking to the surface and stops the dough from drying out.

Using a dough scraper to scrape the dough as you work also helps to loosen the dough from the surface without the need of much oil.


4- Knead the dough for long enough to stretch the gluten

Kneading dough by hand takes around 10-15 minutes for the gluten to stretch properly and become strong.

I tend to knead brown dough and pizza dough for a little bit longer than a white bread dough.

If you’re kneading bread using a dough hook, around 8-10 minutes should be enough on a low speed.

You can tell when the dough is kneaded enough when it becomes smooth and the structure becomes stronger.

To test this, try the ‘windowpane’ test by gently stretching a section of dough. If the dough is kneaded enough it will remain intact and strong when stretched, whereas dough which hasn’t been kneaded enough will tear and blister easily.

TIP: Not sure if you have all the necessary bread baking equipment at home? Check out my recommended picks below (Amazon links):


5- Use a good bread flour

Believe it or not, using and getting used to a good bread flour is a key part of rising performance. This is because different flours contain different levels of protein.

The extra protein in bread flour aids gluten production and the fermentation process which helps the do to rise.

The best bread flours in the UK page image

Bread flour generally contains upwards of 12% protein and is often referred to as ‘strong’, bread flour with a higher protein level usually 14%, may be referred to as ‘very strong’.

Flour with a high protein content helps to produce a good strong dough and to create a chewy texture rather than a crumbly one.

There are lots of good flour producers making high-quality bread flour with no nasty additives such as bleaching agents. They tend to use different milling processes and some flour will be finer than others.

Although good flour can be slightly more expensive, it still normally works out cheaper than buying a good quality shop-bought loaf which won’t taste anywhere near as good as the homemade version.

So if you can get them, I recommend trying some higher quality flour because you will see the difference when compared to supermarket brands.

If you’re in the UK, you may want to click on the link below to find out more about where you can get the best flour:

The best bread flour (available in the UK)


6- Using the right yeast to create fermentation

Yeast performance will greatly affect how the dough rises and how quickly it rises. Once activated the yeast will start to ferment within the dough and the fermentation process produces bubbles of gas which helps the structure of the dough to expand and grow.

While a slower fermentation process is usually a good thing when it comes to flavour, if you don’t have time or your dough isn’t rising after many hours there are a few things you may need to consider:

  • For a faster and more consistent rise, the best yeast is dried fast action yeast which is sold in sachets. Allinson is a good brand, but I find that supermarket sachet yeast works just as well.
  • Make sure your yeast is in date – yeast which is stale or out of date will either be very slow or it won’t work at all and will waste the dough.
  • Fresh yeast produces a good flavour, but it does generally take longer to rise than dried fast-acting yeast.
  • Only buy the tinned dried yeast if you make a lot of bread because the longer the tin is kept after opening, the more sluggish the yeast will become.

So as a general rule if you don’t have much time, stick to fast-acting dried yeast which is pre-measured in sachets.

It’s nice to experiment with fresh yeast and it smells amazing, but if you’re going to use fresh yeast, do it on a day where you have more time.

Image of dried and fresh yeast products

7- Rising the dough in a warm place

Bread dough will rise much faster when it’s risen in a warm place or a warm room. Depending on where in the world you live this isn’t always achievable, for example, I live in Wales and we have about 5 hot days all year!

So, my bread dough generally takes a bit longer to rise unless the heating is on or the wood burner is lit.

I actually like to rise bread in a coolish room, because I get a slower rise and better flavour, so generally, I’ll just leave it on the side and let it do its own thing for as long as it takes.

Typically, the dough needs to rise for at least an hour to double in size and then at least another hour for proving.

If you live in a hot region you may have a battle with dough rising and proving too quickly, in which case you may want to slow it down a little by placing it somewhere cool and dark or consider doing a slow rise in the fridge overnight.

If you don’t have the time to wait for more than an hour and you may want to speed up the process by placing the bowl with the dough in somewhere warm, such as an airing cupboard (if anyone still has one!).

If you’re lucky enough to own a proving oven or proving drawer, these are a great way to rise bread at exactly the right temperature, but they are pricey and generally a piece of kit for the keen baker.

Another good way of creating a warm environment is by warming an oven on a low heat (around 80°C or 176°F) for ten minutes or so and then turn it off.

Place the bowl containing the dough in the oven (making sure it’s turned off). If the oven cools down, remove the dough and repeat the oven warming process.


8- Letting the dough prove for long enough

If there’s one element which needs to be given the time it’s the proving element.

Proving or proofing is the process you follow to raise the dough for the second time once it’s been shaped and or placed in a baking tin.

If the dough is under-proved this will lead to bread which is dense and under risen with a heavy or stodgy inner texture.

Allowing the dough to prove for enough time will produce a good rise which should rise further when baked in an oven.

Generally, it takes around an hour for a yeast dough to prove fully, however, this will depend on factors such as room temperature and yeast performance. In some cases, it could take a few hours.

It’s also important not to over-prove the dough because too many gas bubbles will develop causing the dough to start collapsing in on its self.

When the dough is proved it should have a good strong structure which bounces back part way when you gently stick poke it with a finger.

Once the dough has reached this point it can be baked in the oven.


You might also like…

I hope this post has given you some tips on how to get a good rise from your bread dough. You might also find the following posts helpful:

Bread-making tips and techniques

How to make bread dough softer and avoid heavy bread

Do You Need to Heat Wraps and Tortillas? 5 Proven Options


Wraps as a sandwich bread are becoming increasingly popular and are now available in various flour types to produce different flavours and colours, wraps are a versatile bread for many types of fillings.

There is some misconception around whether or not a wrap should be heated or not before it’s eaten along with whether the wrap is fully cooked when bought from a shop or store.

In short, most wraps which you buy are pre-cooked so they can be safely eaten without heating them up. This said, in many cases heating up a wrap can help to enhance the texture and taste of the wrap which can benefit some wrap-based dishes.

Read on to find out more about how heating wraps in various ways can help to enhance flavour and texture along with some tips on ways to produce the best results when heating wraps.


Can You Eat Wheat and Corn Flour Tortilla Wraps Cold?

Wraps are made using a simple recipe which main ingredients are flour (such as cornflour, white wheat flour and wholemeal wheat flour) and water.

They’re then rolled out very thinly before being pre-cooked on each side, to cook them through.

Provided the wrap has been cooked through, then it can be eaten cold as it is or it can be cooked to create extra colour and flavour and then cooled to be eaten later. Cold wraps work well if you’re using cold fillings to prevent the fillings from getting soggy.

Because wraps work well served cold, they’re good for packed lunches and picnics and can also be stored in the fridge once they’re filled.


Are Store Bought Wraps and Tortillas Fully Cooked?

Although they often look pale when you buy them, store-bought wraps are usually cooked through before they’re packaged for sale. The dough used for wraps takes very little cooking so the factory cooking is enough to cook but not brown the wraps.

There might be some brands available around the world which are an exception to this rule, so if in doubt, check the packet to make sure they can be eaten straight from the packet without heating.

To make a wrap more flavoursome and to improve the colour and texture wraps are even better heated, especially if you’re filling them with something hot. Read on to find more information on the best ways to cook a tortilla wrap.


TIP: Not sure if you have all the necessary bread baking equipment at home? Check out my recommended picks below (Amazon links):


The Best Ways to Heat a Tortilla Wrap

Wraps warm through very quickly, so there are many ways you can quickly warm them through.

Some methods are good for warming and softening, whereas some will produce extra colour and crispiness depending on what you’re using them for.

Here are some examples of how you can heat your wraps:

1- In an oven

Wraps work well heated up in the oven, especially if you already have it on for other elements of the meal.

If I only need to head one or two wraps I just throw them into the oven, straight onto the racks or a pre-heated tray for a few minutes until heated through but still soft.

If you want to heat a pile of wraps in the oven the best way to do this is by wrapping them in foil to keep in the moisture and then place into the oven for around 8-10 minutes at 200°C/392°F.

Carefully open up the foil and serve.

2 – In an microwave

Heating wraps in a microwave is quick and easy, just place them on a microwavable plate or bowl, cover with cling film and cook on high for 1-2 minutes depending on how many wraps you need to heat.

For added softness and to create steam, sprinkle or spray on a little water first, taking care of the hot steam when you open them up to serve.

3 – On a hotplate, griddle or pan

You can also heat a wrap directly onto a dry hot plate, pan or griddle to create some brownness while still retaining some softness so they’re flexible enough to fold.

Creating a bit of colour and texture is a great way to create extra flavour, especially if you’re using hot fillings.

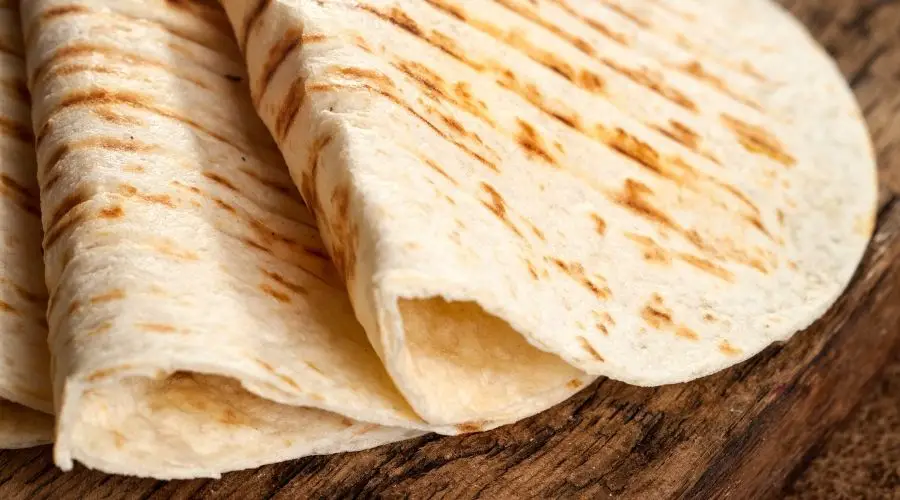
Image of chargrilled wraps

4 – Over a fire or barbecue

Just like the method above, you can get extra flavour by heating up your wraps on a barbecue to serve with whatever else you’re cooking on there.

This method is a quick and easy way to serve your barbecued food, such as grilled chicken and chargrilled vegetables.

5 – Under a grill

If you have a grill inside your oven, you can heat your wraps on here too. Place on a grill pan or tray and cook on each side until they have a little colour but are flexible enough to fold.


You Might Also Like…

I hope this post has helped you to find out more about heating wraps and how you can get the best flavours and textures, you might also find the following articles helpful:

How to heat up an English Muffin

Do crumpets need to be toasted?